


Close up of the message on top of the "O"

Remove the lid, there's stamped tissue - now can this be more personable?

This is what is revealed!

Randomly stamp cut tissue using Real Red, Old Olive, and Chocolate Chip ink. I cut tissue 9" x 14" and folded it in half after ink is dry.

To make the box:
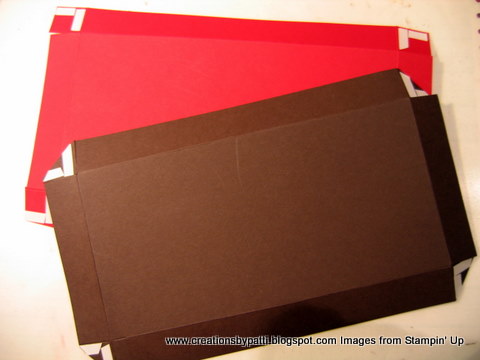
(1) 6-1/2" x 11" Chocolate Chip CS, Score 1" around all four edges
(1) 6-1/2" x 11" Real Red CS, Score 1" around all four edges
(1) 4-1/4" x 8-3/4" Very Vanilla CS - for the top of box
(1) 4" x 8-1/2" Merry Moments DSP
Cut to assemble box as shown below:

Apply sticky tape to the top and bottom boxes
To make the Scallop Message for the box top, use the Stampin' Write Pens as shown - look so great instead of using one color ink! Yes? Apply dimensionals to the back of this message. Position on top of the "O" in J-O-Y.

Position the "J-O-Y" letters (cut from using the Big Shot Serif Essentials Die), then adhere to top using snail adhesive. Before placing the Very Vanilla and Merry Moments DSP, be sure to add dimensionals to back along with Gold elastic cord. The last step: complete top and place the scrapbook inside...............nice?

Box Supplies:
- Stamps: Christmas Punch, Tree Trimmings
- CS: Real Red, Chocolate Chip, Very Vanilla, Merry Moments DSP
- Ink: Real Red, Old Olive, Chocolate Chip
- Accys: Big Shot Serif Essentials Alphabet Die, Scallop Oval Punch, Stampin' Write Pens Real Red, Chocolate Chip, and Old Olive, Dimensionals, Gold Elastic Cord, Sticky Tape
Thank you for stopping by today.................Hugs!!!!


1 comment:
Hi Patti,
You are so clever. I was thinking of something to hold my 6 x 6 mini albums and here you are with your box. Thank you for the inspiration.
Post a Comment