Wednesday, November 30, 2016

16th Birthday Favors and Banner

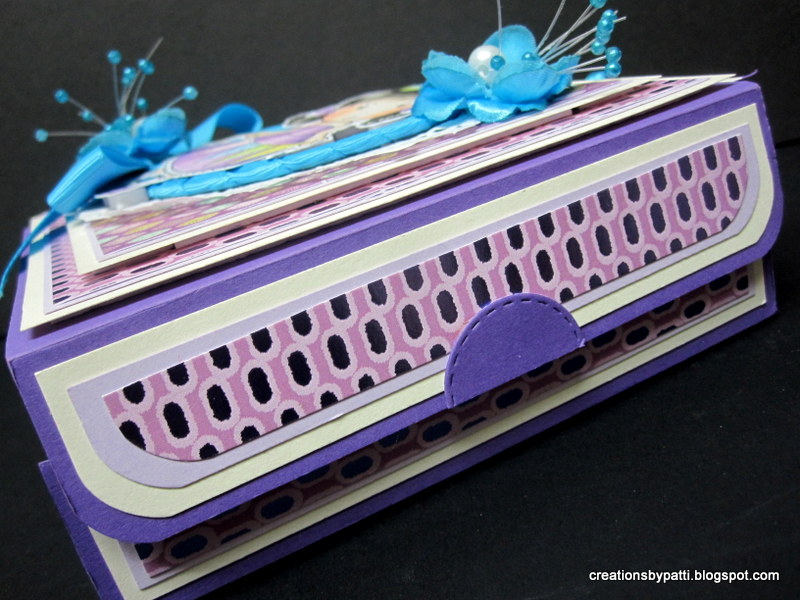
A quick follow-up to the album posting: 16th Birthday party favors are made using the We R Memory Keepers Punch.  Easy and quick to use.  Popped up computer generated embellishments were also quick to make.  These favors match the Birthday album posted 11-28-16. See album posting for paper details and source.
On addition, a banner was made to also match both the favors as well as the album. Banner was easily made using the We R Memory Keepers Banner Punch.
Rosettes made using a strip of 12" long decorative paper, scoring 1/4" all the way: fold and connect. hot glue helps to secure to the banner.  Alphabet die used is a Sizzix Bigz Alphabet series.
Cottage Cutz die used to be the "separation" between the name and letters. A scallop punch in decorative paper is used for the background.
Number die is from Papertrey Ink:
Thank you for again stopping by today...........have a crafty day!


Monday, November 28, 2016

Marci with Camera 16th Birthday Album

Here is a Birthday mini album. There are enough pages to hold 16 Instax Photos. Finished album size: 4" x 5-3/4" x 1-1/4". It is a compact size. This project is from the November 2014 Club La-la Crafts Kit called Marci with Camera Project . Unfortunately, these complete kits which included designer paper are no longer available but you can still purchase the monthly kits with a few options - see this link here.
Papers: Stampin-Up Brilliant Blue card stock, Recollections Black and White card Stock. Decorative paper from Momenta (found at Tuesday Morning Retail Discount Store). LLC Die: Photo Elements, Smile Die, Celebrate You Balloons, Numbers, Fancy Label.  Ranger Glossy Accents on Camera.
Marci with Camera stamp Copic colors:
Face: E13, E11, E01, E00, E000, R11, R20, R21
Hair: C0, C02, CO4, CO6, CO8
Hat, Purse, Shoes: E31, E35, E37, E41
Hat Bow, Hearts, Top, Socks: B000, B21, B23, B24, B91
Skirt, Camera : C0, C02, C04,
Here's a closer look at the balloon with the milestone birthday:
These LLC dies at the bottom left corner:
Album pages:
Stampin-Up Tab Punch (retired) for tag tops.
First page:
Consequent pages:
Cottage Cutz dies used: Party Hat Tag Topper. Gift Tag Topper, Cupcake Tag Topper, Party Hats used to decorate the pages after the photos are secured.  In addition, Sizzix Thinlits Friendship Words #660225 Die will be used for some of the pages, to\o.
La-la Land Fancy Label Die at the back bottom to personalize this album:
Thank you for stopping by today to visit.....................have a crafty day.

Monday, November 21, 2016

Celebrate You Marci Project Kit

This project is from the May 2015 Club La-la Crafts Kit. Unfortunately, these complete kits which included designer paper are no longer available but you can still purchase the monthly kits with a few options - see this link here. Dies included in this kit are Celebrate You Word Die, Balloons Die Set, Fancy Label Die, Numbers Die (set of 10) which are all now available in the La-la Land Crafts on line store.  The Stamps in the included kit: Celebrate You Marci and Time to Celebrate which are now available in the on line store. This month's project included a decorate gift bag, a card, and a Birthday Box shown here"
Here is a closer look at the gift bag 5-1/4" x 8-5/8" (to the top of the bag) x 3-3/8".  The turquoise tissue was also included in the kit contents.  Gift bag is already printed with multi color dots. 
On the bottom left band sits the birthday cake stamped, Copic colors used from the kit instructional sheet. Birthday cake is popped with foam squares and sits on top of a 1/4 cut Doily.  
The tag: 3" x 4" actual tag size.  Stamped Marci is on a 2-1/2" circle, popped with foam squares.  Balloons and stamped message on the flag are also popped with foam squares.  1/4 part of a Doily is behind Marci.
Next Project: a 6" x 6" card..................card base is vanilla. The Numbers Die Set included in the kit are randomly positioned to make the background. 
Here's Marci colored using Copics. Colors used are from the kit instructions.  She is popped with foam squares.
Bottom right corner:  Using the Fancy label Die cut twice to achieve this effect.  The strip is scored with "lines". 
Card inside: embellished with Vanilla card stock die cuts:
Third and last project from this kit: Project is a box that opens from the right side.  The front is a ribbon wrapped paperboard "O"............very clever to decorate the "O" in this way.  Celebrate You Marci is popped and sits on a white paper Doily.  Those are silk flowers which match the Turquoise Grosgrain ribbon. This box top is triple matted, popped, then sits on top of another triple mat.  Box top is very sturdy with all those layers of paper.  The tag peeking out is actually inside the cover.
Here's Celebrate You Marci. She is colored based on the kit instructional sheet using Copic pens.
Side box view:
Tag pulled out from behind the front cover:
Box back: LOVE the Fancy Label Die used here to personalize a "made by" handwritten note.
Right side box opening: it has a magnetic closure:
Open the box to reveal:
On the right inside front cover is that removable tag which is exposed from the front. 
Here's a closer look at the pocket: see how the Fancy Label Die is cleverly used. The "Celebrate You" is die cut multiple times to have that chipboard look. 
Here is a closer look at the insideof the box:
This trio of projects were enjoyable to complete.  Thank you for stopping by today. have a crafty day.

Friday, November 18, 2016

Call Me Marci Monthly Project Kit

Another LLC project is from the September 2015 Club La-la Crafts Kit. Unfortunately, these complete kits which included designer paper are no longer available but you can still purchase the monthly kits with a few options - see this link here. Dies included in this kit are
Kit : Hello Tag die (set of 5 pieces) and Tabs Border Die.  Stamps included were Call Me Marci Stamp and Call Me Stamp Set. This monthly project was a Notebook and a Tag Book shown here:
 
Here is the notebook: size is 5-1/4" x 8-1/4" x 1/2". 
Flat view of the notebook:
Call Me Marci image using Copic coloring pens.  Colors used are from the instructional sheets included in the kit.  See the paper doily behind popped up Marci and scattered sequins.
On the top left corner of the notebook: the Tabs Border die is cut twice in two colors, with adhesive rhinestones.  Button and tied bow embellish the top corner, too.  The "hello" is cut twice: offsetting for a shadow effect.  Add some scattered sequins here, too.
On the bottom left corner are paper roses with a pink rat tail (ribbon), and more scattered sequins. 
Album back:
Three Removable tags (Hello Tag die set) sandwiched in between the front cover:
Open the notebook to reveal: inside cover with two different size sticky notes and a lined tablet at the right side. 
Embellished top left corner:
The lined tablet was made to be removable with a pocket for it to slip into.
Oh yes, on the front and back cover corners are re-enforced metal findings:
The mini Tag book: size is 4" x 2-1/4" consisting of seven decorated paper board tags held together with a metal ring. This Marci is 2-1/2" tall. All embellishments used for this tag front are part of the Hello Tag Die set. Love the doilie behind Marci and also the randomly placed sequins. Papers used for this tag book were lightly sponged with Ranger's Vintage Photo ink.
The tag book fanned out:
pages:
Removable small tags:
Pocket with removable tag:
Both tags have booklets that slip through a band:
More small tags:
Removable booklet with more small tags in a pocket:
Tag book back: (hmmm......looks a lot like the back of the Note Book.
Hope you enjoyed seeing the completion of this kit. Thank you for stopping by today. Have yourself a crafty day.