Friday, January 29, 2016

LLC Retreat: Celebrate Christmas Card

Day 2: Project #9 Celebrate Christmas card designed by Sue Kohler. Her blog is called My Inner reflection and can be found here. Card base is white for this holiday card.  Decorative papers are Kraft card stock.  5/8" wide white satin ribbon embellishes this card.

Die cut Christmas Hill Border is staggered inside the Photo Frame.The die cut Photo Frame is cut in white card stock and also a Kraft card stock, then it is offset.  Pop the frame with foam squares.  Finished card size is 5-1/2" x 5-1/2".
Adhesive rhinestone on the poinsettia:
Add adhesive pearls to the tree tops. 
Details: All dies can be purchased on the LLC site here.
Dies used:  Christmas Hill Border, Winter Branches, Pretty Poinsettia, Heart Snowflakes, Photo Frame, Celebrate

Thank you for stopping by today to visit............stay tuned for Project #10 from Day 2 of the LLC 3rd Annual Retreat.

Wednesday, January 27, 2016

LLC Retreat: Photo Storage Box

Are you ready for 11 awesome projects from Day 2 of the LLC Retreat held early November 2015?  This was the 3rd Annual La-la Land Craft Retreat held in Pacifica, California. The 2014 LLC Retreat projects were previously posted on my blog starting on Friday, January 23, 2015. Continuing with the theme "Life is Sweet", we dug into our projects for Day 2.

Day 2: Project #8 Photo Storage Box designed by Tamara Potocnik.  Her blog Handmade by Tamara can be found here. This cute photo box is really nice not just to hold photos but any type of gift, too. Box base is made using White card stock.  All edges of the card stock and pattern paper are lightly sponged using brown ink.  Finished size for this box is 6-1/2" x 4-3/8" x 2-1/8" ( excluding the Fancy Doily Border die extending beyond the box).  This box is a Silhouette cut file Design #48732 called 3D 4X6 Photo Storage Bin.  Note there are 3 card stock mats in each panel, making this box sturdy on all sides. These card stock mats were made using the SilhouetteMats are popped with foam squares.  A lightly sponged paper doily is tucked underneath the die cut Postage Stamps.
Copic colored Inuit and Bear are popped with foam squares.
Copic pens. Colors used:
for Inuit: R39, YG99, G21, E79, E47, E57, E17, E55, E53
for Bear: E53, E55, E81, R11
for Bear's Scarf: R35, R37, R39, G21, G85, YG99

On the left side: Stardust Stickles is added to the paper Roses and Leaves. Use a small brush to twist the ends of the roses for further embellishment. On the die cut Holly Flourish, Copic pens were used to color realistic leaves.
On the right side: Stardust Stickles is added to the paper flowers and poinsettia. The die cut Postage Stamp has part of the die cut Holly Flourish where the leaves and berries are colored using
Top of box:  Fancy Doily Border extends beyond he box.
Die cut and lightly sponged brown inked ZigZag Trim Banner sneaks out at the bottom of the Postage Stamp.
 Box front:
 Box top:
 On the front corners are the die cut Booktabs.
 Thread a jute cord through the holes and make a knot.
 Open box inside:
Details: All stamps and dies can be purchased on the LLC site here.
Stamps used: October 2015 Club La-la Land Inuit/Bear Image
Dies used: Postage Stamps, Fancy Doily Border, Booktab and Labels, Holly Flourish, Zigzag Trim Banner.

Thank you for stopping by today to visit............stay tuned for Project #9 from Day 2 of the LLC 3rd Annual Retreat.

Monday, January 25, 2016

LLC Retreat: Holiday Bendi Cards

Project #7: Originally designed as a Christmas 12 x 12 Layout by Irina (owner and Queen designers of La-la Land Crafts), this project morphed into Two 6x6 Holiday Bendi Cards. Finished size of each card is ^" x 6".
Card #1: a "Bendi" Santa sighting.  Adhesive rhinestones added to the Heart Snowflakes and top of trees.
Santa Sleigh is popped with foam squares:
This shows how the "Bendi" is seen from the top of the card:
 Card inside: add Stardust Stickles to the "hills".
Card showing how the "Bendi" is made:
Card #2: Reindeer 1 and Reindeer 2 with adhesive rhinestones on their antlers.  The three shades of Turquoise card stock make this a festive wintry scene.
Card overhead:
Card inside: add Stardust Stickles to the "hills".
See how the "Bendi" is made with insert slots int he paper?
Right side flap opened:
This is the fully extended card:
Details: All dies can be purchased on the LLC site here.
Dies used:  Postage Stamps, Reindeer 1, Reindeer 2, Santa Sleigh, Heart Snowflakes, Double Stitched Hills Border, Stitched Zig Zags.

Thank you for stopping by today to visit. Stay tuned for Day 2 of the 3rd Annual LLC 2015 Retreat......there are a total of 11 awesome projects!!!!

Friday, January 22, 2016

LLC Retreat: Molli Gift Bag

Project #6: Gift Bag designed by Tamara Potocnik. Her blog Handmade by Tamara can be found here. This cute gift bag was a snap to put together.  The Cherry Blossom flowers and their white stamens enable the flowers to be very realistic. Finished project is 6" x 3-1/2" x 2".
Here's a closer look at Birthday Molli. Clear Wink of Stella is added to the birthday candle.  Copic colors used to color her and of course, she is a Brunette.
The Birthday Flag is nestled in between the Stitched Circles:
Flap is open: when closed, it is secured using a magnet.
Side view of bag:
Back view:
Details: All stamps and dies can be purchased on the LLC site here.
Stamps used: Birthday Cake Molli
Dies used: Stitched Nested Circles, Stitched Elements, Cherry Blossom
Flowers, Birthday Flag.


Thank you for stopping by today to visit............stay tuned for the last Project (#7) from Day 1 of the LLC 3rd Annual Retreat.

Wednesday, January 20, 2016

LLC Retreat: Cupcake Teacup Card

Project #5: Cupcake Teacup Card designed by Sue Kohler. Her blog is called My Inner reflection and can be found here.

This fabulous card is cleverly made using the Seaweed Die to make the steam for the coffee (or tea).  By using a bone folder,  shape the Tea Cup so it is no longer flat.  To make the tea cup more realistic and protruding out from the card base, add some foam squares to the center of the cup before securing it to the card.  The Stitched Heart is popped with foam squares.  Love the adhesive row of pearls at the bottom of the cup. The co-ordinating two tone twine adds a nice touch.  Adhere a small 1/8" satin bow using mini glue dots to the cupcake as the final finishing touch. Finished Size: 5-1/2" x 5-1/2"
Here's a closer look at the cupcake. Icing is embossed with "dots". 
A overhead view of the Tea Cup protruding from the card base:
Details: All dies can be purchased on the LLC site here.
Stamps: none
Dies used: Cupcake, Large Teacup, Seaweed, Stitched Scallops Border, Flip Flops (flower)

Thank you for stopping by to visit today.  Stay tuned for Project #6

Monday, January 18, 2016

LLC Retreat: Winter Princess Marci Tissue Box

Project #4: Winter Princess Marci Tissue Box designed by Irina (Owner and Queen Designer).  Who wouldn't love this tissue holder box made from paperboard (cut specifically and exclusive to La-la Land Crafts).  Decorating it with a holiday theme was very festive to do at the retreat.  The neutral tone papers used allows this finished project to be versatile in any room. Finished size: 5" x 5" x 5-3/8".

Starting with the main Winter Princess Marci panel:
On each panel, the Snowflake Border is positioned at the top edge. Winter Princess Marci sits on the Stitched circle which is popped on foam squares
Clear Wink of Stella is added to her crown's snowflake, crown bottom rim and top rim as well as her scepter snowflake. (oops - the subtle shine does not show up in this photo).  Original  Copic colors to be used changed to be neutral tones for my project. Copic colors used are: E000, E00, E11, R11, R20, W2, W4, W6, W8,  E50, E51, E53
To make the bow: die cut two Christmas Ornament 2 dies for the "bow" portion and use two pieces of the Snowflake Banner die for the "tail" of the bow. Pretty clever, eh?  A large adhesive pearl sits in the center for the "knot" and clear springs of beads are the winter flowers decorating this front panel.
Panel 2: Another popped Stitched Circle with the Santa Sleigh as the focus with some small adhesive rhinestones.  On this panel, you can clearly see the 3/4" wide grosgrain ribbon is attached around the entire tissue box.
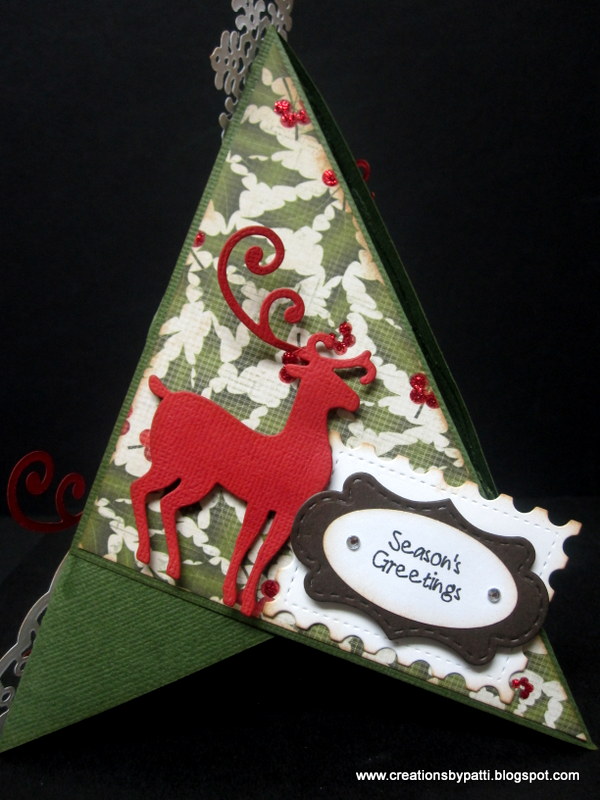
Panel 3: Reindeer 1 and Reindeer 2 is the focus for this section.  Add some small adhesive rhinestones  on their antlers.
Panel 4: Ornament 1 and Ornament 3 are the focus of this panel. Again, add some adhesive rhinestones to complete the festive look
 Overhead view:
Details: All stamps and dies can be purchased on the LLC site here.
Stamp: Winter Princess Marci
Dies: Stitched Circles, Snowflake Border, Christmas Ornament 1, Christmas Ornament 2, Christmas Ornament 3, Reindeer 1, Reindeer 2, Santa Sleigh.

Thank you for stopping by today to visit.  Stay tuned for Project #5.

Friday, January 15, 2016

LLC Retreat: Christmas Tree Tent Card

Project #3: Christmas Tree Card designed by Debbie Pamment. Her blog is called Debbie P's Place and can be found here.   This tent style card is embellished on all three sides.
 
Front main panel has Christmas Elf Luka and his list........which can be filled in manually with names of your choice.  Add Clear Wink of Stella to his belt and shoe buckle. He is popped with foam squares and is positioned on top of the the Fancy Doily Boarder. The sitting red reindeer is also popped with foam squares.  Note the Red Stickles on the designer paper berries.  To finish tent card, secure a snowflake at the top and add a adhesive rhinestone.Overall finished size: 7-1/4" x 5-1/2". This card will fold flat to send.
 A closer look at Christmas Elf Luka. I loved the Copic colors we were given for him at the retreat. The only change I made was his hair: a brunette.
On the right section: a standing popped red reindeer.  Postage Stamp is sponged with brown ink and the fancy label from the Stitched Elements is popped with foam squares.  Add a couple small adhesive rhinestones to finish up this label
 Here's a closer look at the reindeer and Stitched Elements:
On the left section: Festive ornaments are die cut.  Lightly sponged elongated ornament is popped with foam squares.  Both ornaments have small adhesive rhinestones in the center. 
Add a metal snowflake brad to secure card in an upright position.  Simply slip the opposite side (left side) on top of the brad.
Details: All stamps and dies can be purchased on the LLC site here.
Stamp used: Christmas Elf Luka with List plus Sentiment
Dies used: Heart Snowflake, Stitched Elements, Postage Stamps, Reindeer 1, Reindeer 2, Christmas Ornament 2, Christmas Ornament 3, Fancy Doily Border

Thank you for stopping by today. Stay tuned for another fun project: Project #4

Wednesday, January 13, 2016

LLC Retreat: Time Flies Step Card

Project #2: Times Flies Step Card designed by Sandy Dunne. Her blog called The Paper Cove can be found hereThis Kraft color card stock base is using a white card stock mat with decorative pattern paper.  Steampunk Heart Cogs are positioned on the top edge of the card as well as the front right side.  Sponged edge White Steampunk Heart Cogs are positioned on the front card base along with the Steampunk Clock. Finished size: 4-1/4" x 8-1/2", fully opened 11-3/4" x 8-1/2"
Here's a closer look at Time Flies Marci. Copic colors were given at retreat to make her so wonderful. Two metal flourish embellishments (it was cut in half) are adhered along the left front side.
Overhead view:
Open the right flap:
The left side flap:
Cogs on the edge of the card:
Time Flies Marci is popped with foam squares.  Glossy Accents added to her goggles and clock face. This looks great!
The clock shows how shiny the Glossy Accents show up.  On her dress, a Sakura White Gel pen is used to create an "eyelet" look.
Details: All stamps and dies can be purchased on the LLC site here.
Stamp: Time Flies Marci
Dies used: Steampunk Clock, Steampunk Heart Cogs, Steampunk Boarder
Thank you for stopping by today - stay tuned for Project #3.