


Hi Everyone..............no posting today. More importantly, wishing all you a very Happy Thanksgiving with Family or with Friends. I am thankful for all of you who visit or are followers. Thank you ever so much for your support.
I will be taking a little break from blogging for the next couple weeks (secretly working on projects for the holidays) so I hope you all have a great time shopping, enjoying meals with friends, and sharing joy with Family.
My best to all.
Patti
Thursday, November 28, 2013
Monday, November 25, 2013
Happy Belated Steampunk Birthday Mini Book
This is a belated birthday posting with a Halloween theme using the Graphic 45 Steampunk Spells Collection found here. A birthday card and a mini book was the perfect project for a friend who is fond of the Steampunk theme.
 The birthday card was made with some of the left over papers used in the mini book: The Book of Spells. Only a little fussy cutting with some foam squares for this card.
 Add some Glossy Accents to the watch she is wearing for some dimension. Some Smooch in yellow is added to the gear necklace and on her wings.
 Card inside: Stamped message is from Stampin-Up On Your Birthday (very old stamp).

 Add some Smooch in Yellow for subtle shine:
 Hardware with a key to unlock the book:
 Overview of book:
 Pages:


 Smooch in Yellow added here:
 And here on the balloon basket and top:
 Here are the tags in each pocket with Graphic 45 Steampunk Spells Collection mats on each side.


Now for the mini book. This book style was previously posted on here. This is another version using different papers.


Individual pages: Note the Graphic 45 Steampunk Spells Collection comes with these plates easily cut apart for these pages:


Glossy Accents added to some of the images on the pages:
and here:

And here:


Thank you for visiting my blog today........hope you are inspired and enjoyed this project.
Friday, November 22, 2013
Dandelion Fall Thank You
A really quick post today: I got this really cute Thank You card from my friend: Frances C. (she doesn't have a blog but should!) and wanted to share it with you. I love her selection of Fall papers used and also LOVE the (her blog) Dandelion Stamp used SC-8 Mum which can be found in the store here. There is also a whole slightly larger set CL-16 Flower Girls which can also be found in the store, too.
 Frances did a great job coloring her with Copics. The adhesive rhinestones in her hair are perfect.
 And, don't you love the stitch ribbon that finishes off the card so well? That small tag is also so cute, too


Thank you for stopping by today to visit and a very Happy Fall to all, too....................
Wednesday, November 20, 2013
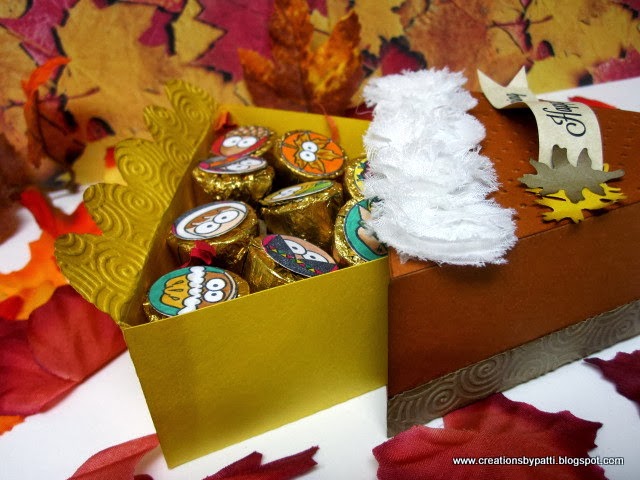
Thanksgiving Pumpkin Pie Treats
Wow - Thanksgiving is next week and it is a race to the finish line for all the prep that happens during this time of year. I made a few of these pie boxes. They are unique in that they are pull out drawers instead of the lid type of box..............pretty cool, I thought. This is a SVG cut file from SVGcutting.com . I used my Silhouette to cut this pie project. The Pie Drawer Box can be found here. I made two different sizes: one is the original size: 4-3/4" x 1-7/8" x 4-1/2" which holds 12 candy treats and another smaller version which finishes 3-1/2" x 1-1/2" x 3-1/2" which holds 6 candy treats . Papers are from Recollection Spice Market Paper pack. I found in my stash some old ribbon roses that can be used to look like "cream icing" - luckily I had small and medium sizes to use.
 Top of the larger Pie is embossed (a separate cut piece) with Cuttlebug Swiss Dots embossing folder, sponged with brown ink, adhered to the top. Leaf punches are OLD - they are from Carl Craft and Family Treasures. Happy Thanksgiving is printed using the free font called Lavanderia size 26 although the stamp set does have the same message (which I had actually forgot it was there).
 Edge of the pie pull out is embossed with Letterpress Twirl Embossing folder. See the drawer slightly pulled out revealing the candy treats. Stamps are from Jaded Blossom from their Candy Stamp collection called Let's Talk Turkey found here.
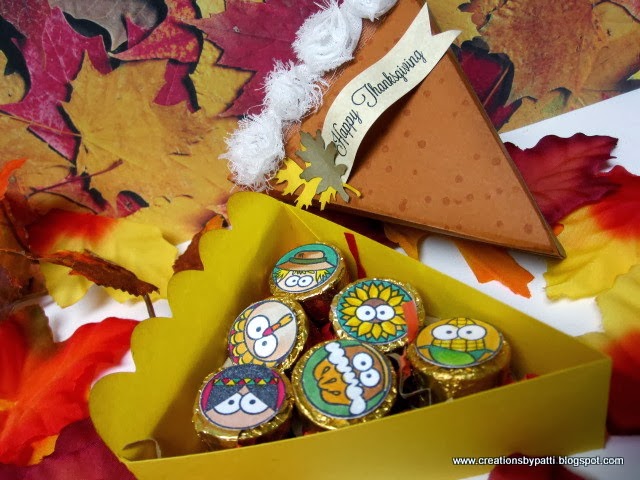
 Now here are all the treats revealed:
 A closer look: aren't they cute!!!
 And, the view of the larger pie with the scallop edge/Twirl embossed edge and "faux" creamed edge.


 Pulling out the drawer to reveal candy treats:

 This is how each of the treats were decorated: Stamp all the images, use your desired coloring medium:
 Here they are all punched and waiting to be attached to Rolo candies or Hershey Kisses:


The smaller pie: this time, it is stamped using Versamark Ink with a Stampin-Up Itty Bitty Backgrounds:

The slightly smaller font message for the smaller pie:


The smaller pie will hold 6 candy treats:


Thank you for stopping by today to visit......................enjoy!
Monday, November 18, 2013
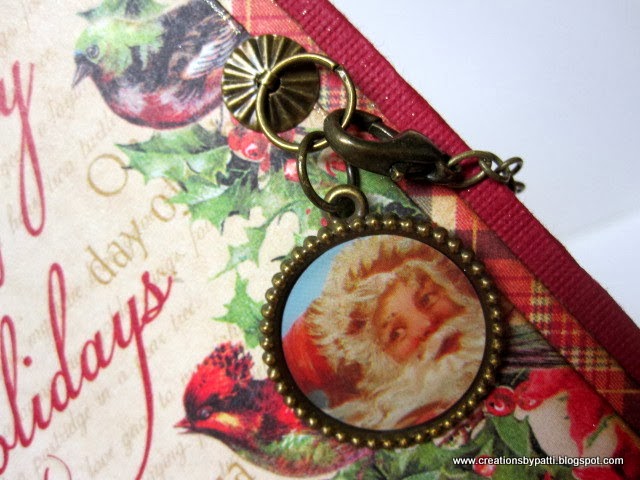
12 Days of Christmas Mini Book
I participated in a mini book class at Scrapbook Territory recently and made this really cute project. It was taught by Glenda (you can contact Scrapbook Territory for her for upcoming classes ). It was a great group of gals who all made little mini books using papers of their choice and putting their own signature tot he project. The paper I chose is the Graphic 45 12 Days of Christmas..................finished album size is 4-1/4" x 6-1/4" excluding the top of the tags.
 Here's a better photo of the front closure: the charm is from Joanne's attached with a "o" ring to the Tim Holtz ideaology Ring Fasteners.
 On all the pages, a Sakura Crystal gel pen used to highlight many of the areas:
 Closure: Chain and Tim Holtz Idea-ology Ring Fasteners along with a Lobster Claw. Lobster claw can be purchased in any craft store jewelry section. Create the clousure using a punnch through the covered chipboard.
 Side binding:
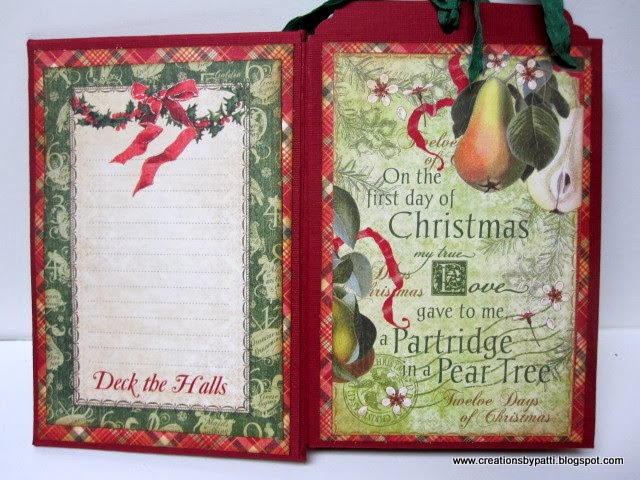
 The four pocket pages:
 Now for the photo detail of the pages:


 Here's the tag with a punched "cloud" corner by My Memory Keepers, size is 4" x 6-1/2". There are four tags for photos or journaling.


This was a great fun project that would fit many of the those papers with divided photo mats........try it!!! I plan to make a few more of these little books in a variety of sizes.
Friday, November 15, 2013
Dandelion Holiday Wreath
Are you ready for this? This turned out much better than I expected. I LOVE it!!!!! I happen to purchase this holiday wreath from a recent Asian Craft Fair - I knew I was going to slight alter it. The original 9" wreath is made by "Wong Creations", a local Crafter. It already had the pleated Lucky Red Envelope Fans and Fabric Fun Foam Fortune Cookies. I added some "snow" (using brush correction fluid that can be found at Daiso - a Japanese Store in my local area). Then I added some Dandelion Design images using the following stamp sets:
CL-8 Friends Set, CL-11 Keiko Set
MC-8 Christmas Flowers, MC-10 Sweet Wishes, MC-12 Christmas Things, MC-24 Tea Time, MC-25 Hi There
I love how all the characters are about the same size so they fit so perfectly on the wreath
 Copic colors used for all the images: E21, E43, E15, R20 V04, V09, V12, V99, Y11, Y38, R21, R24, R29, R32, R39, R85, BV02, BV04. Here's one of the Dandelion images with a present in her hand. Her dress hand decorated using Copics and touches of Sakura Crystal gel pen used for some sparkle. Her present is using Stickles Star Dust.
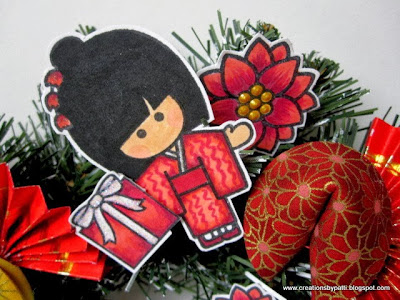 Here's another images using yellows for her dress and highlights in Sakura Crystal gel pen. Her candy cane has Stickles Star Dust. See the poinsettia? All the centers of the poinsettias are using Viva Gold pen.
 This Dandelion girls is in pink colors - her dress pattern is made using Copic colors. Her hat has the Stickles Star Dust. Sakura Crystal gel pen also used on her dress, too
 A BOY!!!! Yes, and he has his favorite friend: a dog with him. He is in Lavender with some patterns on his clothing using Copic pens. His hat , like the others, has Stickles Star Dust.
 And, here are "best buds" - some Sakura Crystal gel pen used for their clothing and hair accessories. Clothing made using Copics markers.
 A closer look at the areas using Stickles Star Dust:
 the candy cane:
 the present:


CL-8 Friends Set, CL-11 Keiko Set
MC-8 Christmas Flowers, MC-10 Sweet Wishes, MC-12 Christmas Things, MC-24 Tea Time, MC-25 Hi There
I love how all the characters are about the same size so they fit so perfectly on the wreath


All the images and poinsettias were attached using a wire, curled around a pencil, using a foam to secure one end of the wire to the image, then wrapping the wire around the wreath extensions. It worked out well. It was much better than using a hot glue gun.

Hope you enjoyed this altered wreath..................for lots of inspiration, check out Dandelion's blog found here.
Subscribe to:
Posts (Atom)

