Day 2: Project #13 Paper Doll Marci Slider Card designed by Debbie Pamment. Her blog is called Debbie P's Place and can be found here. Finished card size is 5-1/2" x 5-1/2" - tag is 5/8" beyond the card base. This fun slider card has a tag "pull up". In the center are the Stitched Nested Circles, then added are the Lantern Banner on the left side. This is how the card looks when it is flat.
Pull the tag in the back to reveal a place for a note or stamped message:
Side view:
Closer look at Paper Doll Marci (Kimono): Copic colors used were given to us at the retreat. And, don't you just love that row of rhinestones at the bottom of her feet?
Paper Doll Marci's earrings have adhesive turquoise, green and purple rhinestones.
Popped up fish (from the Koi Circle die) are positioned on each bottom corner on top of the Stitched Zigzag.
Die cut white Scroll Corner is embellished with adhesive Turquoise rhinestones.
Details: All stamps and dies can be purchased on the LLC site here.
Stamps used: Paper Doll Marci (Kimono)
Dies used: Cherry Blossom Flowers, Lantern Banner, Scroll Corner, Stitched Nested Circles, Stitched Zigzag, Koi Circle
Thank you for stopping by today to visit............stay tuned for Project #14 from Day 2 of the LLC 3rd Annual Retreat.
Showing posts with label 2015 Asian. Show all posts
Showing posts with label 2015 Asian. Show all posts
Monday, February 8, 2016
Friday, February 5, 2016
LLC Retreat: Kimono Marci with Lantern Screen Card
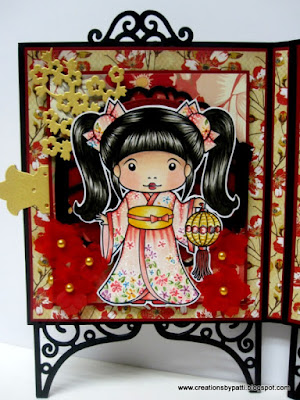
Day 2: Project #12 Kimono Marci with Lantern Screen Card designed by Irina Blount (Owner and Queen Designer) of La-la Land Crafts. See the LLC Blog here with lots of inspiration and ideas. Card base is Black color. Actual card size is 5-1/4" x 6". With all the die cut embellishments the finished card size: 6" x 5-1/4" x 3/8". This card will stand up on it's own on a table.
Opened card reveals on the left side:
Popped inner mat which has a Koi Circle, Stitched Circle, and two die cut Bridges glued together. Adhere a die cut Gold Gold shimmer Cherry Blossom Branch under Kimono Marci. On the right and left side of Kimono Marci are die cut Cherry Blossom Flowers using red vellum card stock. Add adhesive Gold Pearls to the centers of the Cherry Blossom Flowers.
Kimono Marci was fun to color with Copic markers. We were given colors to be used to create the flowers in her dress - yup, it 's not paper piecing - it is hand flower coloring! In addition, using a Sakura White Gel pen for some highlights and outlining made the dress a bit more 3-D. The only color I swapped out was the pink colors for shades of red.
Here's a closer look at the details of her dress:
Her hair bows were also Copic colored using the Sakura White Gel pen for some highlights and outlining.
On the right side: Popped inner mat which has a cut apart Koi Circle, Stitched Circle, and two die cut Bridges glued together. Adhere a die cut Gold shimmer Cherry Blossom Branch, Cherry Blossom flowers and popped fishes which are part of the Koi Circle die.
Here's a closer look at the die cut Cherry Blossom branch:
The popped up Koi Fish:
Don't you love all those red vellum double layered die cut Cherry Blossom Flowers with gold adhesive pearls?
This is the actual card front: three of the four corners are embellished with the die cut Scroll Bracket. The Lanterns Banner is used on the top right corner. 2 Stitched Nested Circles sit on top of the Koi Circle, then is popped with foam squares. Happiness and Asian character are cut using the Silhouette machine - cut file is from Lettering Delight Japanese Yorokobi Cut Set. On top are two layers of the Scroll Corners glued together for stability. There are two Scroll Brackets glued to the back of the card and two Scroll Brackets glued to the front which means a total of four brackets to create a chipboard-like piece.
A closer look at the cut Asian Character:
Card back: The embellishments used are the same used for the front side of the card but without the Silhouette cut sentiment.
Card open showing front and back:
Details: All stamps and dies can be purchased on the LLC site here.
Stamps used: Kimono Marci with Lantern
Dies used: Bridge, Koi Circle, Booktab and Labels, Cherry Blossom Branch, Cherry Blossom Flowers, Lanterns Banner, Scroll Bracket, Scroll Corners, Stitched Nested Circles.
Thank you for stopping by today to visit............stay tuned for Project #13 from Day 2 of the LLC 3rd Annual Retreat.
Wednesday, February 3, 2016
LLC Retreat: Kimono Marci Stand-Up card
Day 2: Project #11 Kimono Marci Stand-Up card designed by Debbie Pamment. Her blog is called Debbie P's Place and can be found here. I love the colors chosen for this card. Original card designed using a different image. Kimono Marci works great for this stand up card style. Finished card size is 6-1/4" x 6-1/4".
Kimono Marco Copic colors used:
Umbrella: E01, E02, E13, E30, E57
Shoes: E13, E57
Clothes: E02, E08, E09, BG11, BG13, BG15
additional note for the clothes: Use Copic colors to make the pattern on her dress. It is not paper pieced.
Die cut Bird Cage in white Neenah card stock is colored using Copic : E08, E09, E13. stamped message is from the Luka on Tractor set.
Copic colors used for the die cute Lantern using Neenah card stock: E09, E13, E57, BG11, BG13, BG15. Add small adhesive turquoise rhinestone to the lanterns as shown.
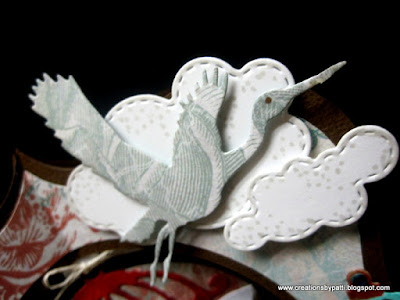
Here's the die cut Stork (trim off the "baby bundle). Pop up with foam squares. Use Copic W2 on the popped up Clouds
A side view. The die cut String of Hearts Border has been colored with Copic color E29
Overhead view:
Back view:
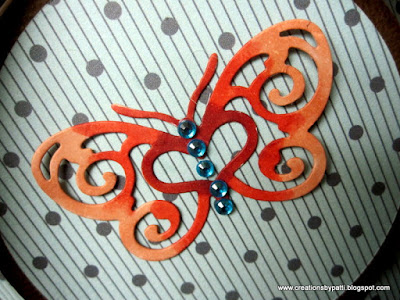
Die cut Butterfly in Neenah White card stock is Copic colored: E08, E09, E13. Final touch: add adhesive turquoise rhinestones.
Details: All stamps and dies can be purchased on the LLC site here.
Stamps used: Kimono Marci, sentiment Luka on Tractor
Dies used: String of Hearts Border, Birdcage, Stork, Lantern, Stitched Elements (flag), Stitched Sun and Clouds, Butterfly Set 1.
Thank you for stopping by today to visit............stay tuned for Project #12 from Day 2 of the LLC 3rd Annual Retreat.
Wednesday, December 16, 2015
Hula Marci Shaker Fuse Card
Made a few of these for my Hawaiian friends using the "Fuse"......if you haven't gotten one, you are missing out on the fun. Clear shakers are a blast to create fun projects.
Inside each packet are white seed beads along with turquoise and blue round sequins (or party scatters). Words "Mahalo" are from the Silhouette On line store. Waves and sand are a Jaded Blossom Tropical Die Set found here. Sand is using Kraft card stock, then stamped with Stampin-Up Itty Bitty Backgrounds (retired) stamp using Brown ink.
Here's Hula Marci: She is approximately 2-3/4" tall printed from a digital image which can be found here in the La-la Land Crafts Store. Color used for her can also be found in theLa-la Land Crafts, too.Reverse side of card: Note, when using the Xryon, the adhesive will not be visible but those beads do stick a little to words.
Thank you for stopping by today ...................have a crafty day!
Friday, December 4, 2015
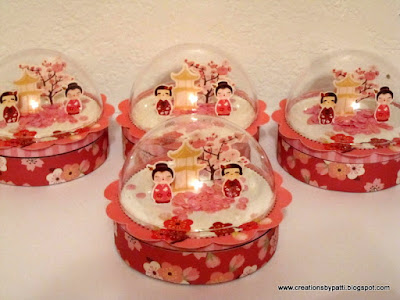
Asian Themed Treats with a Dome Top
I made a few of these covered tins treats using the My Little Shoebox Cherry Delight paper collection (no longer available). The inspiration for this project is from Papertrey Ink - they show many type of stamped, then die cut images in a clear plastic dome. To be able to execute a Asian theme, the images are from the My Little Shoebox found in the Silhouette Store. Yup, then all you do is a "print and cut" once they are re-sized to fit underneath the done. You can even do a reverse flip image so the back will mirror the front using the Silhouette Machine. The scallop base is also a"print and cut" image from the Silhouette Store. Add some pink sequins inside to finish up this project.
Front view of dome:
Side view of dome .
Back of dome:
Front view of dome:
Side view of dome .
Back of dome:
Remove lid to reveal dark chocolate covered espresso beans (purchased from Trader Joe's):
Thank you for stopping by today to visit........have yourself a crafty day!!!
Wednesday, December 2, 2015
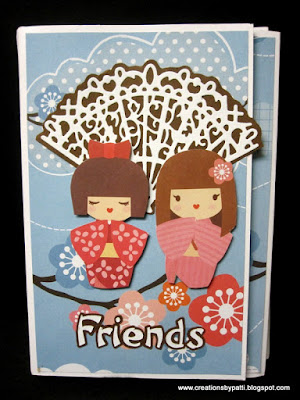
A Friends Multi Flap Mini Album
It is so nice to receive such inspirational gifts. This one is from Kris G. - I recently learned she is a fan of mini books and she made this one for me. I absolutely love this decorative paper from MLS (My Little Shoebox) which has been retired for a couple years. The paper collection is called Cherry Delight. After receiving this mini, I added a little more embellishing using the same paper collection along with some fussy cutting on many images. Mini Book base is made using white card stock. Finished size is 6-1/2" x 4-5/8" x 1". This interactive mini is way fun to open.
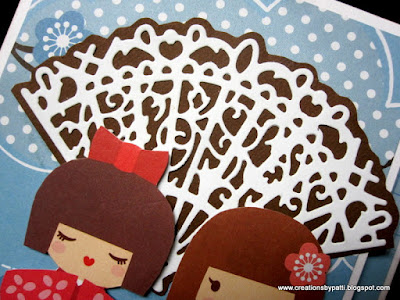
Fan die is by Tonic called Delicate Fan. White fan on top of the brown card stock mat worked well to contrast this cover. The two doll images are fussy cut, then popped with foam squares.
"Friends" and brown card stock mat is cut using my Silhouette. Font style used is called "chow fun"
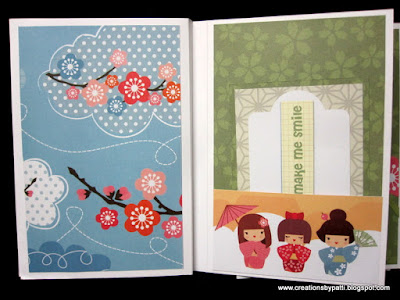
Open the front cover to reveal: There is another doll that was fussing cut on top of the side pocket. In the side pocket is a removable booklet. Right side flap is another fussy cut Doll.
Open the right side flap to reveal a pocket with a removable booklet. There is a removable booklet in the center pocket, too.
Next section is another pocket with a removable booklet.
Flip over another page - another pocket and removable booklet!
I love this section: Cherry Blossoms are fussy cut along the right and left side along with fussy cut dolls.
Open the right side flap to reveal a center pocket with more fussy cut Cherry Blossoms and removable booklets.
See the color change? Open the left side flap to reveal a new color with pocket and removable booklets in the left side and center. Fussy cut doll added to the center panel pocket.
Open the center page to reveal left side pocket with removable booklet. Center panel has a photo mat n the center section page to reveal a left side pocket
Back:
Overhead of project:
Thank you for stopping by today.............have a crafty day!!
Subscribe to:
Posts (Atom)


