Inside of the wallet holds a gift card on the left side and a note card on the right side.

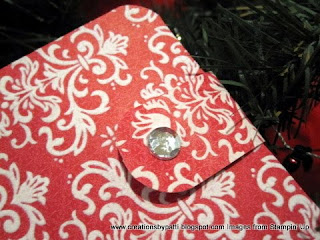
Here's a close up of the wallet "bling" closure":

The underside closure is "lined" with Real Red CS and Velcro (that really flat kind- yes, it does exist!)

And here's the note card: a simple message and a snowflake embellishment from the SU Exclusive Big Shot Merry Details Die in the right hand corner.
Outside Wallet:
(1) 8-1/2” x 3-1/2” Flocked Christmas Cocoa DSP, Score along the 8-1/2” side @4-1/4”
(1) 3-1/4” x 3” Whisper White CS for the note card
(1) 3-1/4” x 3” Whisper White CS for the note card
(1) 8-1/4” x 4-3/4” Real Red CS, Score along the 8-1/4” side @4-1/8”. Score along the 4-3/4” side @1-1/2”
(1) 8-1/4” x ¾” Flocked Christmas Cocoa DSP, cut in half for top of wallet insert edge (not shown in photo)
(1) 8-1/4” x ¾” Flocked Christmas Cocoa DSP, cut in half for top of wallet insert edge (not shown in photo)
(1) 7/8” x 2-1/2” Flocked Christmas Cocoa DSP
(1) ¾” x 2-1/2” Real Red CS for the tab
(1) ¾” x 2-1/2” Real Red CS for the tab

Here's what you should have:

Use the 3/16" corner punch on all 4 corners of the outside wallet and note card. Only punch 2 corner for each tab.

Crease the fold line for the inside wallet. Using the 3/16" corner punch, punch 4 corners of the inside. The folded up wallet may be thick since it is 2 layers of CS. With a crisp fold using the bone folder, it will punch OK through 2 layers of CS.

Cut away1/16" each side of the fold line as shown:

Add sticky tape. Remove backing and you know what to do.........press down.

Adhere cut 3/4" wide x 8-1/2" long Flocked DSP for the top of the inside wallet using snail ad shown in the next photo. THEN, add sticky tape right below the Flocked DSP.

To complete the wallet, position the tab with sticky tape. Then adhere ONLY one side of the wallet (preferably the right side). Then adhere the left side by FOLDing the left side over the right side. You need some leeway for the wallet fold in the center. Note: don't adhere the inside wallet flat - it will "buckle"
You're done - like it?
Supplies:
- Stamps: Delightful Decorations (small star stamp)
- CS: Real Red, Whisper White, Flocked Christmas Cocoa DSP
- Ink: Real Red
- Accys: Big Shot Sizzlits Merry Details Die, 3/16” Corner Punch, Dazzling Diamonds Glitter, Sticky Tape, Mini Glue Dots, Velcro Adhesive Dots (non SU), Rhinestone (non SU)
Thank you for visiting today.........stay tuned for Project #6 next week...........Hugs...........


5 comments:
Hi Patty,
your wallet is so beautiful! Thank you for the tutorial!
Greetings from Germany
Susanne
Lovely! Thanks for the thorough directions.
I love it! This is a super cute way to present a gift card! Thanks for teaching us how!
I think I need to make this now for next Christmas. I still have Christmas on the mind. I just finished wrapping my presents for my sister today. You know you can't rush into these things. We always send each other things in the week following so we don't have to go crazy.
Carey Rogers
aka Roscoe's mommy
This wallet shaped gift card holder is perfect to gift..:-)..it was nice visiting here and i like the Wallet Gift Card Holder designs that you have shared here.. Inside Wallet points that you have shared..thanks for sharing..these point will help me..:-)..
ticket frames
Post a Comment