


Left Photo: Start with a 6" x 6" Square piece of Washi.
Right Photo: Fold diagonally, crease as shown.


Left Photo: Open, fold diagonally, crease as shown
Right Photo: Open, fold bottom corner to center, crease and unfold


Left Photo: Fold top corner to the fold line created (above right photo). Pencil line is marked to show the fold line.
Right Photo: Unfold, then fold top corner to the crease line just created on the left photo. Pencil line is marked to show the fold line. The center of the 6x6 is lightly marked with a pencil.


Left Photo: fold right side, match edge of top corner as shown
Right photo: fold back the "wing", matching the edge to the side


Left Photo: repeat for the left side
Right photo: Fold up the bottom point to meet the center


Left Photo: fold top edge toward the center (that's why there is a pencil mark for the center line) - see pink arrow
Right Photo: unfold, take top corner to fold up toward the top
Right Photo: unfold, take top corner to fold up toward the top


Left Photo: fold down the top corner - this is the kimono collar
Right Photo: to create the sleeve, this is the side view. Do a "pleat fold" - this is the Kimono sleeve. Note: The width is 1-1/4".


Left Photo: view after "pleat fold"
Right photo: make a triangle, fold down the corner - see green arrow


Left Photo: Origami verbiage called the next fold a "swivel fold and squash fold" Translation: fold back the left side toward the center.
Right photo: See green arrow - press down the triangle.


Left Photo: repeat fold for the left side
Right Photo: Pull out Kimono bottom at an angle and fold - see green arrow


Left Photo: Pull out the inner layer - see green arrow (this is the small piece)
Right Photo: Fold toward the side - See green arrow


Left Photo: Fold bottom corner of sleeve up
Right Photo: Flip Kimono over, this is what it should look like.
Right Photo: Flip Kimono over, this is what it should look like.


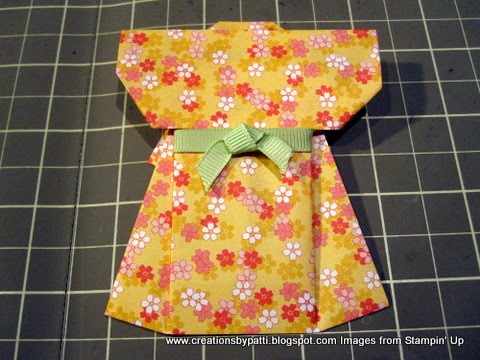
Left Photo: 3/8" wide grosgrain ribbon is a added embellishment. Tuck under the fold with a mini glue dot.
Right Photo: Complete grosgrain to the right side with a mini glue dot. Finish it off with a single knot also attached with a mini glue dot. KIMONO IS COMPLETE

Thank you for your patience...................let me know if there any questions. I look forward to everyone making this Kimono.
Embossing folders used for previously posted Kimono Cards - please e-mail me for the info.


13 comments:
Patti, THANKS SO MUCH for taking the time to share this kimono tutorial. I love your art work.
**June**
Hello Patti!
I hope that all is well with you! Thank you for the wonderful tutorial - I do want to make this lovely kimono!
Wishing you a great week!
Hugs,
Barbara Diane
Thank you for the training, you are very talented
Thanks for sharing another great tutorial.
Liam
arigato gozaimasu..you are awesome
Wow! That is a piece of art and so beautifully made...TFS your talents with us!
Patti,
thank you!!!
will be trying this tomorrow...you are a wonderful for doing this 'tut' and taking ALLLLL the pics - you rock!!
Thanks Patti! Will give this a try...I usually just do an iris fold for my Kimono...this should be a fun change!! I appreciate you sharing your tutoial!!!
Jan Castle
Thank you to share with us this tutorial.
Un grand Merci pour le tuto
bises de la France
Thanks for the tutorial...I was never very good at origami when I was growing up, and this looks a little too advanced for my brain... However, I loved your card so much that I am determined to try!
plein de mercis
super tuto
md
Hi Patti - thanks so much for this awesome step-by-step tutorial! I'm gonna try it! Have a wonderful week! Aloha, Linda
Post a Comment