side view:

Top view:

Here's a close-up of the top rosette: tutorial for this scallop flower was by Meg Loven (a fellow demonstrator - see her blog www.lovenstamps.com - she has a video posted 8/6/10..way to go Meg!!!!). I learn how to make the flower center from attending a recent Scrapbook Expo in San Jose. It was taught by Melissa Frances (love her!!!!) - more photo details below.

When the lid to removed, the 1st scallop tag is revealed:

Whenever I attempt to take photo of a banner..........it never turns out so hopefully this is a better way to show it off. Total length of banner is 37" long.

Want to make one? It's not to difficult.
To make the box, here's what is needed:
(2) 5" x 5" Chipboard
(3) 5" x 5" Solid Black CS
(1) 2-1/2" x 12" Solid Black CS, score along the 12" side @1/2"
(1) 3-3/4" Circle in Solid Black CS
(1) 5" x 5" Love Letter DSP
(1) Scallop #2 (3-1/2") Love Letter DSP
(3) 2-3/8" Extra Large Scallop Circle in Love Letter DSP - these are the flowers
1-1/4" wide Striped Ribbon

For the Inside banner:
(9) 3-1/2" Scallop #2 Circles in Solid Black CS
(9) 3-1/2" Scallop #2 Circles in Love Letter DSP
(5) 2-5/8" Circles in Solid Black CS
(4) 2-5/8" Circles in Solid Cherry Cobbler CS
(4) 2-1/8" Circles in Solid Black CS
(5) 2-1/8" Circles in Solid Cherry Cobbler CS
(9) 1-3/4" Circles in Very Vanilla - Stamped with the Welcome words + Fleur image
(1) 39" cit 1-1/4" wide striped grosgrain ribbon (not shown in photo)

Top Lid and bottom base: Apply adhesive to each side of the chipboard - adhere Love Letters DSP and Solid Black CS. Use Scallop Circle Big Shot Bigz die to cut.

After cutting, use a Black Stampin' Write pen to conceal the chipboard edges - set aside.
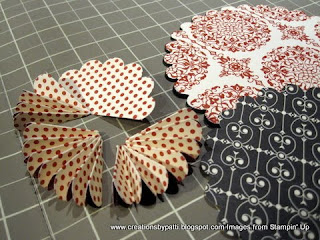
To make the flower on the lid: follow Meg Loven's video. 3 scallops were used to make a fuller flower. Apply adhesive to connect all 3 sections.

To make the center of the flower: single knot a 5/8" wide black grosgrain ribbon. Thread both ends of the ribbon through the center of the flower (Thank you, Melissa Frances for showing me this trick!)
This is what your flower should look like after the ribbon is threaded:
Adhere complete flower on top of the 3-1/2" Scallop Black Love Letter DSP with adhesive. Add dimensionals to the black DSP - set aside. Make a lid template and mark the center. Use a Big Bite (this is the mother of the Crop-o-dile) to punch the center of the scallop lid. Thread through one end of the 39" 1-1/4" striped grosgrain ribbon through the hole - apply adhesive to the end. Cover the ribbon end on the lid with the Black Love Letter DSP.
Now to make the Banner Holder, clip the 12" strip 1/2" section as shown. Wrap around the 3-3/4" solid Black Circle. Apply adhesive to secure. Add sticky tape to the edge to finish the circle. Adhere this section to the scallop chipboard.

Now to make the banner:
Position each 3-1/2" Scallop Circle along the striped grosgrain ribbon. Adhere a 2-5/8" solid CS, apply dimensionals on the 2-1/8" circle. Then add the stamped images. Repeat for all the other 8 sections.

The back of the banner is solid black CS

Supplies:
- Stamps: Lovely Letters Alphabet
- CS: Black, Very Vanilla, Cherry Cobbler, Love Letter DSP
- Ink: Cherry Cobbler
- Accys; Bog Shot Scallop Circle Die, Big Shot Scallop Circle #2 Die, 1-1/4" Riding Hood Red Striped Grosgrain Ribbon (retired), 5/8" Black Grosgrain Ribbon, 2-3/8" Scallop Circle Punch, 1-3/4" Circle Punch, Circle Scissors Plus, Dimensionals, Sticky Tape, Anywhere Glue Stick., Big Bite (non SU).
Thank you for stopping by today.................


10 comments:
Saw your idea on SU connections and I love this project. Thanks for posting this on your blog for all to see!
This is a totally wonderful project! Thanks for sharing!
this is great! This would make a wonderful holiday gift. Thanks for the tutorial.
This is too cute! I can see one for Halloween and Christmas too.
Love it! GREAT JOB!
Thanks for sharing!!!
Великолепна творба,отлична изработка!Поздрав!
Beautiful! Thanks for sharing so much info!
Wow Patti, I am totally inspired. Great idea and wonderful work!
splendide!!
bises de la France
This is so neat! I've been eyeing this Sizzix chipboard hatbox for a while now...and this is yet anothter good reason to add it to my shopping list. Thanks for the creative inspiration!
Post a Comment