


Lid top, double mat with some blue and silver card stock - this is that inexpensive thick stuff from Michael's. An adhesive rhinestone is in the center.


Remove the balloons to reveal that Silver chipboard snowflake:


Keep unfolding the sections:

Third section:

When all the characters are removed, the magnetic strip is seen here.............very ugly. But this way, the characters can be position on any metal surface (like a refrigerator). Cool? The only elements that do not have magnetic strips are the presents.

So I finally figured out to cut the backs with black so the magnetic strip is not so "ugly" - well, forgot to do that to the blue ones......oh well.

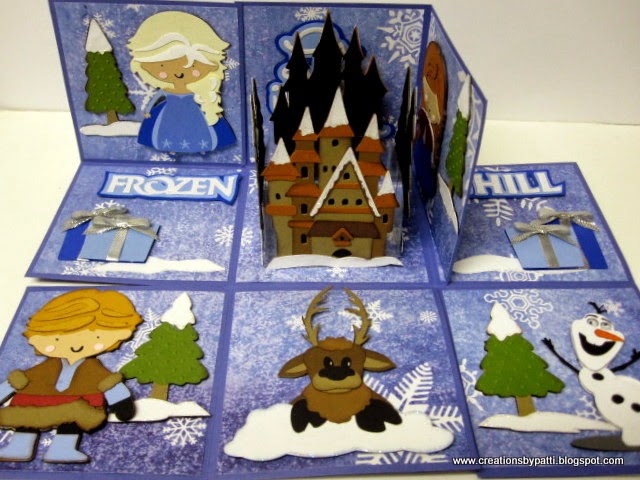
Here you can see the acetate box created to hold the Arendelle and the trees. Magnetic strips are attached to the acetate box and in the center of the lid is that famous snowflake where all the fun skating is done in the movie. Yes, the castle also has black card stock backs.

This is the outside of the box with some randomly placed card stock glitter snowflakes:

Sizzix Snowflake #3 Original Die
Recollections Silver Glitter Card Stock
Snowflake pattern paper was found in a clearance bin - reference not noted.
SVG Cut files used:
Lettering Delights Ice Princess Cut It Set and Ice Princess Party Cut It Set found here.
Olaf is from PPBN Designs SVG cut file called Happy Magic Snowman found here
Sven is from Treasure Box Designs SVG cut file called Let It Go found here
Paper: Card base and envelope cut using Core-dinations Canvas Texture Oceanic, Bazzil textured Lt. Blue, Recollections White and Kraft..........balance colors used are scraps from various Recollections color packs.
Ink: Brown and Lt. Blue - any brand will be OK
Star Dust Stickles
Magnetic 3/4" tape by XyronEK Success
Cuttlebug Swiss Dot embossing folder


4 comments:
OMG! Another FABULOUS Frozen birthday card! I love that these are also magnets and love even more than you incorporated them into a surprise explosion box. Taylor is one lucky girl to receive this amazing birthday card!
Wow, Patti, I wish you were my aunt! Such a well-thought-out project and such amazing work!
All your hard work on this card really paid off......
It's a Fabulous card......
I love making explosion boxes and have many on my blog too, but I think your idea of removable magnets is a fantastic idea for kids. I would love to know how do you go about posting your boxes.
Post a Comment