


Here's the detail of the punched and sponged vellum butterfly with the adhesive rhinestones. A Silver pen is used for the butterfly antennae throughout this album.

Here's a photo of the spine: the twill is threaded using a needle through the holes in the accordion spine and then through holes in the envelopes. Quite a unique way to secure the pages in a book.

Here is a photo of the spine spread apart:

The overview:

Inside the cover and first envelope: There is a pearlescent rose in the corner. I added punched SU Old Olive leaves, die cut Sizzix elegant flourish in Naturals Ivory - t hen sponged with Dark Moss ink, and a punched and sponged vellum butterfly on the inside front cover. A tag with a white organdy ribbon (instead of black) and triangle paper clip along with a stamped image fits into the side of the "Treasure" pocket of the first Pink envelope. A small vellum butterfly is added, too. All envelopes are sponged with either Colorbox Chalk inks Rouge or Dark Moss.

Once the envelope flap is tucked inside, a cut piece of DSP is attached on 3 sides and is embellished with Stardust Stickles and an adhesive rhinestone over the "i" in precious.

The 2nd envelope has a floral rub-on with added Stardust Stickles, a punched vellum butterfly, a journal tag popped with dimensionals and another removal journaling tag to be tucked into the sides. The journaling tags are also embellished with Stardust Stickles.

On the backside of the 2nd envelope, again tuck in the flap to attach this message with a punched vellum butterfly in the top corner. Add Stardust Stickles and adhesive pearls to further embellish this envelope.

Another envelope: silver foil (now this was fun!). I scattered tiny rose rub ons, too. The brown tag holder was slightly too bold so I sponged it with a little SU Vanilla Craft Ink and also ran it through an embossing folder. A white organdy knot with an adhesive rhinestone is at the top of the tag holder. The journaling tag fits great in this spot.

On the backside of this envelope: the DSP that covers the backside of this envelop is embellished with Stardust Stickles. Embellished journaling tag is used as a pocket and a vellum butterfly.

Another pink envelope with lace rub ons, a die cute frame with adhesive rhinestones. "Precious Moments" is also a rub-on embellished with Stardust Stickles. Added a large Vellum Butterfly and a journaling tag slipped into the die cute frame.

On the backside of this envelope is a larger printed message that is simply embellished with Stardust Stickles.

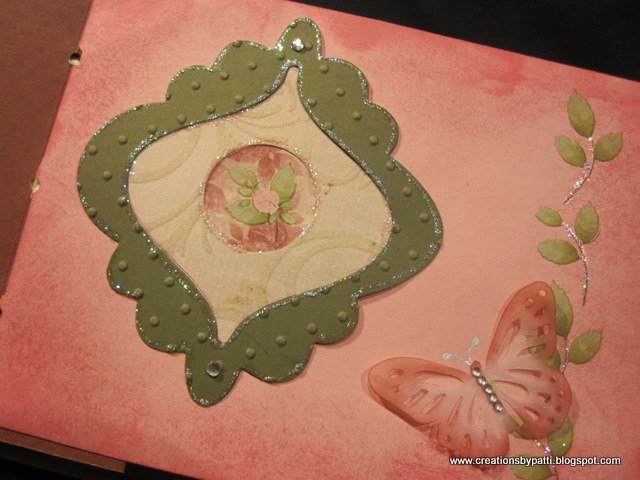
This is a smaller size envelope with a die cut frame.........I put it through a dot embossing folder. Adhesive rhinestones are positioned on the top and bottom of the frame. In the center is a rose rub-on. The frame is outlined in Stardust Stickles. The leaves are a rub on, too. The large vellum butterfly is positioned at the bottom right corner.
In the back of this envelope is what was left of the lace rub on. Stardust Stickles added the to flourish areas on this paper.

This envelope has a corner rose rub-on embellished with Stardust Stickles. The message is also a rub on. A large and small vellum butterfly finished off this envelope perfectly.

On the backside of this envelope, a small vellum butterfly, a journaling pocket with a tag all adorned with Stardust Stickles.

The last green color envelope: original sample had a stark brown multi square die which is replaced with SU Lattice Die in SU Naturals Ivory cardstock. Leaves were also punched using Old Olive Card stock and entwined into the lattice. A rose rub on is in the center. A large vellum butterfly is on the corner. The bookmark in the corner has small rose rub ons and Stardust Stickles. There was a brownish button on the bookmark but I covered it with a organdy and paper flower along with a adhesive rhinestone............in my eyes, much better.

On the backside of this green envelope, another rose rub on the books mark. A scallop punched edge is a pocket to hold two journaling tags.

This is the back inside cover where again, journaling tags are used:one to make a pocket and a couple for journaling or small photos. A large butterfly is attached to the pocket. Lots of Stardust Stickles used for the journaling tags, too.

Completing this project definitely was a challenge. The final product exceeded my expectations.
Resources:
Paper, Flower Punch: unknown
KaiserCraft: Journaling Tags, English Rose Paper and Rub Ons, Adhesive Rhinestones
Clearsnap: Chalk Rouge Ink, Chalk Dark Moss Ink, Silver Foil, Design Adhesive
American Tag: Triangle Clips, Metal Corners
Dies Direct: Tag Die
SU: Naturals Ivory CS, Bigz Lattice Die, Extra Large 2 Step Bird Punch, Dimensionals, Scallop Boarder Punch, Very Vanilla Craft Ink
Martha Stewart: Large and small Butterfly Punch
Sizzix: Elegant Flourish Die
Ranger: Stardust Stickles
Hope you also enjoyed seeing this project come to life.


13 comments:
This is absolutely BEAUTIFUL!
This tag book is incredibly beautiful!! I love the binding - I am going to have to re-read how you did it and give it a go. Thank you so much for the inspiration!
Hugs, antonella :-)
nice subtle colors - I recently bought a book - on how to create books and binding - great to see the thread in the binding technique
pure beautiful bliss for my eyes... lovely lovely lovely...
This envelope tag book is beyond gorgeous. You put a lot of work into it and it's so beautiful, page after page. I would love to try making something like this. Thank you for sharing this...you're always an inspiration.
Hugs, Cami
gorgeous!!! It makes my eyes happy :) TFS- Hugs~
So elegant, Patti! Thank you for sharing.
Aloha,
Toots
You are so very creative! Thanks for sharing all your projects with all of us!!
Debbie
I love it! This is absolutely beautiful! I appreciate your sharing with me.
Beautiful......
But is there a tutuorial somewhere that shows how to do the spine...... very interesting technique......
WOW! Absolutely gorgeous! Thanks for sharing.
amazing, all the pages.
love your tag book very muuucchhh... so adorable and beautiful....
Post a Comment