Here's the how to for the Valentine Message Containers:
Left Photo: completed project from 1/13 posting
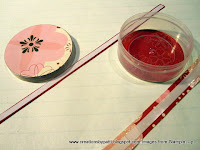
Right Photo: This is what I started with: scraps from a previous projects. My light bulb went off: why not use the scraps on those containers SU uses for embellishments. See Page 203 Item #103649/6 containers.


Left Photo: Supplies needed for this project
(1) Stampin' Store container
(2) 2-1/2" diameter circles in Sending Love DSP
(1) 9/16" x 8-1/2" Sending Love DSP strip
(1) 1/2" x 2-1/2" Whisper White CS for message banner
(1) Punched scallop circle in Very Vanilla or Real Red (whatever works best)
(1) Full heart punched in Pretty in Pink, run through the Big Shot using the Polka Dots Impression Folder
(1) Small heart punched using the Heart to Heart Punch in Real Red CS for the message banner
(1) Medium heart punched using the Heart to Heart Punch in Real Red CS
(1) Large heart using the Heart to Heart Punch in Sending Love DSP
(2) cut 1/4" x 8-1/2" Real Red Grosgrain Ribbon (for lid and handle)
(1) cut 1/4" x 8-1/2 (or 6-1/2" depending on your skill for the bow) Real Red Grosgrain Ribbon
Right Photo: turn paper over, using a pen or pencil, trace around the bottom and top. In this case: the size is 2-1/2" in diameter.


Left Photo: tape down (Dotto just doesn't work for me!!!) your scrap on the glass mat
Right Photo: Using the Circle Cutter Plus, position the blade to cut out the circles


Left Photo: Adhere the 2-1/2" circle to the container - snail adhesive worked OK
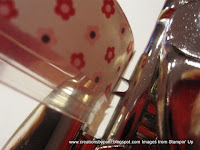
Right Photo: Now to cut the strip - 9/16" is in between 1/2" and 5/8" (see the pink arrow). 1/2" seems a bit narrow.


Left Photo: Here's a "far away" view. Because the strip is narrow, using masking tape was helpful.
Right photo: Apply sticky tape to one of the 1/4" x 8-1/2" Real Red grosgrain ribbon and also to the 9/16" x 8-1/2 strip of DSP.
Left Photo: Remove adhesive backing and wrap the Real Red Grosgrain around the lid as also so the same for the DSP on the bottom container.
Right Photo: To prepare for the handles, mark the sides of the container bottom using masking tape 1" down from the top (see pink arrows)


Left Photo: (oops - Not a great photo). Position Crop-o-dile large hole punch in the middle of the container side.
Right Photo: can you see the "prongs" and the position which is near the DSP edge...........???
Left Photo: Here's what your punched hole should look like.
Right Photo: Thread the Real Red Grosgrain through the holes. Apply sticky tape (about 3/4" long) to the ends.


Left Photo: remove the adhesive from sticky tape, press into container sides as shown. A tied knot at the ends was not an option - too lumpy! Add a mini glue dot to the ribbon on the outside near the hole so the handles stay flat and closer to the sides of the container.
Right Photo: To prepare for the lid embellishment, add dimensionals as shown.
Left Photo: stamp message, add punched heart. Clip corners. Use your fingers to "curve" the banner. Add skinny dimensionals, position on lid.
Right Photo: Another light bulb moment: why not add "stamped by" so it can be seen through the container


The container is now complete......instead of candy, I decided to go one step further to stamp a couple messages as shown below. Use the SU Big Shot Exclusive Pennanet die scallop circle which fit perfectly into the coantiner. The letters are popped with dimensionals and scattered punched hearts complete the surprise message. Use 5/8" Grosgrain ribbon to string the letters together. Use sticky tape to adhere the letters to the ribbon.
Supplies:
- Stamps: Lovely Letters Alphabet, With All My Heart
- CS: Pretty in Pink, Real Red, Very Vanilla, Sending Love DSP
- Ink: Real Red
- Accys: Scallop Circle Punch, 1-1/2" Circle Punch, Heart to Heart Punch, Full Heart Punch, Polka Dot Impressions Folder, 1/4" Real Red Grosgrain Ribbon, 5/8" Real Red Grosgrain Ribbon, Circle Scissors Plus, Sticky Tape, Dimensionals, Mini Glue Dots, Crop-Dile, SU Exclusive Big Shot Pennant Die
Like this project? Let me know. The supplies are listed above. If you would like to place an order, send me an e-mail OR you can now place an order on line in my store: http://www.pattilee.stampinup.net/!!! Anyway, I'd love to hear from you, especially if you are in my neighborhood! Hugs......................!!!!


5 comments:
What a beautiful project! Thanks for sharing the details.
oh my gosh....thanks Patti for posting a tutorial ! I'm running right now to my stamping space and make one !!! WOWZA !!
Connie - You QUACK me up so bad.............giggle.......giggle...giggle!!!
Completely brilliant! LOVE the look of this & the idea to cover the stampin store is TOO clever for words.
My dear Patti, let me tell you once again how wonderful and sweet you are for sharing all of your ideas with all of us! You are the best! hugs, d
Post a Comment