


.

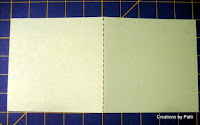
This is the inside of the 1st CD Folder below.
- Cut (1) 5"x5" for the left side
- Cut pocket template, trim 1/8" smaller
- Adhere

For the accordion to hold the tags/envelopes:
- Cut (1) 5"x11" (for 3 tags). For 4 tags, cut 5"x12"
- Score 5", 1/2", 1/2", 1/2", 1/2", 1/2", 1/2", 1/2". There should be 7 score lines. There will be 9 score lines for 4 tags.

The mountain folded accordion should look like the photo below.

Below is a close-up of the folds. There should be 3 of them. The bottom of the fold MUST be FLAT, otherwise, there will be problems with your album.

Turn paper over, apply adhesive ONLY between the score lines. This will prevent your folds from "bursting" - THAT would be ugly!

The glued accordion folds should now look like this:

The 5" side is the right side of the CD Folder and the smaller side is the left side.

Now fold the CD Folder in half: that means the outside should be touching the outside Cd Folder. Now you can slip both sides of the accordion into the pockets as sown below.

It should look the like this:

Tags:
- (3) Tags are cut 3"x4-1/2". Corner punch used for the outer corners.
- Add adhesive ONLY to the tag/envelope bottom, position to backside of the accordion.
- DO NOT add adhesive to the backside of any of tags.
- Evenly space all tags/envelopes

Below shows the last tag adhered to the accordion.

To connect the 1st CD Folder to the 2nd CD Folder:
- Cut (1) 5"x10-1/8"
- Fold in half
Place the 1st CD Folder right up against the 2nd CD Folder as shown below.

Place the 1st CD Folder right up against the 2nd CD Folder as shown below.

Generously apply adhesive to the right CD Folder. Adhere the 5"x 10-1/8" card stock on top. Ensure the CD Folder edge and the card stock edge is matching.

Then generously apply adhesive to the left side and adhere the card stock. Make certain the "connector" lays flat.


The Front & Back covers:
- Cut (2) 5"x5" Card Stock
- Cut (1) 5"x5" Card stock for the spine (this is optional)
- Adhere the spine to the Front & Back cover BEFORE finishing project
If there are 3 CD Folders, a 2nd "connector" will be needed. Follow the same procedure above. The inside of the 2nd and 3rd CD Folders are also the same procedure. There are endless creative ways to embellish the album......let your imagination guide you. There is no right or wrong way.
Thank you for stopping by today. Let me know if there are any questions. I aim to be as clear as possible, and...............thank you for your patience.


6 comments:
Patti - You rock! Thanks a bunch as this is easier and I don't have to buy a case of folders! You are "the woman"!
Outstanding job on your tutorial! Thanks so much!
Whoo hoo Patty, I guess I will try it on my own, I was hoping for a class, a girl can hope right! ha ha THANKS for the detailed instrucitons!
Thanks so much for these instructions. I was searching for them yesterday, but couldn't get Scrappers Lounge to upload. THANKS!!!
Where is the pocket template you refer to here?
Thanks for the tutorials
Thank you so much!! Excellent and so extremely easy to follow! Only one question. Afte3r making acordian folds and slipping into pockets of cd holders, do we use adhesive? Or do they just slide in and out??
Post a Comment