Thursday, November 4, 2010

Asian Notes

This note pad is unique - can you tell? The DSP is wrapping paper. A matching pen completes the ensemble. Finished project size is 2-5/8" x 1/4" x 8-1/4".

Inside: removable book mark

Template for cover:
(1) 8-1/4" x 10-5/8", score 2-1/2", 2-5/8", 1/4", 2-5/8" , leaving 2-1/2"

For pocket angle: measure 3-1/2" up, cut to the fold line.

Cut pieces as follows:
(1) cover in Black CS
(1) cover 2-3/8" x 8" Soft Suede
(1) cover Wrapping paper 2-1/8" x 7-3/4"
(1) inside left flap Soft Suede: trace shape, cut slightly smaller
(1) inside left flap Wrapping Paper, also cut 1/8" smaller than Soft Suede
(1) 2-1/2" x 2-1/2" Wrapping Paper for note pad top.
(1) 1-3/8" brass coin
(1) 1-5/8" Soft Suede circle, attach using mini glue dots to 1-5/8" Soft Suede circle.
(1) 3/4" brass coin, attach using mini glue dots to the top of the note pad.
(1) 2" x 7-3/8" Black CS for bookmark
(1) 1-1/2" x 7" Soft Suede contrast for bookmark
scrap for RSVP pen.

Cover the note pad top with wrapping paper.
Apply sticky tape to the following areas:
inside flap insert
inside right side (note: this section is a double layer to provide sturdiness to hold the note pad)
back of note pad

Adhere front and left inside while note holder is open and flat.

Now remove the back of the sticky tape of the inside left flap and inside right flap. Remove sticky tape from the note pad, adhere.

Supplies:
  • Stamps: none
  • CS: Black, Soft Suede, Wrapping Paper (non SU)
  • Ink: None
  • Accys: 1-5/8" Circle (non SU die), Mini Glue Dots, Sticky Tape, 1/4" Black Grosgrain Ribbon, Gold Coins (non SU), Brushed Gold eyelet (non SU)

Thank you for stopping by today......................

Wednesday, November 3, 2010

Xmas Swap from Gina

I can finally post these fabulous swaps from my fellow Demonstrator: Gina. (see her blog http://www.ginataylor.wordpress.com/). Gina generously gave me these before she went to convention this year - these were her swaps. I promised to hold off posting them and just recently saw them peeking behind a stack of cards...................ah, there you are!!! So cute!!!! If you have any questions, contact Gina directly on her blog.

The Reindeer ornament: it measures 2-1/2" x 1-3/4"

The clear acetate pillow box with the reindeer embellishment: it measures 2" x 3" x 3/4"

Side view of the reindeer candy treat holder: it measures 2-1/4" x 3-3/4"

And, here is a "Thank You" version:

Thank you for stopping by today.......................

Tuesday, November 2, 2010

2011 Asian Mini Calendar

When I saw Lisa Johnson's (www.poppypaperie.typepad.com) Mini Fold Book on 10-22-2010, I just had to make one. Please go to her blog for the full tutorial on how to make this project. I did slightly tweak the cover measurements so finished project is 3" x 1/2" x 3-1/2". I added a black rayon bookmark which acts like a cord - it's thread through the spine, then tied....... like the small 3/4" brass coin on the end?

Back View:

Close-up of the 2" brass medallion etched with a Dragon and a Phoenix: because it was brass, I used my glue gun to make sure it is securely attached.

Open to reveal the inside cover. Yup, there is black custom colored Velcro on the right side and a clear Velcro on the left side. The white color just stood out like a sore thumb. These Velcro attachments are way cool because they are so thin!!!

Here are the inside monthly calendars:

Overview:

To make this calendar, I had some stamped textured paper dying to be used for a project............opportunity knocks!!!! So without thinking twice, I cut the paper up into 1-3/4" x 2-3/4" for the front flap,back inside flap, and left inside flap. Another piece 2-3/4" x 2-3/4" was cut for the calendar back cover..
Here are the cut and trimmed computer generated calendars. 2011 is stamped using Real red ink and my (finally used)" Just Right" Brayton stamp set..............now how long have I had this stamp set? and was finally able to use it. I ain't telling. Yeek.....and I had to dust off my stamp-a-mah-jig, too.

Adhere monthly calendars to the strips. Then adhere backside of Feb. to March, etc.

To make a custom black Velcro: first punch out a 5/8" circle to be used as a template. Then color using a permanent marker. Allow to dry.

Results of coloring the Velcro:
I will be making more of these - there is a huge opportunity to further embellish this project.
Thank you for stopping by today.....................................

Monday, November 1, 2010

Halloween RAK

Look what I got!!!!! Wow - I love these kind of surprises!!! This is from my stamp friend Gail W: isn't she the greatest? She has such great creative talent............and she is so humble, too. This will be the last Halloween project to be posted - I'll be moving on..............maybe on to Christmas????
Swing card: I absolutely LOVE this card........a swing style. The spider embellishment at the bottom is amazing!!!! that witch!!!! Oh that witch!!!!! ...see next photo for a closer view of the witch.

Check the witch out: she is glittered all over and popped with dimensionals - way cool and glittery!!! I gotta ask her how she did this amazing card!!!

Here's an overview of the swing card:

And, a closer view of the plastic spiders at the card front bottom:

Open the card and the witch swings to the back to review the Halloween message. (I've covered up the message using white post it note):

And what does the back looks like: see this? cool, with a strip of multi color stripe DSP with a black backdrop.............love it.

Here's a close-up of the Candy Wrapper with an Owl embellishment: cute!

To my surprise, inside the Pumpkin faced container were not treats...........no disappointment here.........they were three wood face stamps (from Dandelion Designs). Aren' they so ever cute? I have had these on my wish list for a while and they appeared!!!! Wow - there are angels flying around!!! I can't wait to use these soon!!!!

Here is a closer view of the bag which held all these goodies"

Thank you for stopping by today to visit...............................

Friday, October 29, 2010

Wedding Album for a Friend

Hello..........a wedding album made for a friend. I love how it turned out. The "Happily Ever After Mini Album" instructions were purchased from Laura aka www.followingthepapertrail.blogspot.com . Sigh.......I had every intention of making this album in plenty of time but at the eleventh hour.....it still turned out GREAT! I did tweak the cover and made some changes from Laura's original design - hope she is OK with that. Here goes (lots of photos) so grab a beverage and enjoy..........final album size 6-1/2" x 7-1/2" x 2-1/2"............first up: Tie the Knot Simply Scrappin paper (retired SU) was used throughout the album. The cover with a string of pearls and a simple message at the corner.

Left photo: overview
Right photo: side rings decorated with various tied ribbons and a special metal embellishment

Left photo: album back
Right photo: view of inside pages (there are a total of 7 pages)

Left photo: inside front cover, a tag made from the invitation, The first page for the bride & groom's photo
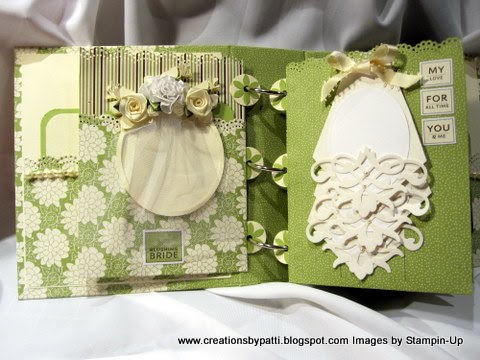
Right photo: turn page over to reveal the veil to hold the bride's photo and the left side is for the brides train. The train is decorated using a elaborate die cut with adhesive pearls.

Left photo: pull down each section of the train to place photos on the oval mats
Right photo: turn page to see the ring page and the Groom's page

Left photo: inside the ring page, a tri-fold card for photos and journaling. Inside the Groom's vest shows the shirt which can be pulled out for a photo, tucked in the cumberbund is another photo mat
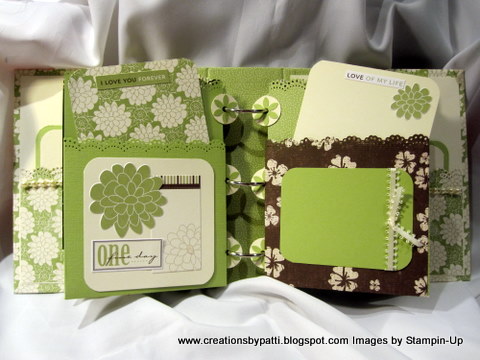
Right photo: tucked into both sides of the pockets are photo mats for the Maid of Honor and Best man.

Left photo: a basket with little mats for the brides attendants and a garter on the left side along with a photo mat for the Groom's attendants
Right photo: shows the inserts taken out from the pockets

Left photo: closer view of the garter
Right photo: the cake and the toasting page
Left photo: closer view of the cake
Right photo: closer view of the tasting glasses: metal embellishments on the glasses on the gate fold page

Left photo: Cake holds 3 tags, each stamps with special messages. Open the gate fold to reveal sections for additional areas for tasting photos
Right photo: turn the page to reveal pages for the reception photos

Left photo: pull out the tri-fold photo mats on each side to hold reception photos
Right photo: A mat for the new couple on the back of the last page. The back cover page has a pocket containing a tag.

Of course, then a bag had to be made to hold the album: a Kraft bag with some of the "Tie the Knot" stickers. Ticked inside the bag with tissue (finally) is the album................
Thank you for stopping by today.............I hope you enjoyed this post.
Have a great weekend!!!