





Friday, December 23, 2011

Teresa Collins Noel Album

Well, only a couple more days until the BIG holiday. I was able to finish this album (finally). This was a Noel kit from Teresa Collins. This was one of those start - stop projects. Then I saw my friend Karli (Crafting with Class) who also finished this kit this earlier this year posted here. I was soooo motivated to do mine in the same way as hers. It was soooo gorgeous. I did use my Bind it All with red o-wires to bind the pages and added a few here and there blings I had around my craft room dying to be used. This was a perfect project to use some of that holiday embellishment stash

That bling attached to the o-wires: got that from Pier One Imports. It was 80% off and suppose to be used to decorate candles. A pair of pliers was used to curve that sharp point and it worked perfectly. And, gosh, does everyone have enough ribbon?

Those silk poinsettias: I believe are from Recollections, another embellishment from my holiday stash which finally got used. Tied organdy bows are scattered throughout the album a subtle embellishment.

More Recollection silk Holly leaves and organdy bows along with a silk Poinsettia

More subtle embellishments: red adhesive rhinestones on the tag:


Gold Glitter paper: used a Martha Stewart Jingle Bell punch here. There is a "hidden tag" that is pulled out from under the larger mat.

Left photo: A Gold Glitter strip was added to the tag pocket and page. Hand trim "traditions" and pop it with dimensionals.

Left photo: see the tag with the gold metal star? Gold metal star is also along the pocket opening. You can see the page more clearly when the tag is flipped up.
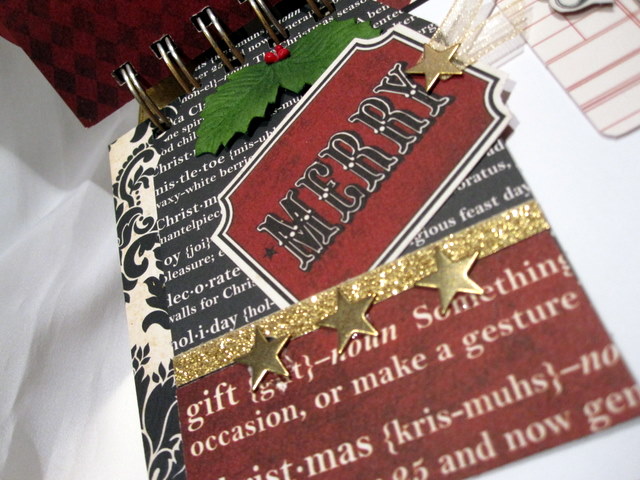
Left photo: Pull the poinsettia out to reveal a manila tag. On the right photo, another tag where the brad is used as a pull tab to reveal........see next photo

Left Photo: Underneath is a tag for journaling. Right photo: is another pocket with a tag and silk poinsettia on top of the pocket.

Left photo: this page has a strip of gold glitter at the bottom. Right photo shows a tag under the photo mat. Note another punched gold jingle bell at the top right mat corner.

Left photo: Gold stickles was added around the "december". Right photo: another page and punched gold metallic jingle bell on the pocket with a gold organdy bow. Gold metal stars flanked the label on the mat. A gold metal strip along the bottom of the page.

Left photo: another tag inside the pocket. Right photo: Album back.

There wasn't much paper left after making this album. I tried to make use of all the paper in the kit. Now hopefully, it won't takes years for the photos int his album. I hope you enjoyed this project.
Note: I will be taking a little blog break for the holidays and will be back to posting after a bit of rest..........HAVE A GREAT HOLIDAY!

Thursday, December 22, 2011

Sister Stamps Holiday Ornaments

Is this the most fun project or what? I wish I would have thought of this much earlier so I can make a whole bunch of them since they turned out sooooooo cute!!!! I used the holiday release of the Sister Stamps #3 which can be purchased from Pineapple Cove's on line store here. The plastic ornaments can be found at Michael's and are about 4" in diameter. There are many "how to" on You Tube to make these type of inserted acetate ornaments..........so check them out to make your own variety of ornaments next year. I stamped the clear acetate with Staz On White using a snowflake stamp them glued the cut Copic colored image to the acetate with a Solid Crinkle paper for the back side. Don't forget to date the back of the ornament because it will be tough to get the acetate back out once it is inside. Ugh.....I couldn't decide: snow....no snow....snow inside????

Here's Yuki: I used some Moonlight Smooch for the stocking top and Gold Smooch as an accent on her dress.


Yuki's backside is red:


This is Shimo-san: Gold Smooch accents on her dress and his "cape", and also on Snowman's scarf.


Backside of Shimo-San is Purple


Last of the series is Setsuna. Hat trim and beard accented with Moonlight Smooch. Gold Smooch is accented on his clothing.


Backside is red color:

Thank you for stopping by today and everyone............HAVE A GREAT HOLIDAY!!!!!

Wednesday, December 21, 2011

2011 Cookie Swap with Recipes

Are you ready? LOOK at my dish of cookies I walked away from the 2011 Annual Cookie Swap given by gracious Hostesses Frances and Teresa. This year, the cookies all look so professionally made. No duplicate cookies made..........we are all surprised which cookies are baked when we bring our dish to set on the table. We could have sold them and made lots of holiday cheer!. Recipes and individual photos of each cookie are below. My cookie brought to this swap was posted yesterday (12/19/2011) so it is not repeated today. Note: For easier viewing of the recipe details, Click on the recipe and it will be enlarged to full size


Frances made a batch of Red Velvet Blossoms
recipe correction: in "combine section" ONLY one 1/2 Cup packed Brown Sugar. It was listed twice.


Yvonne made the delicious Chunky Chocolate Gobs


Gail made these Chocolate Gingerbread Drops


Emeline made this cute Pizza Cookie


Linda made these Chocolate Cereal Treat


Frances also made these wonderful Almond Cookies and such a cute recipe card


For a fun factor: some Chocolate Covered Marshmallows sprinkled with a variety of crushed candies. These were made by Linda, too

Karen made these Chocolate Orange Pinwheels: They look great and they tastes great


Teresa made these awesome Cinnamon Roll Cookies.......yummy!


JoAnn brought these two cookies. Left photo is Reindeer Chocolate Chip Cookies and Right photo is Lacey Florentine Cookies (Gluten Free).......sorry no recipe provided at this time


Hope you all had your own swap this year. If not, start one next year and start collecting some cool recipes that you have actually tried. It is quite a fun event to be a participant