Friday, July 13, 2012

Takeo Happy Birthday

A Boy card? ...............well, it just happen to be a Boy card because the card template is from the Silhouette on line store......yup, a card template with balloons already built in!  Now how perfect is that to go with the Sister Stamps Release #8 Takeo stamp with balloons. It is so EASY to just cut this card.  I did change the font and added a contrast background. And, why not also add some micro glitter to the inside frame...............some sparkly is OK for a boy card. The paper is from K & Company Birthday Scrap Kit.: perfect for that festive feel. The Brown card stock base is textured from Bazzil. Neenah white paper is used for the card front - you'll see why further below............yup, it's because the contrast color balloons and frame were using Copics to give then matching color to Takeo. Even the "happy birthday" letters are using a Copic pen which matches Takeo's clothing. 
A closer look at the inside frame with micro fine glitter. I just used a glue stick and applied the micro glitter - it seems to work fine and hasn't fallen off. Original font didn't work for me so I changed it but forgot to make note of the font style......ooops.  A contrast shadow made using the Silhouette was easily made. A Quickie glue pen is used to adhered those really fine letters. No problem to pop up the message with foam tape on top of the micro fine glitter
And here are those balloons that look like the ones Takeo is carrying.
Details of Takeo:
Card inside: message is stamped using SU "Best Yet" and SU Chocolate Chip ink
This Silhouette cut file was done completely using Neenah White card stock. Coloring is done BEFORE removing the card stock off the mat. That's how I got the balloons and the frame to match the colors used for Takeo. The balloon strings were left white color.  I just wanted to utilize the colors and dreaded the thought to have to scour through piles of paper to see what would co-ordinate.
Copic color details:
Takeo hair: W8, W5, W4, W6
Takeo Clothes: Y17, E27, E31, E55 (letters happy birthday)
Takeo Face: R20 E21
Bamboo: E71, E55
Frame, Message mat: Y38
Balloons: Y17, R35, B24 +a white gel pen on the side of the balloon
I hope you enjoyed this card, it worked out fine................have a crafty day!!!

Wednesday, July 11, 2012

Rock and Rollin Jukebox Card

Here's the quickest card I've made in a while.  Luckily I already had the layout on my mat to cut out on my Silhouette using SVGcuts.com Rock & Rollin Collection /Jukebox Card which can be found here.  It took me from selecting the papers to finish, about a couple hours. The finished card is 5" x 7".....I thought it is a bit large but actually it's an OK size. If I had to do over again I would make the silhouette girl a bit taller.  Don't you love her "saddle shoes". She is from the same collection but from the Party Card-33 file. Personalized name on the card is made with my SCAL computer program using Impact font cut at .75 twice to make a contrast shadow. All the pieces have been sponged with SU Chocolate Chip. Accents are using a fine tip black pen. Michael's Kraft paper is used for the card base, then stamped with a wood grain background stamp from Hero Arts using SU Chocolate Chip ink. Only some parts of the jukebox are popped with dimensionals.
Here's a closer detail of the letters: A red copic pen was used for the buttons and a fine black pen used for the record names (swiggly). I had litghtly penciled the lines so I could get the buttons straight but it looked so good, I decided not to erase them.
Card inside: a simple note (part of the collection) and stamped message (from SU On Your Birthday set)
Now are you ready to see MY VERY OWN jukebox? Isn't it so cool?  Lights and those water bubbles and everything!!!! Not an original Wurlitzer but it does play actual 45 rpm records (what's that?) OMG - yes, I still have my favorite records from so very long ago. And it has been 25 years since I got this jukebox!. It sits in our favorite spot in the family room. SVGcuts.com did such a fabulous job making this cut file. AND, there's a jukebox "box", too that is part of theis Rock and Rollin SVG collection so you can position a tea light inside so it will light up!!!!
It was a last minute request to make this card but was still fun to make. I was amazed I was able to put it together in a real hurry........................hope you all enjoyed it and have a great crafting day.

Monday, July 9, 2012

Koi Flip Card

OK - the cat's out of the bag...............it's my actual Birthday today - HAPPY BIRTHDAY TO ME!!!! I'm one who likes to give parties not celebrate my own so am keeping it low key: some nice lunch with my Honey and quiet time at home............yay!!! Just what I wished for.

But today, here's an Koi Flip Card............boy, I struggled with this one but finally, it turned out great (I think).  Leave me a comment to let me know.  The card style can be purchased in the Silhouette On Line Store and is called a Flip Card.  There are many videos on You Tube that show this style of card but the Flip card from the Silhouette on line Store finishes 4-1/4" x 5-1/2": perfect to fit into a A@ size envelope.   Yippeee..............right?  Asian Cuttlebug embossing folders used on SU Sahara Sand card stock. Koi fish is a Cherry Lynn Die which can be purchased here. Corner dies used are from Corner Deco from Cherry Lynn: B174 Lace  1 and can be purchased here.  The die was trimmed in half, attached to the front of the card using a Quickie Glue Pen. SU Night of Navy card stock is the card base with Darice Polka Dot Embossing Folder.  Only the exposed Night of Navy was embossed and not the inside circle part at all. See attached link here on You Tube posted on January 24, 2009 Double Embossing with Cuttlebug and Nestibilities to see how to achieve this shape..............it's so cool! SU Pumpkin Pie is used throughout this card as an accent.
And, Dew Drops attached as bubbles with mini glue dots.
Here's an overview of the card:
Inside: card is flattened - Calligraphy is a Hero Arts Thanks stamp using black ink. Inside strip is 7.8" wide with a little bit of Pumpkin Pie showing.
Another view:
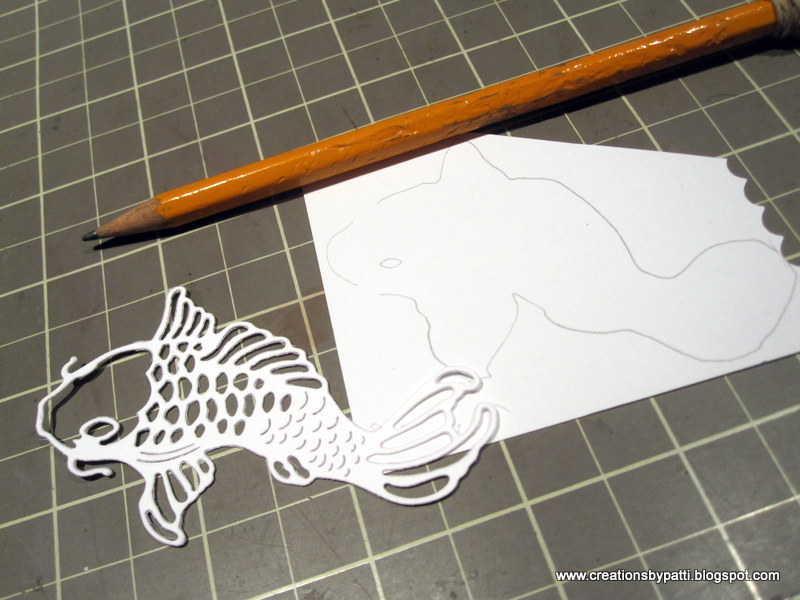
To create the Koi fish, die cut in white Neenah white paper. Then trace around the Koi using a pencil. 
Randomly color sections using Copic Y18, 110 Black, Y38, YR07. Color the die cut Koi with YR07 and Y38.  This way the Koi colors will match the "scales" made".  Adhere trimmed Koi on top of the randomly colored card stock with a Quickie Glue Pen.  Trim Koi, add dimensionals, then attach to the Asian embossed circle.
I thought to add some flowers on the inside bottom right corner but darn, no flowers to match the Koi...............oh well, it would have been too difficult to put through the mail anyway. Hope you enjoyed this post.  Thank you for visiting today.

Friday, July 6, 2012

Cupcake Srapbook Birthday

The Cupcake Tag Birthday Album  from Pine Cone Press has been updated.  My Grand Neice: Marissa's name has been added along with her milestone birthday of 12 years.  The original Cupcake Tag Birthday Album was posted on 2/6/12 here.  The front cover looks like this along with a card that was made. The envelope shown below is decorated with her name, flowers, and "12th" was added to the album front.  I won't be showing the inside of the album again. I knew she would have a tough time getting photos filled so I went ahead to add photos of her growing up from one month old and the last 12 years. Pretty cool, eh?
The Envelope: Name is made from using SCAL3 and then cut using my Silhouette. Outlining the pattern paper edges is Stardust Stickles for bling!
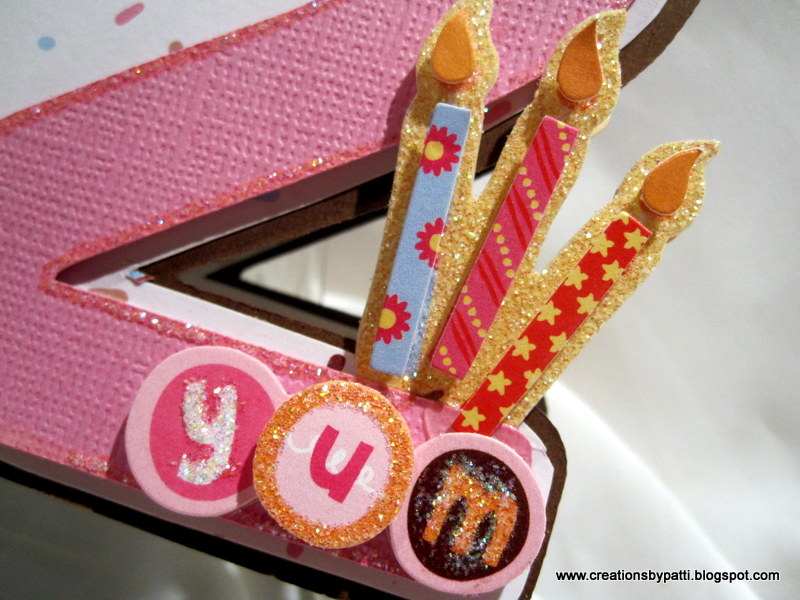
And here is the card: it was made using SCAL3 with Arial font and cut using my Silhouete. The embellishments are from K&Company Birthday Scrap Kit which I purchased at Ross..........can you believe? The embellishments were perfect for this card.  Tie a pink organdy ribbon around the "1".  And I LOVE the Imaginisce Ribbon Sealer to prevent all those frayed edges.  Pop both numbers with dimensionals, add Stardust stickles around the numbers for some sparkle. That Pink is Core-dinations Lipstick color. DSP is left over from the Cupcake Tag Birthday Album.
A little more detail showing the Stardust Stickles that outlines the "12".
Card inside: paper is left over from the cupcake tag album.  Stamp set used is retired SU On Your Birrthday stamp set using SU Chocolate Brown ink.
I know Marissa will enjoy this album. I enjoyed collecting all those 12 years of photos showing her growth. The next 12 years will be a new chapter in her life. Hvae a great weekend.......................and remember to make something fun!


Wednesday, July 4, 2012

A Hello Kitty Graduation

When a little one graduates from Pre-School, it is a milestone.  For her graduation, a really pretty pink silk lei and a card for her great day.  The Leis are from Target.  They were inexpensive to use to decorate. One lei was left plain and the other is decorated with 3-1/2" Graduation Hello Kitty using the Hello Kitty Greetings Cricut cartridge.  Hello Kitty outfits were made in her favorite colors Lavender and Pink instead of traditional Black. Leis will be presented in one of those fancy white take out boxes.
The card: Images are from the Hello Kitty Greetings Cricut Cartridge. Adhesive Rhinestones have been attached to Kittys knot in the bow.  This is a spinner style card with the graduation diploma as the spinner. Use the SU word window punch to make the track for this spinner card. Card base is using SU Melon Mambo, the pattern paper is from K&Company Birthday Scrap kit .  It's birthday paper but hardly noticable with the SCAL words (Arial font) cut using my Silhouette. The scallop rectangle is a free SVG cut file, then popped with dimensionals. Kitty and graduaation hat are also popped with dimensionals as well.
Scalloped card inside: stamped message is from G Studio
More details of the Lei: Hello Kitty is backed with a plain black Hello Kitty attached with dimensionals.  The diplomas are adhered to 1-1/4" and 1-3/8" cpunched circles, then attached with dimensionals against another 1-3/8" punched black circle.  These images all stay in place since they are in between the "clear straws" used in the lei.


This was a fun graduation gift to make and hopefullt she will keep for many years to come.