Friday, January 28, 2011

Chinese New Year Card - a RED one

On Wednesday, January 26, I posted my first "Sliding Pop-Up" card and this is now the RED version. I like both colors. This one I decided to give the "base" a little more stability by cutting a black Matt on top of the real red (see photo below) and I added a 5/8" wide Gold Organdy ribbon. I followed the colors int he Washi paper scraps I had to make this card. Experimenting with several Copic colors was key to co-ordinate the clothing colors. Gold Smooth was added to the flowers and to the boy's hat/buttons (very subtle and does not show in the photo). Instructions for this card are on Kim Score's blog (http://www.paperaddiction.com/) or on Split Coast resource section.

Here's a closer view of the two children.....................


Slide out the back to reveal stamped message on Real Red with a Gold Modern Label punched piece. (I would have used "celebrate" but had some trouble trying to find the stamp........urgh!!!! I know i have one around here somewhere). The back piece is black card stock with gold flower embossing.


Side view:


Copic colors used:

The same "tools" were used from the card posted on 1/25/11: Calendar Cricut cart cut at 2", Cuttlebug Asian Embossing folder, 1" circle punch, Word Window punch, and "enjoy" from the SU On Your Birthday stamp set. and the doll images are from Hero Arts. The Flower is from Oriental Trading.
So I hope you enjoyed this RED version, too.....................have a great weekend. More Asian themed cards coming soon.....................

Wednesday, January 26, 2011

Chinese New Year Card

A quick posting:
Here's a great card for the 2011 Chinese New Year. This card style is called "Sliding Pop-Up Card" - see the video tutorial on Kim Score's blog (http://www.paperpunchaddiction.com/) or at Split Coast Stampers in the Resource section for all the specific details. Certainly Celery and Lavender Lace (retired SU) card stock was used because it co-ordinated with the colors in the Washi paper. The words "Chinese New Year" is from the Calendar Cricut Cartridge cut at 2". The Certainly Celery is embossed using the Cuttlebug Asian Folders.

And, when the card is pulled forward: reveals the stamped flowers using Versamark ink (stamp from Oriental Trading) and the message to "enjoy" the celebration. The Modern Label Extra Large Punch and Word Window Punch were used..stamp "enjoy" in Black ink. The 1" circle punch is used for the "pull".

And here is a close-up of the two images. They were colored using Copics. Some Gold Smooch was painted on the center of the flowers in the little girl's hair, the flowers on her dress, the front of the boy's "frogs" and his hat. I forgot to keep track of the colors used - sorry about that.
I do hope you enjoyed this posting and will hop on over to Kim's tutorial or Split Coast Stampers.
Gotta run..........................off to make a red (of course) version.............so stay tuned.

Tuesday, January 18, 2011

Hello Kitty Birthday Activity

Once in a while, I have craft birthday parties for my Grand Nieces. Last weekend, we had 6 little girls over for a fun birthday craft day.

Each attendee got their own Kraft bags with their initials: decorated with pink, lavender, and pixie pink curling ribbon. The bags were filled with a boas and bead wand along with other girly goodies. The birthday girl got her own lavender beaded crown and boa wand. Don't you love that Hello Kitty DSP adhered to white chipboard and die cut using the Scallop Circle Die. The initials are also die cut using the Serif Essentials and finished off with adhesive rhinestones. Oh yes, white jumbo eyelets are used to tie the tags onto the Kraft bags.

A request by my Grand niece: nail polish. I found these perfect small bottles at the local craft store and used Hello Kitty stickers to decorate them since they were "blank" and very plain looking.

Laminated back pack tags: These tags are individually packed for the girls. The Hello Kitty is a Sizzlit die (I believe the die is on clearance for under $1 - can't beat that.......!!!). Using Pixie Pink along with the Hello Kitty scrap paper.........the tags are laminated using a official heat laminater. Results are fabulous and looking like they are store bought.

Closer view of the tag: Purple, red and Pink beads and the clasp.


Book Marks: Individually packed projects for the girls to make. The DSP is Hello Kitty with Pixie Pink (retired SU) CS. Hello Kitty is a sticker on a white 1" circle, a 1-1/4" Pretty in Pink CS, and Pixie Pink Extra Large Scallop Circle. I cut the "red" words fro, the Cricut Cart: A Child's Year. Surgery was done since the words were enclosed within a book.


Add 2 small adhesive rhinestones to the flowers in her hair to complete this project.


We made customized headbands by wrapping ribbon around a "blank" headband. Each girl wanted a different type of bow and they were very creative with adhesive rhinestones, too. I didn't get a photo of their creation. I was in charge of the hot glue gun! The girls also got to paint 2 sun catchers each - they were pretty neat - no big spills or painting catastrophes. I was very relieved. A ice cream cake was the highlight. The last event was a game of Bingo - boy, I hadn't played that in a while and it was FUN!!!!

Sunday, January 16, 2011

Tennis B'day Card

Here is an appropriate birthday wish for a friend who has a passion to play tennis. The message is clear and simple. It was made by using my Cricut (after I brushed off the cob webs). The stamped tennis racket and ball are popped with dimensionals after stamping. Remember ":magic mesh" - I still have some and decided it needs to be used for the tennis net.....worked out great!!! The grass boarder is a Martha Stewart punch popped with dimensionals - Love it! That DSP is a retired paper from previous Sale-a-bration packs.................yup: gotta use it!!!
Inside message: Magic Mesh on the inside, too.

Supplies:
  • Stamps: It's Your Birthday,
  • CS: Bashful Blue, Certainly Celery, Black, Whisper White, DSP (retired)
  • Ink: Staz-On Black
  • Accys: Magic Mesh (retired), MS Grass Edge Punch, 1/2" Circle Punch, Dimensionals, Cricut Beyond Birthday Cart.

Thank you for stopping by today..............

Saturday, January 15, 2011

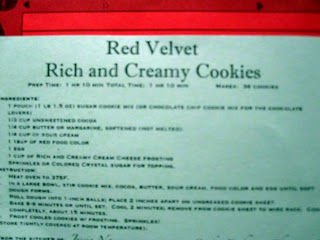
Family Holiday Recipe: Red Velvet Cookies

So very sorry for such a blurry shot: the actual recipe card is 4 x 2-3/4 and I tried to focus as best I could. So, no other choice but to retype it:

RED VELVET RICH AND CREAMY COOKIES
- 1 pouch (1.5 oz.) Sugar cookie Mix (Chocolate Cookie mix)
-1/3 cup Unsweetened Cocoa
-1/4 Cup softened butter (not melted)
-1/4 Cup Sour Cream
-1 Tablespoon red food coloring
-1 Egg
-1 Cup Rich and Creamy Cream Cheese Frosting
-Sprinkles or color crystal sugar for topping

Instructions:
1. Heat oven to 375 degrees
2. In a large bowl, stir cookie mix, cocoa, softened butter, sour cream, food coloring , and egg until a soft dough forms.
3. Roll dough into 1" balls, place on ungreased cookie sheet
4. Bake 6-9 minutes or until set. Cool 2 minutes, remove from cookie sheets to wire rack. Cool completely about 15 minutes
5. Frost cooled cookies with creamy cream cheese frosting, add sprinkles or crystal sugar.

store tightly covered at room temperature.
Prep time: 1 hour 10 mins. Makes 36 cookies

Yummy!!!!

Thursday, January 13, 2011

Family Holiday Recipes Details

Hi Everyone: well, scanning each of the recipes and attaching them to this blog post didn't work (or I just don't know how to do it). So what I am attaching are the photos of those recipes hidden by the cookies displayed on the plate. For those of you who e-mailed me directly, all the recipes have been sent to you. below are the photos of the recipes....they are at full scale (not compressed). Click on each photo for the details.

This one may be a little tough to see - the original is also quite small.


Enjoy baking.....................

Family Holiday Cookie Recipes

Thank you all for your comments and surprising interest in receiving copies of the recipes. I will try to have the recipes posted for everyone to enjoy within the next couple days. So stay tuned.

I will be printing the photos when there is a "sale" to save with the recipe - that way I can remember what they should look like and it willl be my own perosnal cookie book saved in the Holiday recipe box.

Schedule your own cookie or ornament exchange............instructions can be found on Martha Stewart's web site and I am sure other sites.

Stay tuned.................

Wednesday, January 12, 2011

Family Holiday Cookies

First: Happy New Year to All...............I am busily (is that a word?) cleaning, sorting, and purging. You all know how that is. Every year, I go through this motion and with Chinese New Year on my heels (it will be the Year of the Rabbit) on February 3, I need to quickly clean the house. Cleaning the house is one of the major tasks that need to be completed before the New Year or I will be cursed with bad luck!!!!

I forgot to post our family Holiday Cookies from the swap.....here is just a sampling......yummy!!!
Left photo: Peppermint Sugar Cookies

Right photo: Almond Biscotti Dunkers

Left Photo: M & M Cookies
Right Photo: Funfetti Cookies

Some of the swappers were very creative in their packaging:

These are Red Velvet Rich & Creamy Cookies in little cute lunch boxes!

Don't worry, here are the recipes:
In the Santa bag, Reece's Chewy Chocolate Cookies made by lat - she is a seasoned baker! (note: Recipe is on the Reese's web site, too). E-mail me if you want the recipe.

Next up: a Mother and Daughter (Tina and Laura) joint effort and also seasoned bakers making Molten Chocolate Chip Cookies. (oops, the entire recipe is not revealed - please e-mail me for the pdf)

These are Chocolate Espresso Cookies. I heard the espresso is from Starbucks made by my neice, Nannette.

Next: Michele made these delicious Strawberry Cream Cookies - soft and very delicious!!!

Marissa (age 10) made these Chewy Chocolate Chip Cookies and they are yummy, for sure!

This is what I made: Almond Biscotti Dunkers. They are about 3" long and 1/2" wide - this is what I call petite.

Lauren (age 8) made these Peppermint Sugar Cookies. Lauren crushed the peppermint using a hammer - it was a site to see!!!

I got a Cookie in a jar from Teri and made these for Kyoko and Hana for the swap. I was able to find the recipe on line from M&M. Wow - I couldn't believe the crisp exterior and chewy soft center with scattered M&M's.......

These cookies were made by a GUY: Randy.......his first try but a great effort and his cookie tastes great...............he forgot the recipe but that's OK. These thumbprints are a holiday favorite and I do hope he will continue to participate in our annual cookie swap.

Another batch of cookies made by a GUY: Jay made these cookies called Funfetti. Very sweet with the icing and also tastes really good, too! Note the empty plate - someone ate all the cookies when I tried to photograph them but I was did take the photos before the cookies were handed out. Whew!
This was a really fun event with 11 participants this year. Everyone had fun putting their recipes in their decorated box, too.
Thanks for coming by today.............it's not a card or project. It's a follow-up to the holidays!!!! They seemed so long ago already but I haven't finished clearing and cleaning up the house of Christmas yet!!!! I will be done this week and then I can start to play again!!! So stay tuned...............