Wednesday, September 30, 2009

The Mummy is Updated

This is an updated Mummy card. Last year's card was simpler (torn and sponged). This updated one is water sprayed and crumpled giving this Mummy more "character". I was thinking of the Mummy movie when I made this card so the spider is crawling up from the corner. Like those cross hatch marks. Cool, eh?

Close-up of Mummy: see the cross hatches - they were made using a Stampin' rite Pen. The eyes are adhered to the card front using Pop-Up Dot. Get these from your local craft store.
Check Spelling
Top view of card:

When the card is opened, the message will spin and then reveal "BOO" message:

Card inside showing "YEEK" message:

Card right and left side:

To achieve that Mummy look: Spray strips of Whisper White CS with water, crumple, and unfold.

Position torn pieces on card front

Use Close to Cocoa to sponge card front edges and all torn pieces. Note: Sponge inside edges all the way around as well as card inside.
Inside spin mechanism:
  • Cut (1) 5" x 5-1/4" in Close to Cocoa, score 1/2", 2-1/2, 4-1/2"
  • Cut center out: 5/8" away from the top and bottom, 3/4" away from the center fold

Stamp and cut out spiders. Add dimensionals behind and set aside.
Position Linen thread in the middle of the underside of the message. Apply sticky tape as shown to the top and bottom. Apply adhesive to the sides. Then sandwich the two pieces together.
Position inside message, secure with transparent tape. Apply sticky tape to the 1/2" edges as shown.
Remove sticky tape from the right side. Position edge 1/2" away from the middle fold line, adhere. Repeat same procedure for the left side.
Cut (2) Whisper White CS 3-1/2" x 5-1/4" for the right and left card inside. This will provide stability to the card. Sponge edges as well as inside areas with Close to Cocoa.
Lastly, position cut spiders. Use Black Stampin' Write pen as shown and you have completed the project.
Supplies:
  • Stamps: Batty for You
  • CS: Whisper White, Close to Cocoa
  • Ink: Close to Cocoa, Black
  • Accys: SU Exclusive Big Shot Billboard Alphabet Die, Stampin Sponge, Close to Cocoa and Black Stampin' Write Pen, Dimensionals, Sticky Tape, Linen Thread, Pop-Up Glue Dots, Googlie Eyes (non SU)

Thank you for stopping by to visit today................Hugs.................

Tuesday, September 29, 2009

Lovin the Holidays

I was soooooooo lucky to participate in a Manager's Meeting this past weekend. A great group of gals who are way so creative and totally inspiring. There was so much enthusiasm in the air - great atmosphere! I shared my card posted yesterday: Xmas Message for You. The following card was created by the hostess (Patricia). Highlight of this card is the technique used for this card: Stamp the leaf with Versamark, add Clear embossing powder, heat, then using daubers: apply Shimmer Paint. Then cut out and pop with dimensionals. Cool, eh?

Here's a closer look at the leaves with the Shimmer Paint:

Bev created this card using the items from the Hol Mini: highlight of this card is the Big Shot Die Cut Buttons threaded with Silver Elastic cord and popped with dimensionals. Tip: be sure to back the DS with chipboard before putting through the Button die for stability. Love that Christmas Cocoa Specialty Designer Paper. The Eyelet Boarder Punch used adds a nice finished touch. Check out Bev's blog: http://www.stampinalldaywithbev.blogspot.com/ where she has waaaay more great cards!

Denise created this soooo cute little gingerbread person - it was really tempting to take a "bite" out of his.........???? This gingerbread is all made from Punches: Word Window, Tag Punch, 1-1/4" Circle. And of course, the SU Exclusive Big Shot Top Note die is in the background, edges sponged with Real Red. Notice the Sassy Sparkles Jumbo Roller used on the Real Red CS, too? How about a Gingerbread Family? It's coming soon to your blog!

Linda shared this one - Highlight of this card is the SU Exclusive Mover & Shapers Curly Label Die and water coloring the tree popped with a dimensional That red ribbon: it's the reverse side of the 3/4" Polka Dot ribbon...........cool, eh? Eyelet Boarder Punch at the bottom finishes off this card.

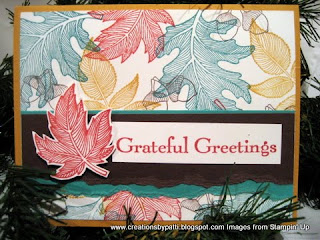
Brenda created this perfect Fall card using the Autumn Splendor Stamp Set from the Hol Mini. Lovin all the colors and the flexibility of this stamp set. The leaf is popped with a dimensional.

Monica created this AMAZING card! It is using the SU Exclusive Final Press Embossing Folder which provides the textured backdrop for this Christmas collage. We voted this the BEST card!!!! That red ribbon: yes, it is the reverse side of the Polka Dot ribbon. The pointsetta/leaves: it is the 5 Petal Flower Punch. The ornament is from the Hol Mini (Delightful Decorations) and the Ornament Punch is used for the perfect punching.

Here's a closer view of this AMAZING card:

Karen created this amazing card: Love the soft colors for this card - see the glitter on each one? 2 way glue pen was used to apply the glitter. That White CS - it's the special Shimmery White CS. The special Holiday Mini Mistletoe Ribbon Originals adds a finishing touch.

Sigh..........a closer look still doesn't show the glitter on the ornaments.

This was such a fun event to attend. I am looking forward to the next one.

Thank you for stopping by today................Hugs!!

Monday, September 28, 2009

Xmas Message for You

9/29: Updated this posting with photo & measurements for inside card - see below
Here's a Christmas message card that has a surprise inside. The outside is using the fabulous new Stamp set from the Holiday Mini and the Ornament punch. Pair it with the Big Shot Decorative strip die and it looks great!

Card front close-up:

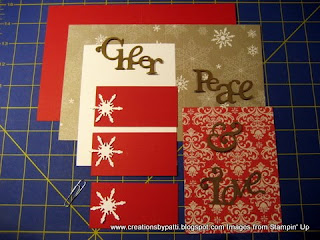
Card Inside with "Peace & Love" message along with die cut snowflakes (also in the Holiday Mini Catalog).

Top view of card:

Some of the parts to make this card: (corrected measurements below 9/29 in red)
  • (1) 5-1/2" x 8-1/2" Real Red CS, Score 4-1/4"
  • (1) 5-1/4" x 8-1/2" Christmas Cocoa DS paper, score 3-1/2", 4-1/4", 5" (inside- see photo below)

  • (1) 5-1/4" x 4" Whisper White CS (outside)
  • (1) 5" x 3-3/4" Christmas Cocoa DS Paper (outside)
  • (3) 1-3/4" x 3-3/8" Real Red CS (inside tabs)

Left Photo: Here's a cool trick: Use the cut 4" x 5-1/4" Whisper White CS to stamp and punch the ornament in Brown Suede. Tip: be sure to stamp and punch a min of 1/4" away from the card edge. Use this punched Whisper White piece under the cut 3-3/4" x 5" Flocked CS. It will be hidden!
Right Photo: Position paper clip, then apply dimensional as shown. Apply dimensional to each side of the ornament. Tie a single knot ribbon through paper clip.

Left Photo: punched ornament will go on top of Flocked CS
Right Photo: apply die cut "Cheer" with 2 way Glue Pen

Left Photo: Position inside die cut words and stars, apply to tabs using 2 way Glue Pen
Right Photo: Apply adhesive to DS right side and adhere to right inside 1/4" away from card edge

Left Photo: Apply adhesive to DS left side and adhere to the left side 1/4" away from card edge
Right Photo: finished left inside
Last step: Adhere tabs as shown in the 3rd photo above.
Supplies:
  • Stamps: Delightful Decorations
  • CS: Real Red, Whisper White, Brown Suede, Christmas Cocoa Specialty Designer Series Paper
  • Ink: Brown Suede
  • Accys: SU Exclusive Big Shot Join in the Cheer Decorative Strip Die, SU Exclusive Merry Details Sizzlits Die, Ornament Punch, White Tafetta Ribbon, Dimensionals, 2 way Glue Pen, Paper Clip (non SU)

Thank you for stopping by today..............hugs!

Friday, September 25, 2009

Itty Bitty Scary Spiders

So here's another great surprise card (THANK YOU Jan Tink!). There is a video tutorial for this type of card on Jan's blog: http://www.stampspaperscissors.typepad.com/ - go see it and be creative! This one is really SCARY!
Added Measurements used for this card:
Outside Card: cut (1) 5-1/2" x 8-1/4", score @ 2-1/8" each side for gate fold
Inside DS size: cut (1) 5-1/2" x 2-3/4:
Inside Black Appendages: cut (2) 4-5/8" x 2-1/2", on 4-5/8 side only, score 1/2"

Card partially opened, see the eyes moving over to the left?

Card fully opened, revealing the inside message:
Note: inside DS punch size used is 1-1/4 " Circle Punch so it doesn't show when the card is closed.

Close-up of those spiders:


Because I tweaked the original measurements for this card, a mock-up was made as shown to be sure it all worked.


Here are the "parts" to make this card:


Here's how the legs were made: Punch small Oval, then Punch Large Oval. Cut in half lengthwise, and cut in half width wise again.


Using a scrap white piece of paper, apply 2 way glue for the legs. Note: best to close the front so legs can be symmetrical.

Punch out excess legs:

Position the Black CS as shown (see Jan's video):

The right & left side should now look like this:

Position the Cast-a-Spell Designer Paper inside. The right and left side Black CS can be slipped underneath the Cast-a-Spell Designer Paper. Then you are done!
Supplies:
  • Stamps: Itty Bitty Background, Eat Drink and be Scary
  • CS: Cast-a-Spell Designer Paper, Black, Only Orange, Whisper White
  • Ink: Black, Craft White
  • Accys: SU Big Shot Exclusive Billboard Alphabet Die, 1-1/4" Circle Punch, 1" Circle Punch, 1/4" Circle Punch, Oval Punch, Large Oval Punch, Sticky Tape, Black Stampin' Write Pen

Thank you for visiting today.........HAVE A GREAT WEEKEND!....hugs!