Sunday, March 20, 2011

New Asian Stamp Stash

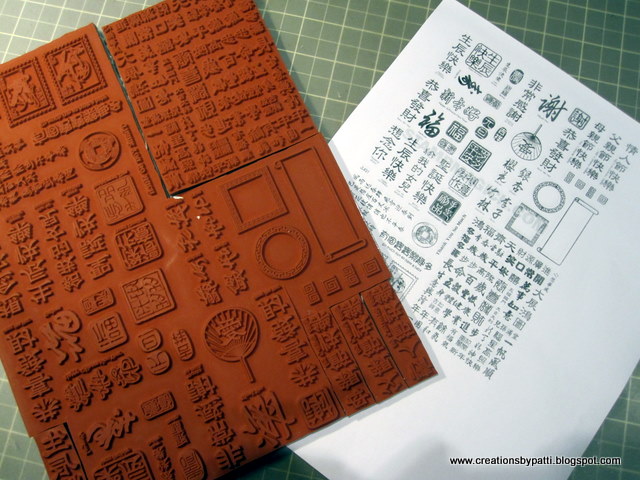
My newest purchase: a stamp set from Joanne at http://www.stampmagick.com/. They have the best unmounted 8-1/2" x 11" Asian rubber stamp sheets with some really nice greetings in both Chinese and English. Many of their sets are Asian inspired and unique. They are unmounted so all you have to do is buy a whole sheet of cling to prep the stamps. I printed out the sheet from their on line store so I can use it to identify the stamps.

Here's the whole sheet of stamps purchased. There are 47 stamps in this one rubber sheet which comes to about .50 cents a piece with the cling.


After attaching the entire cling sheet to the rubber, I used a pair of kitchen shears to cut the rubber. Those Kai scissors also work but kitchen shears happen to have a longer blade. I also did not get any gunky adhesive on the kitchen shears because the whole sheet was attached to cling.....yay!!!

So here are all the stamps cut and now stored in an Stampin-Up medium box with the stamp identifier under the cover.
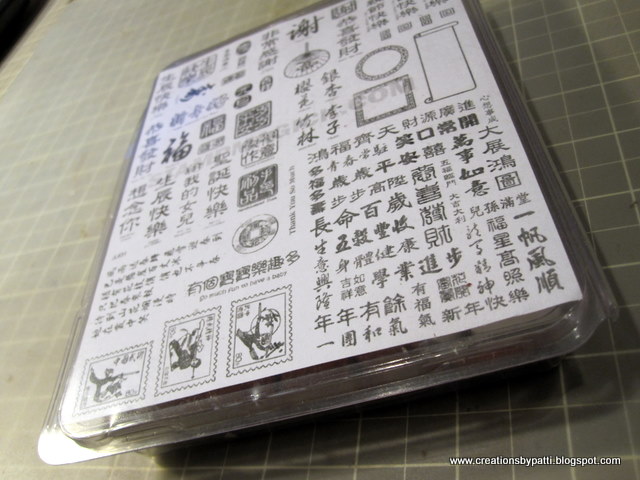
Now I will need to carve out some time to use these.........oooh...can't wait!!!

Friday, March 18, 2011

Another Asian RAK Received

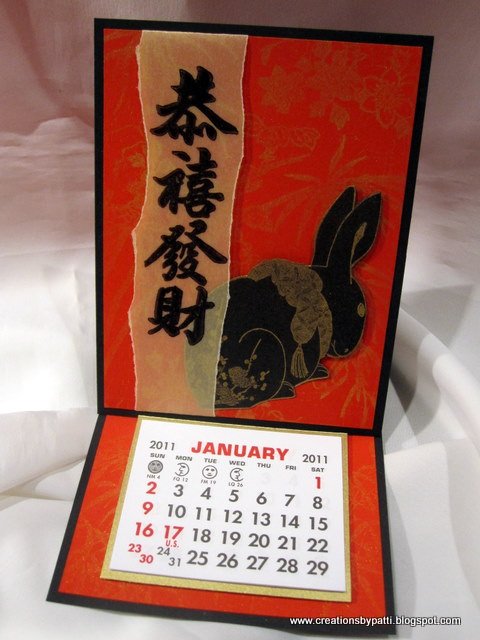
This is the 2nd card Gene L. gave me when she was visiting SF from Las Vegas. The Asian words stamped on cardstock gold vellum translated to say: Happy New Year or Wishing You Wealth in the New Year............it is the Chinese Year of the Rabbit. Both the background and the rabbit are stamped in gold.

Open this easel card to reveal a calendar.

Side view:

Isn't this card beautiful? I just love her creative work using my favorite colors.

Wednesday, March 16, 2011

Asian RAK Received

I am the most fortunate person to receive this beautiful card from my friend Gene L. who was visiting from Las Vegas. I can't tell you how beautiful this card this. Look at all the detail involved! The finished size is 4-1/4" x 5-1/2. This card is made in my absolute favorite colors and of course in my favorite theme: Asian. Like the falling petals? Those are hand trimmed...........and scattered on the front card cover.

Open up the front screens to reveal.................a calendar:

Here's a closer view of the details: double layer cut flowers with die cut branch. Those specs of gold: OMG - she really punched them out using a 1/16" hand held punch and individually glued them on...........now that is a real Crafter!!!!

Here's an overview of the card:

A close-up of the inside round screen:
Don't you just love this card........stay tuned tom for the 2nd card Gene gave me.................

Monday, March 14, 2011

Safari Boy Brag Album

This cute mini brag album was a Make & Take project from the Best and Company Booth at CHA. They make such fabulous paper that all coordinate. I got this "kit" since I missed the Make & Take from the previous day but forgot to pick up the punch out lion. But by using the Create a Critter Cricut Cart in the same colors for this album, the front image matched pretty good with the paper. How perfect is that! Finished project size is about 5" x 7", enough room for 4+ photos.

Open the front cover to reveal: a photo mat on the inside and a criss cross pocket with a removable photo mat.


Inside Page 2 back and back cover inside. Another mat for the photo and a removeable photo mat.


Back Cover is plain - snazzy and glam with those blue glittery dots.
This is the perfect quick gift to make and also is easy to slip into an envelope.
Resources:
Best & Co.: all papers
Provo Craft: Create a Critter Cricut cartridge
are you lovin this, too?

Friday, March 11, 2011

Remember Journal

Here's a Make & Take from the Clearsnap Booth at CHA. Project is a Kraft snap front journal from Sierra Pacific - finished size is 5" x 5-3/4" x 1/2". I got a Hampton Art Cling Stamp set for this project to keep. Sizzix Fall Set Impression folder was used for the leaf embossing. Watermark ink was used to stamp the background. The die cut heart is Smooch Spritz with Cosmic Pink and the embossed leaf is River Moss Spritz. Those birds are colored with Sundance Smooch after being stamped with Brown ink.

Here's the inside cover I decorated. The original sample was not decorated:

See the inside journal? The pen is also covered in Kraft paper. It is easy to mold the stamp around the curves of them pen to match the background of the journal.

Here's the back of the journal:
Resources:
Journal: Sierra pacific Kraft Notebook
Hampton Art: Stamps
Sizzix Die: decorative Label #3, Heart Set #2, Impressions Embossing Folder Fall Set
Colorbox: Chalk Dark Brown ink,
Top Boss: Watermark Ink
Smooch: Sundance, River Moss, Cosmic Pink

This is a great and quick project and makes a great gift..................