Friday, May 21, 2010

Tropical Party Tote

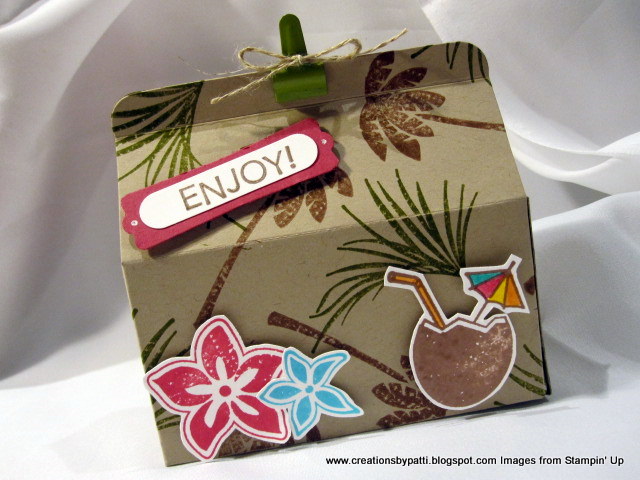
This little tote turned out better than I expected - cute! I CASed this box from Split Coast stamper "bgalec" posted 5/16/2010 and made some slight changes. These were made for a 3-D swap (Wacky Stampers!!!) Are you one of the lucky recipients? If not, you can certainly easily make one of these. They will be sent in the mail today except they will have linen thread to close the top instead of the clip - the clip is too bulky to put in an envelope (so sorry!). Finished project size is 3-3/4" x 1-1/4" x 3-3/4"

Side View of Tote:

Back of tote:

Final touch: add clip with a tied linen bow:

Use the Sizzix Big Shot Box #2 die. Cut an additional lid only, be sure to include a min of 3/8" allowance along the lid to enable attaching to the box top.

Stamp as shown randomly on Box and additional lid. Add sticky tape to box extension and second lid.

Stamp and cut out large flowers, small flowers, and coconut drink. Pop all with dimensionals:
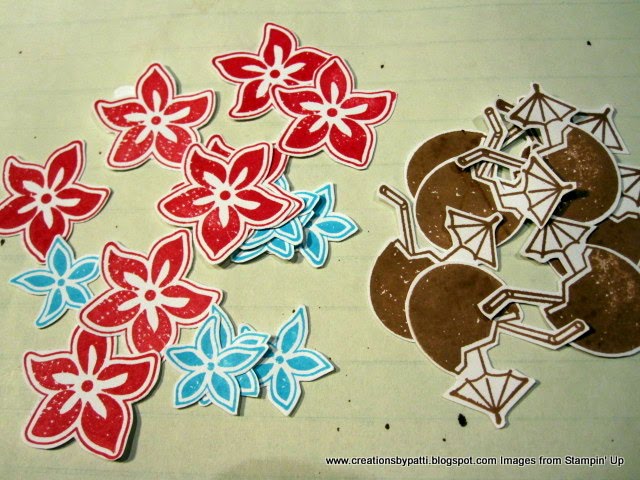
Use Stampin' Write pens to color the straw and umbrella:

Using the Stampin' Write Close to Cocoa pen, ink the words "enjoy" and stamp on to the Whisper White. Then punch out using the word window punch. Back with Rose Red CS Modern Label Punch. Add dimensionals. Draw white dots on each end of the Modern Label. Attach to tote.

Supplies:
  • Stamps: Tropical Party, On Your Birthday
  • CS: Kraft, Rose Red, Whisper White
  • Ink: Old Olive, Close to Cocoa, Rose Red, Tempting Turquoise
  • Accys: SU Big Shot Box #2 Die, Word Window Punch, Modern Label Punch, White Gel Pen, Linen Thread, 1/2" Library Clip, Stampin' Write Pens: Rose Red, Summer Sun, Close to Cocoa, Old Olive, Pumpkin, Tempting Turquoise, Sticky Tape, Dimensionals.

Thank you for stopping by today.........fill your projects with treats!!!! Have a great weekend!!!

Thursday, May 20, 2010

More File Folder Gifts

Made more of the file folders because I stumbled upon some oh so fabulous file folders - aren't they so the best, feminine and classy? added note: For instructions on how to make these, refer to my previous blog postings on 2/15 and 3/29. I believe there is also a tutorial on Split Coast Stampers as well, too.

Made a stack of these wonderful folders:

Add bling to the Monogram:


Back: oooooohhhhh so cool!

Open the file folder to reveal:

Closer look at the accompanied CO-ORDINATING sticky notes matching the file foldeR and the flower paper clips:

Bling at the top of the note pad: love that message:

Inside:
Hope you enjoyed this posting......keep a look out for fabulous file folders at your local discount stores. You can imagine in these type of projects to give!!!!

Wednesday, May 19, 2010

Metal Front Accordian Album

Whoo - hoo: I completed another kit that was purchased many moons ago..........feels great to finish it! This is a new type of technique for me: using metal as the base, embossing it, and then sanding it. Results are very unique. Everything came in the kit except for my added silk flowers and adhesive red rhinestones. Finished project size is 6" x 6". This album is in my absolute favorite colors so naturally I wanted to play with it.

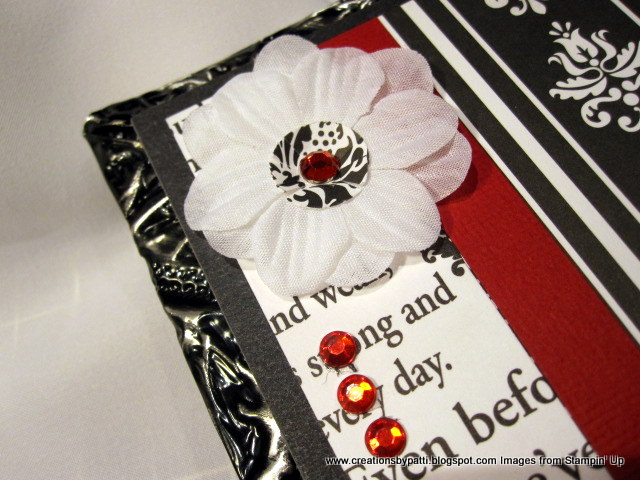
Here's a closer view of the my added large and medium silk flower with adhesive red rhinestones and punched DSP from the kit.

Inside Page 1: I added silk flowers with adhesive red rhinestones and punched DSP from the kit:

Page 1-2:

Page 3-4:

Page 3-4: removable tags

Back view:

Top view of album:


Overall length of album stretched out: 22-1/2" long!!!

Back view:
Thank you for stopping by today........may this inspire you to dig through your stash to finish those projects, too............Hugs......!!!!

Tuesday, May 18, 2010

Coconut Pop-Up Cup Card

Here's a fun card to make. Inspiration for this card came from Jan Tink's Cylinder Card - she has a video tutorial for this as a cup (9/15/09)...click on her name on my side bar to get to her blog. Finished card size is 5-1/2" x 4-1/4"

And here is the inside: The coconut "pops" up:

Here's what is needed to make this card:
Card Front:
(1) 5-1/2" x 8-1/2" Temping Turquoise CS, score @ 4-1/4 on the 8-1/2" side
(1) 5" x 3-3/4" Rose Red CS
(1) 4-3/4" x 3-1/2" Whisper White CS
(1) 1-3/4" Whisper White CS punched: stamp Coconut
(1) scrap Whisper White CS for "Happy Birthday" word window punches message (not in photo)
(1) cut 6" long 1/2" Polka Dot Melon mambo grosgrain ribbon (use reverse solid side)
Card Inside:
(1) 5-1/4" x 8-1/4" Whisper White CS, score 4-1/16 on the 8-1/4" side
(1) 2-3/4" x 2" Tempting Turquoise CS
(1) 2-1/2" x 1-3/4" Rose Red CS
(1) 2-1/4" x 1-1/2" Whisper White CS
(1) T-bar Template in Whisper White
(1) Coconut Template in Close to Cocoa
(1) Drink Umbrella
(1) Straw

Template for inside T-Bar: note: this template has been adjusted for the coconut shape.

Coconut template: to achieve the coconut texture, apply Close to Cocoa ink on the texture plate, then put through Big Shot


Stamp images on the Whisper White CS for the front and card inside using the colors Old Olive, Rose Red, Tempting Turquoise, and Pumpkin (oops, that color got left out in the photo):

Adhere to the Rose Red CS, pop with dimensionals.

Secure the ribbon to the Rose Red CS as shown. Stamp and prepare the image "Happy Birthday"

Stamp coconut with Close to Cocoa ink. Color with Markers, pop with dimensionals, then adhere to card front. Adhere on top of the Melon Mambo ribbon..card front is complete.

"Happy Birthday" is stamped with Old Olive ink, punch with Word Window punch:

Card Inside: to avoid that "buckling" look inside the card, adhere one side of the Whisper White, then fold over card to adhere the other half.

Prepare message: use Rose Red, Pumpkin, Tempting Turquoise Pens on image, stamp and secure to other pieces. Set aside.

Once the t-template is cut out, apply sticky tape (see the pink arrows) as shown. Note: do not apply sticky tape to the edge of the mid section, stop short of the edge because the coconut cup will not cover this area.

Fold the long extended section as shown. Remove mid section sticky tape, position the coconut cup to the bottom the the T-template.

Remove sticky tape from the folded back tabs (left side of the template) and position 1/2" from the card edge (see ruler). Then secure on the inside bottom right section of the card (see pink arrows).

Next: Pull the left extended tab (see pink arrow) to as much as you desire for the coconut to achieve it's rounded shape. Remove sticky tape from the underside of the extension and secure. Adhere the stamped message on top of the extension.


Trim down straw and apply sticky tape. Open drink umbrella and smash in half, apply sticky tape. Place both inside the cup. Your project is finished!


Optional step: stamp flowers, cut out and apply to the coconut. Your done with the project!
Supplies:
  • Stamps: Tropical Party, On Your Birthday
  • CS: Whisper White, Rose Red, Tempting Turquoise, Close to Cocoa, Pumpkin
  • Ink: Old Olive, Rose Red, Pumpkin, Close to Cocoa
  • Accys: Big Shot Texture Plate #4, Word Window Punch, 1-3/4" Circle Punch, 1/2" Polka Dot Melon Mambo, Stampin" Write Pens: Pumpkin, Tempting Turquoise, Summer Sun, Rose Red, Dimensionals, Sticky Tape.

Thank you for stopping by today..................Hugs!!!

Monday, May 17, 2010

Asian Purse Mini Album

Here is the latest fabulous project from Laura @ www.followingthepapertrail.blogspot.com. It's a Purse mini album. Finished purse size excluding handles is 5" x 6" x 2". See Laura's U Stream from May 14 to see her tutorial on creating this project. The paper used for this project are from my Asian paper stash.

Back of purse:

Side view of purse:
The type of closure chosen is using 5/8" wide Black grosgrain tucked underneath the front DSP. There is a magnetic closure concealed in the grosgrain and the other side of the magnet is concealed in between the 2 layers paper. The fan embellishment is perfect on top of the grosgrain as the final touch. I "shored up" the sides by using Stampin' Up's Modern Label punch - love the shape for this project.

Purse open to reveal: note book, compact, keys, wallet, glasses, lipstick and cell phone:
Both inside top edge of the purse is clean finished. Eyelets and closure are attached before adhering the inside DSP.
Inside looks like this with all contents removed:

Wallet tucked inside front of the purse:

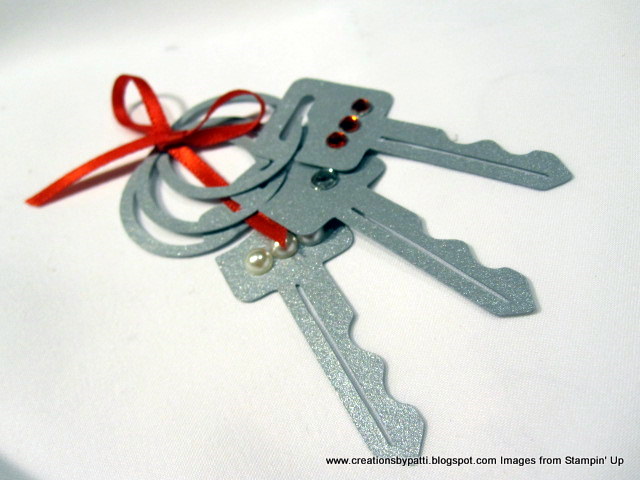
(3) Silver keys: finished size 3" x 1-1/2". Adhesive rhinestone adhered to each key for identification (of course).

Compact tucked inside the back purse flap. Opened compact with mirror and blush combos. Finished closed compact size 4" x 3".

Wallet outside with Bamboo embossed image and metal dragon closure. Inside wallet holds (4) gift cards or Driver License, or note cards. Finished wallet size 4" x 4".
Small note book with a sticker front image and inside notebook. Paper made from cut index cards with a pen on the side, too. Finished size is 4" x 2-3/4"

Cell phone and cell phone opened. Finished size is 2-1/2" x 4" (closed) Those buttons: dew drops!!! Great idea from Laura!!!

Lipstick case with a sticker (from my ancient stash) and Lipstick (red color,of course) revealed! Finished lipstick size: 2-3/4" x 4-1/2 in case.

The glass case and the glasses. Finished case size 4-1/2" x 2-1/4"
Thanks so much for stopping by today to enjoy what I made over the weekend..........great fun project!!! Many more of these purses to come!!!