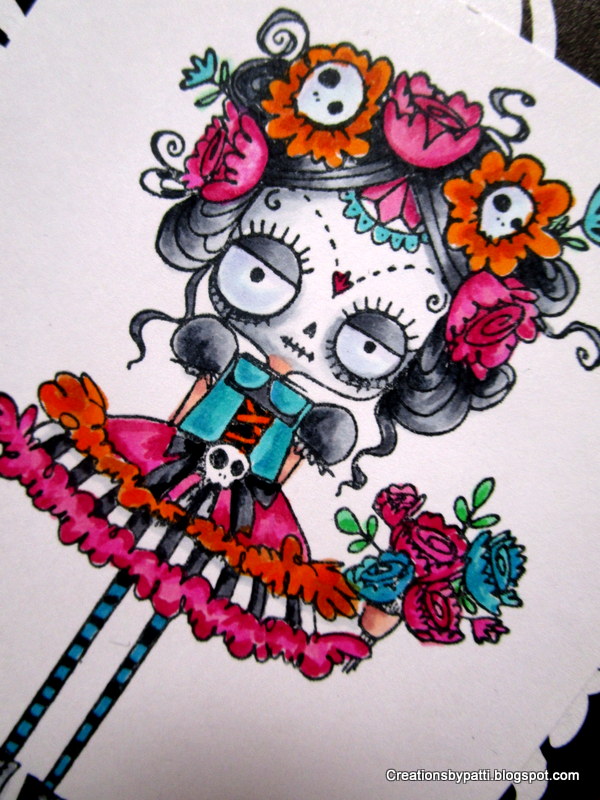
Showing posts with label Stampingbella. Show all posts

Thursday, October 3, 2019

Uptown Couple Wedding Card

Made this special wedding card recently.  Co-ordination Textured White card stock used for the card base. All Grey card stock mat from Recollections. Craft Smith Love Story 12x12 paper pack for the Mr. and Mrs. mat.  Grey decorative paper from my Stash. Add a few adhesive pearls to embellish card.  Finished card size: 6x6.
Front dies used:  
La-la Land Crafts Heart Border, Numbers,  Pierced Scallop Circles, Love  found here.
Spellbinders Circles Large and Small
 View of card: Both Pierced Scallop Silver Foil circles are popped with foam tape.
 Another view:
 Congratulations is popped with foam tape:
Stamp: Uptown Couple Brett and Brenda get Married by Stampingbella
Copic used:
Skin: E00, E01, E11, E13, R21
Groom hair: W4, W6, W8
Groom suit: W4, W6, W8
Bride hair: E29, E31, E35, E47
Bride dress, Shoes:  W0, W02, Clear Wink of Stella (on entire dress)
Flower Bouquet: G85, Clear Wink of Stella
La-la Land Crafts Heart Border die that has been die cut 3 layers grey card stock, 1 layer Silver foil card stock.  Love and 2019 also cut and assembled in the same manner.

 Center panel: La-la Land Crafts Love die (without the heart)
 Far right panel: La-la Land Crafts number die.
Wedding Ring die from Ali Express cut using Silver Metallic  and oil Silver card stock from my stash. Die cut 3 layers of card stock, then adhere Silver Foil and metallic piece.

Here is the card completely flat:
 Computer printed message in the back using Ariel Font style. Red Heart is inserted. 
 Thank you for stopping by today to visit. Have a crafty Day.

Tuesday, January 1, 2019

Wedding Card for 2019

First card of 2019: a wedding on New Year's Eve. Whoo-hoo!  Co-ordination Diamond Textured Shimmer card stock used for the card base. All Grey card stock mat from Recollections. Craft Smith Love Story 12x12 paper pack for the Mr. and Mrs. mat.  "forever" metal message from Making Memories (retired). Add a few adhesive pearls to embellish this card.  Finished card size is 6x6.
Stamped "Congratulations" is popped with foam squares:
The satin and organdy bow:
Stamps: Uptown Couple Brett and Brenda get Married by Stampingbella
Copics used:
Groom hair: W2, W4, W6, W8
Groom suit: W4, W6, W8
Bride hair: E29, E31, E35, E47
Bride dress, Shoes:  W0, W02, Clear Wink of Stella
Heart: R29
Flower Bouquet: G85, Clear Wink of Stella
The shimmer on her dress is barely seen in this photo:
Card inside: 
Gift card holder die from My Creative Time
Wedding Ring die from Ali Express cut using silver metallic and silver card stock from my stash.
 Thank you for stopping by today to visit. Have a crafty day and a very Happy New Year!

Sunday, December 30, 2018

Chatty Squidgy Thank You Card

Thank you card for a friend.  Papers used are from my stash. The shimmer pink card stock can be found at your local craft store.  White card stock mats used for outside and inside card. Layout for this card is simple and quick to assemble. Card finished size 4-1/4" x 5-1/2"
Card front is popped with foam tape.  Chatty Squidgy is die cut (purchased separately from stamp from Stamping Bella.) and popped with foam tape. Die-namics (from My Favorite Things) Talking Bubble die. Thanks die source unknown. Papertrey Ink Scallop Card die. 
Copic colors used:
Hair, Telephone: W2, W4, W6, W8
Face: E000, E01, E02, E11
Dress, Shoe, and Hair Bow: RV10, R81, R83, R85, W8
 Die cut "Thanks" in talking bubble die.
 Card inside:
 Thank you for visiting today - have a very crafty day!

Friday, December 28, 2018

Oddball Day of the Dead Card

Made this cute Day of the Dead card for a friend.  Card base is black color.  Pink Metallic card stock mat and decorative black and white paper (from my stash) mat used.  This is a A2 size card.  Oddball Day of the Dead stamp is from Stampingbella. Copic colors were used on this image..........sigh...........unfortunately, I forgot to write down the color numbers........boo-hoo! But, you get the idea.

In the bottom left corner are colorful paper flowers with adhesive pearls for the centers:
Card inside: The stamped message (which is included in the stamp set):
Thank you for stopping by today to visit. Have a crafty day.

Monday, December 17, 2018

Snapshot Gift Cards and Tag

Here are two gift cards and tag made in addition to the Slider Card previously posted. Papers used are from my stash. Gift cards die cut, then wrapped with red/white twine. La-la Land Crafts Stitched Tag, Mama Elephant Envelope die used.Finished gift card size is 3-1/2" x 2-1/4". The tag finished size: 3" x 4-5/8".
Copic color details:
Snapshots Mini - I have a Secret
Frame: C1
Background: B000
Hair: C2, C4, C6, C8
Face: E000, E01, E02, E11 
Purple Top: BV1, BV11, V17
Red Top: R14, R24, R29
Color and cut
1/8" around all edges, then cut mat 1/8" around as well
Snapshots Mini - Lean on Me
Frame: C1
Background: B000
Hair: C2, C4, C6, C8
Face: E000, E01, E02, E11 
Pink Top: RV10, RV55, RV63
Yellow Top: Y32, Y35, Y39
Color and cut 1/8" around all edges, then cut mat 1/8" around as well.
 Birthday Cake
Hair: C2, C4, c6
Face: 000, E01, E02
Present: V09
Dress: BG10, BG45, BG53
Cherry: R29
Cake: E31, E35, E39
Cake Plate: C3
Candle: Y18
Present Bow, Icing, Dress Ruffle: Clear Wink of Stella
 Close up of the coloring and the Stardust Stickles on the icing:
 Thank you for stopping by today to visit. Have a crafty day.

Sunday, December 16, 2018

Snapshot Birthday Slider Card

Made this slider card using Stamping Bella Snapshot series stamps. In order to make this card, all images needed to be stamped and colored using Copic pens.  Papers used are from my stash. Front Snapshots are cut to 2-3/4" x 2-3/4" with a red mat. Decorative paper used on the front is 6-1/4" x 3-3/4", and is popped with foam tape. The words "celebrate" and "make a wish are die cut using Black Glitter card stock. Finished card size 6-1//2: x 4" (excluding tabs at the ends). 
Copic coloring details for the front are:

Snapshots - I Heart You (left image)
Frame: C1
Background: B000
Hair: C2, C4, C6, C8
Face: E000, E01, E02, E11
Red Top: R14, R24, R29
Turquoise Top: BG10, BG45, BG53
 Snapshots - Acting Goofy (right image)
Frame: C1
Background B000 
Hair, Moustache C2, C4, C6, C8e: C2, C4, C6, C8
Red Top, Glasses: R14, R24, R29
Green Top: G24, G94, G99
Prop Sticks: E57

 Slowly pull the tabs:
 Slider pulled out:
 Left side stamped message:
 Right panel stamped message:
 Dies used:  La-la Land Crafts  Make a Wish die, Celebrate die from Aliexpress.  
Tab pulls are punched using a retired Stampin-Up punch.

Mats for the sliders are cut:
Card stock base: 4-3/4" x 3", Decorative Paper cut 3-1/2" x 2-7/8", stamped message cut 3-1/4" x 2-1/2'. To make the "slider" mechanism: cut a inside piece of card stock 6-1/2" x 3-1/2" . Hand cut or punch a panel to wrap a plastic strip to allow the card pieces to slide.  Attach one mat on the front slider panel and the second amt to the back panels matching the ends to the opening, then securing the opposite end to the slider. Make sure the slider panel is also secured to the card so it does not come out.  There are no doubt You Tube videos how to make this type of card.

Thank you for stopping by today to visit. Have a crafty day!


Monday, October 15, 2018

Opal Optimist Anniversary Celebration

This card is 6" x6". All papers used are from my stash.  A red paper doily is centered in the back of the card front. The "1" is adhesive silver  on lightweight chipboard and is popped with foam. Die is from Papertrey InkAdd a 5/8" wide White Organdy band and double looped ribbon.  Stamping Bella Uptown Girl Opal the Optimist rubber stamp image, is popped.
Copic colors used:
Hair: E31, E33, E34, E37
Skin: E000, E01, E01, E11
Bottle: G12, G24, G82, G85. E31, E33, E34, E37
Dress and Shoes: G03, R24, R32, R46, T04, T06, T08
Add Clear Wink of Stella to the wine in her glass and the dots in her dress.
 Paper roses with wound wire stems at the bottom right corner:
 Celebrate die using adhesive silver on light weight chipboard across top of card:
Card inside: computer generated message. Creative Time Stitched Gift Card Pocket die.
Thank you for stopping by today to visit.  Have a crafty day.

Monday, June 25, 2018

Loaded Tea Envelope Swap

Another loaded envelope swap: Tea Theme. I chose a Kraft, Black, and Red color theme with decorative papers from my stash.  Another loaded envelope was previously posted here. Tutorial to make this style of expanded envelope is by Michelle Rudolph - her You Tube Channel link found here.  Lots of details and fun stuff for each recipient. Here's a photo of them individually bagged for the recipient.
 Each loaded envelope is as shown:
 The "TEA" is Ariel font cut using a Silhouette Cutting Machine. Tea cup border is a SVG cut file also cut using the Silhouette.
 The bookmarks tucked in the first panel have metal tea pot and tea message attached with lobster claws around the tie.
Each section has a decorated paper clip with the Asian Character: Tea cut using my Silhouette. Finished size is 2-1/2" x 1-1/8".
Front panel tags:
Two 2" x 5-3/4" Tags: papers used from my stash
Stampin-Up Tag Punch  used for the tag top with We R Memory Keeper 1/4" Chomper used at the bottom corners. Tea pot charm and "A cup of Tea solves Everything" round charm from Ali Express. La-la Land Crafts Small Tea Set Die attached to tag bottom.
Right side tag: 3-5/8" x 4"
Recollections Kraft, Black, Red, White card stock
Papertrey Ink Tag die used with Spellbinders S4-383 Marvelous Squares Die
La-la Land Crafts Small Tea Set Dies used on each corner shown.
Having Tea card is 5-1/2" x 4-1/4". Red mat is 4-3/4" x 3-1/2" tucked in the 2nd panel. Stamped scalloped white mat is 4-1/4" x 3".
Stamping Bella Uptown Girls Paige and Peggy Pour Some Tea Copic colors:
Hair: W2, W4, W6, W8
Face: E000, E01, E02, E11, R11, R20, R21
Red Dress, Bird: R14, R35, R39, R46
Yellow Dress: Y23, Y28, Y32, Y36
Table, Tea Cups, Tea Pot: B21, B23, B41, BG70, W2 (for Shadow under Plates)
Grass: G07, G46, G99
Grass Ground: G12, G24
Bear: E34, E35, E39
Doily: Y23
Slice of Cake, Cupcake Liner: E34, E35 
Wire Chairs: W4 
Papertrey Ink Scalloped A2 Vertical Die with Cuttlebug Swiss Dots Embossing Folder mat.
Second panel contents:
Cloth Tea Bags: packaged in a cello bag with 4-3/8" x 3-3/8" decorative paper mat with a red tea cup die. 3 plastic tea vials containing: Apple Black Tea, Champagne White Tea, and Blueberry  Black Tea.  Each vial makes 2 cups of tea. There are 3 Tea cup blank note cards with envelopes decorated using a Scalloped circle, embossed, packed with a spoon.  The "YUM" package contains a chocolate cookie to be eaten with tea. 
Back panel:
A Tea Wand, a bag with a surprise, a personal size shortbread to "enjoy" as appropriately packaged.  For the creative ones: a bag containing A2 size cards using Couture Creations Tea Party embossing folder.  One each color of Recollections Vanilla, Black, and Red card stock inside the cello bag. A Embellishment bag: contains Marianne Designs die cut  baked goods - recipient can add as many of as little of the baked items on the brushed silver card stock tiered stand,  (Tiered stand and spoon die is from Ali Express). The Tea Bag tag is a SVG cut file.
Tea Wand:
Finished width is 5" diameter: using 3 strips of 1-3/4" card stock, then scored 1/2" apart. 
Front of pinwheel has a white paper doilie, 3-3/8" Lawn Fawn Scallop die cut and Cuttlebug Textile embossing Folder. Tea character is cut using my Silhouette.
Tea Wand Back 2-1/2" circle EK Success punch. Red card stock tea pot from La-la Land Crafts Afternoon Tea Die set. Wooden skewers attached to pinwheel using a hot glue gun in between the folds.
 Inside the stamped white bag is a Hydrating Aloe and Green TEA mask:
 All contents removed reveals:
This was a fun project to make - hope it will also inspire you to make one yourself.  Have a crafty day.