Friday, December 11, 2015

Disney Memories Mini Album

I made a couple of these albums for friends who were making Disneyland as a destination for their family vacation. The instructions for this album can be purchased from Cristi Maron in her Etsy shop found here.  Her blog site is called Paper Hoarder Disorder found here. Her assembly video on You Tube is easy to follow and very informative with lots of tips and tricks of assembly. There are lots of photos of this 6 page album - lots of pages that flip up, flip out, open here, open there, pull out here, pull out there. For this 7" x 7" x 2-3/4" album, I followed Cristi's Simple Stories Say Cheese paper direction and sequence to get a feel of this album. Thank you Cristi for this great album inspiration.  This is the front album cover:
 Here's the spine and back cover:
On the spine, a special Disney Diamond celebration metal embellishment adhered using Ranger's Glossy Accents.
Punch out a Mouse head using the EK Success punch on Black glitter paper: I also used a black pen around the edges of the Mouse head.
The view master is a image that was cut using my Silhouette. The heart brad is from Stampin-Up (retired embellishment). This view master actually turns and photos can be slipped in between the layers.  In order to ensure the view master was stable, several layers of black card stock was cut, then glued together. The film strip is also a Silhouette file.
Inside front cover: I added a glitter die cut Princess Castle (die is from Frantic Stamper found here).  For the pocket decorative edge, I welded together a couple mouse heads (made using circles) using my Silhouette.
Page 1: pocket with film strip made using my Silhouette and a EK Success punched glitter Mouse Head.
Pull out tags with glitter Mouse Head punched in each of the 6 pages:
Page 2: a flip up page here
Revealing the Polaroid cut out and some tags:
Page 3: the first of three tag pockets:
In the tag pocket, a pull out tag
Fold aside the tag to reveal the pocket page with some additional photo mat booklets:
Page 4: a larger glitter Mouse Head cut using the Silhouette with a few layers of black card stock for stabilization.
Page 5: a gate fold page with a mouse head decorative edge and glitter mouse head cut using the Silhouette and has a magnetic closure.
Here's Page 5 gate fold opened:
Page 6: flip out page with a punched glitter  Mouse head:
Flip open Page 6 to reveal a pocket page and booklets:
Page 7: the second tag pocket: fold over the tag pocket is a plain page.
Page 8: is a pocket page with booklets
Page 9: the second gate fold with a magnetic closure:
Open the gate fold to reveal a pocket with a booklet:
Page 10: my favorite is the Tripe Flip page with a magnetic closure
Flipping up the pages:
Page 11: third pocket tag with a plain page underneath
Page 12: Last and final page with a large Mouse head to hold a couple booklets.
Back inside cover: same details as the front inside cover.
Overhead view of album:
Thank you for visiting today................have yourself a crafty day!!!!

Wednesday, December 9, 2015

Graphic 45 ATC Size Mini Book

This little album was made for a friend's birthday. The companion card was posted yesterday.  I love this little mini album - finished size is 3" x 4" and will hold (36) 2" x 3" photos. Can you even believe that?  Inspiration for this project from Alexandra - her blog is Clay Guana found here. This project on her blog is called the ATC Size Mini Album posted on August 23, 2015 - instructions can be found here. Graphic 45 Couture Paper used.
Chain Tassels are from Rangers Tim Holtz Ideaology and Brads from Tim Holtz   Ideaology. A We R Memory Keeper Enveloper punch used to make the tags and pocket flaps.  Clear Wink of Stella is added to many of the clothes worn by the girls (unfortunately, none of the photos show this).
Here is the Album Front:
 Spine: with crumpled Rayon black ribbon
 Back:
 Overhead view of mini:
 Front closure detail:
 Back closure detail:
Open the book to reveal: note right side pocket flap is opened
With right side flap closed, this is what it looks like: Note the tag is removable.
The second page: Left side Booklet is removable and right side pocket flap is opened.
When left booklet and right side pocket flap is closed, this is what the page looks like.
More pages with the same process:
 Here, the side booklet and tag has been pulled out:
This is the last page and inside cover with the booklet inserted into the pocket on the left side:
 Fold over the booklet to reveal:
Thank you for stopping by today...................have yourself a crafty day!!!

Monday, December 7, 2015

Graphic 45 Couture Birthday Card

This 5" x 7" Birthday card is using the Graphic 45 Couture Paper collection. Card base is black card stock with a Vanilla mat and decorative paper.  Image is from the  Graphic 45 Couture Paper collection and is popped up using foam squares.
A crumpled black rayon bow embellishes the side of the image:
Buttons are die cut using some of the decorative papers and vanilla card stock.  Black floss is used through the button holes. Die is from Papertrey Ink and can be found here.  They are popped up using foam squares. Stamped message is Stampin-Up Warmest Regards (retired).
Card inside: Stamped message is from Stampin-Up It's Your Birthday (retired).
Thank you for stopping by today .....................have a crafty day. Check in tom to see the Mini ATC Book made using this same paper collection.

Friday, December 4, 2015

Asian Themed Treats with a Dome Top

I made a few of these covered tins treats using the My Little Shoebox Cherry Delight paper collection (no longer available). The inspiration for this project is from Papertrey Ink - they show many type of stamped, then die cut images in a clear plastic dome.  To be able to execute a Asian theme, the images are from the My Little Shoebox found in the Silhouette Store. Yup, then all you do is a "print and cut" once they are re-sized to fit underneath the done. You can even do a reverse flip image so the back will mirror the front using the Silhouette Machine. The scallop base is also a"print and cut" image from the Silhouette Store. Add some pink sequins inside to finish up this project.
 Front view of dome:
 Side view of dome .
 Back of dome:
Remove lid to reveal dark chocolate covered espresso beans (purchased from Trader Joe's):
Thank you for stopping by today to visit........have yourself a crafty day!!!


Wednesday, December 2, 2015

A Friends Multi Flap Mini Album

It is so nice to receive such inspirational gifts.  This one is from Kris G. - I recently learned she is a fan of mini books and she made this one for me.  I absolutely love this decorative paper from MLS (My Little Shoebox) which has been retired for a couple years. The paper collection is called Cherry Delight.  After receiving this mini, I added a little more embellishing using the same paper collection along with some fussy cutting on many images.  Mini Book base is made using white card stock.  Finished size is 6-1/2" x 4-5/8" x 1".  This interactive mini is way fun to open.
Fan die is by Tonic called Delicate Fan. White fan on top of the brown card stock mat worked well to contrast this cover. The two doll images are fussy cut, then popped with foam squares.
"Friends" and brown card stock mat is cut using my Silhouette.  Font style used is called "chow fun"
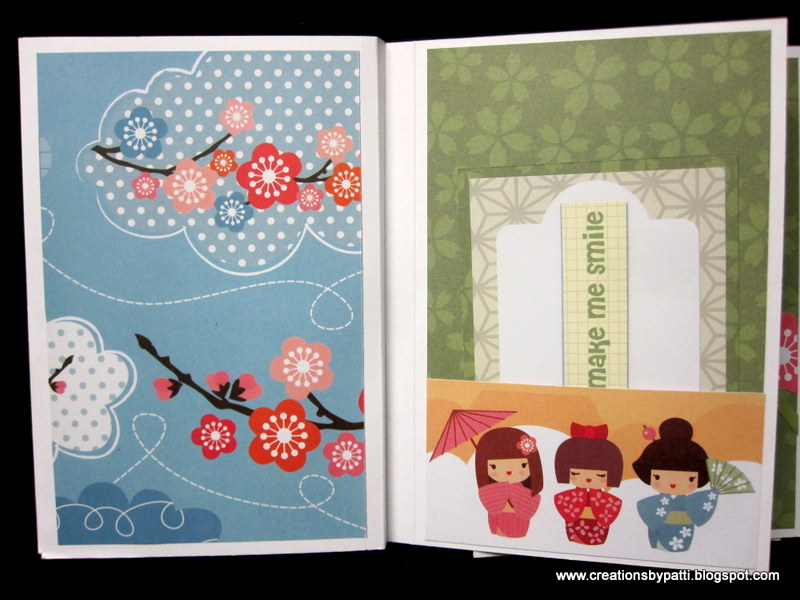
Open the front cover to reveal: There is another doll that was fussing cut on top of the side pocket. In the side pocket is a removable booklet. Right side flap is another fussy cut Doll.
Open the right side flap to reveal a pocket with a removable booklet. There is a removable booklet in the center pocket, too.
Next section is another pocket with a removable booklet.
Flip over another page - another pocket and removable booklet!

I love this section:  Cherry Blossoms are fussy cut along the right and left side along with fussy cut dolls.
Open the right side flap to reveal a center pocket with more fussy cut Cherry Blossoms and removable booklets.
See the color change?  Open the left side flap to reveal a new color with pocket and removable booklets in the left side and center. Fussy cut doll added to the center panel pocket.
Open the center page to reveal left side pocket with removable booklet.  Center panel has a photo mat n the center section page to reveal a left side pocket
Back:
Overhead of project:
Thank you for stopping by today.............have a crafty day!!