Monday, August 11, 2014

Donald and Minnie Recipe Card

UPDATE: Please note these kits have all the pieces pictured and need to be assemble - which is very easy to do. The only cutting needed to be done is taking the 8-1/2" x 11" paper, cutting down to 8" x 8" and maybe some of the recipe titles.  That's it!!!
 
This is a kit that comes from a company www.itsscrapbooktime.com. These recipe pages  can be ordered on line and they will be shipped to you. This kit is from their February 2014 group. I love this one because of the Stir Fried Rice recipe.  I did add my own punched edge to this page which I think made it more Ethnic.  Finished page size is 8" x 8".
Here's close-up of Donald: I used Stampin Up's basket weave embossing folder for his clothing. Ooops, looks like I missed adding white gel to his eyes.......you get the idea.
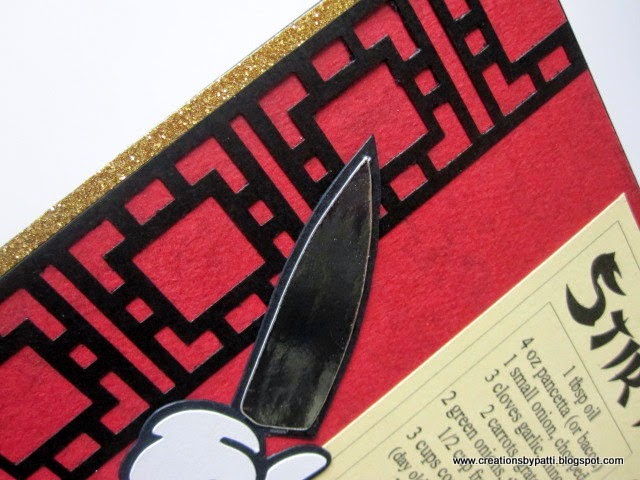
And, here is a closer look at the punched edge:
The second page for the month of February is Minnie's Bread Pudding.  She is so cute with her hat and apron:
I added some stitching around her apron and also stitch lines to her oven gloves.   There is also some textured from using a black .05 point pen on the pie pan.
cute, eh?  Thank you for stopping by today to visit....stay tuned for more completed pages.

Friday, August 8, 2014

Mickey and Goofy Recipe Cards

I decided to make a Disney Recipe Book - this is a monthly kit that comes from a company www.itsscrapbooktime.com. So, if you see any of these recipe pages and want to make one of your own, you can order them on line and they will be shipped to you.  For the next couple weeks, I will be showing some of the completed pages.  All the pages are 8" x 8" and are quick to complete: VERY satisfying indeed.  This first page is the very  beginning of the recipe book.
Obviously, everything you see on  the page is included in the kit.  I put my own spin on the page by adding stitching to the gloves using a black.05 point pen.
I also added some interest on the side of the chef hat by using a black .05 point pen. 

The second page is Goofy with some measurement info:
See the textured I added to his hat using a black .05 point pen?
Some subtle sponging of the mats shown here:
Thank you for stopping by today and stay tuned for more completed pages.

Wednesday, August 6, 2014

Snow White Treat Tin

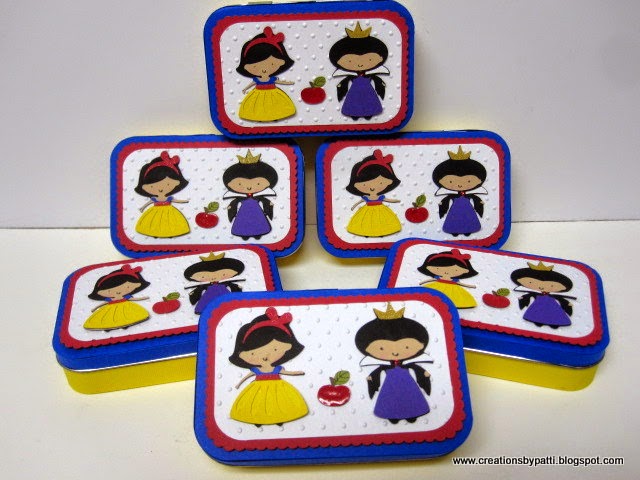
I had made a recent trip to the Disney Museum here in San Francisco's Presidio. I wanted to make something memorable for everyone who went.  I made these decorated Altoid tins (SVG cut file from the Silhouette on Line Store).  The Images are also SVG Cut Files from Lettering Delights, their collections called "Happily Ever After" and "Villains and Sidekicks" found here. I did separate the apple cut file from Snow White's hand, made it larger, applied some Glossy Accents. Paper used is from Recollections.
 
Here's a closer look at the top of the tin: Cuttlebug Swiss Dots on the white card stock background mat,  The colors of the tin are using Snow White's dress colors.   Snow White has Clear Wink of Stella on her headband and waistband.  The Queen's crown has Gold Wink of Stella. There is a adhesive red rhinestone on her collar. 
See the apple glistening from using Glossy Accents.
Side view: I love how this cut file fits so well on this Altoid box.
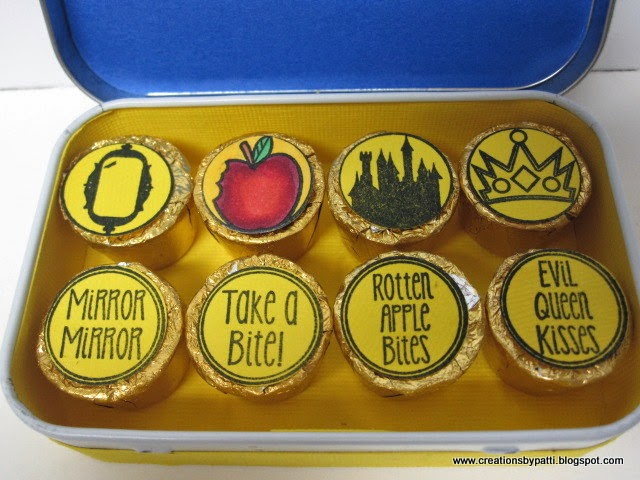
Open the tin to reveal a stamped message and some treats: The stamp set is from Jaded Blossom "V is for Villain" and using Momento Lux Tuxedo Black to get that dark color on the blue card stock.  The treats are also from Jaded Blossom stamp set called Villain Candies. I love how they can be punched out using a 3/4" circle punch. 
Here's a closer look at the inside tin................
The covered Rolo treats and the stamped messages: For the apple, it was stamped on Express it White paper, then colored using some Copic pens.
On the bottom of the tin: the Disney Museum Logo
Thank you for stopping by today.....................

Monday, August 4, 2014

More Thank You Cards

Just a couple quick cards to share with you:
This is a simple A2 cards made using the DCWV Adhesive Mat Stack Prints, Red and Yellow card stock base for the card is from Recollections.  "thank you" is a die from Papertrey Ink found here.  So easy to replicate the circle of the flowers int he print by using .a Stampin Up Scallop Punch, EK Success 1-3/4" Circle Punch, EK Success 1/2" circle punch and a white Gel Pen............stack and adhere.  Simple as that!!!
Card inside: sentiment is a stamp from the Papertrey Ink stamp set: Thanks All Ways found here. I love this stamp set because there are so many staying that can be used for many occasions.
The second card today is another quick one. I also used the paper for the card from  DCWV Adhesive Mat Stack Prints, with some white and blue card stock from Recollections.  This perfect die is from Papertrey Ink found here.
Card inside stamped sentiment is from  Papertrey Ink stamp set called Get Lost found here. With the scrap leftover from the card front, a strip of the DCWV paper was added to the bottom of the inside card. Plenty of room for some handwritten message, too.
Thank you for stopping by today to what had been created................

Friday, August 1, 2014

Kokeshi Box Card

I have a post today that will knock your socks off.............another great, I mean great surprise card from my fellow blog friend Eunice (A star for Chiemi - her blog found here and perhaps with more details on this project).  Anytime I get something from Eunice, I am always in AWE of her creativity.  Her skill using the cut computer program MTC (Make the Cut) is beyond excellent! She took the Box Card style to the highest level of creativity shown here.
The envelope sent is 8-1/2" x 6-3/4" x 1/2".  Shown here is the belly band which acts as the closure for this envelope.  I LOVE the Washi paper used along with the gold card stock (two of my favorite colors).  The small tag with the panda is a tag.  The panda is "print and cut" image along with a sakura punch in the bottom corner.  Lovely!!!!
 Open the envelope to reveal something very very cool................
The following photos show each side of the box card. Each section is 3-1/2" x 6-1/2" with a Oval cut out int he center framed with black card stock squares which look like a shoji screen.  The cherry blossom branch is pretty cool, too The  Kokeshi image is from a story book by Annelore Parot - such cute cute cute yummy images!!!!!
Here's another side .................and don't you just absolutely LOVE the panda? sigh............
Another side with a Kokeshi image in another fashionable kimono and the cherry blossom  branch:
This fourth side may be my favorite since this Kokeshi image has so much hair - love her, and the panda , too
Wondering how this card was made...............?..............here's a photo of the underside.......I love how clean looking the card is on the inside...............and I still can't figure it out right now....................
So give Eunice's blog a visit to see many of her amazing projects...............and thank for coming by today.