Sunday, April 10, 2011

Pushing the Envelope Tutorial

Thank you all for your patience in waiting for the "Pushing the Envelope" tutorial. The original post on 3/5/2011. The tutorial will provide the BASIC steps to make this type of album. Left Photo: To prepare to make this book: (2) 6-1/2" x 5" chipboard pieces (2) 7-1/2 x 6" patterned paper (2) 6-1/4" x 4-3/4" solid/pattern paper for inside cover (2) 4-3/4" x 12" solid/pattern paper for spine, scored 1-1/4" along 12" side (7) envelopes of your choice - A2 size used for this tutorial (7) 20" long cut ribbon of your choice 1/8" Hand Held circle punch Keep in mind, these are basic measurements. If the envelopes used are larger in size, increase to adjust the covers accordingly. COVER: Right Photo: Adhere the 7-1/2" x 6" piece to the chipboard. To make the corners, apply adhesive to the edge, then fold up the corners (as shown in the photo), repeat on all 4 corners. Left Photo: to achieve crisp sides, use a bone folder or simply lift up the side and rock forward (see yellow arrow), apply adhesive, secure. Right photo: finished front and back cover results. Set aside - do not apply inside cover yet!!!


SPINE: Left Photo: Crease and fold the 4-3/4" x 12 strips. Connect the two strips (see yellow arrow)

Right Photo: There are a total of 7 mountains for the outside and 8 for the inside. Note: The total amount of folds will also depend on how many envelopes are being used for the album.


Left Photo: Make a template 2" x 4-3/4" using chipboard. First hole is 1-1/8" from the top, following (3) 1/8" holes on the edge 1-1/4" apart. Note: if envelopes are larger/smaller in size, center the template for the same results. Place the template on the 3rd fold line which will the 1st mountain fold, mark holes - continue marking on all mountain sections.

Right Photo: Fold crease to punch holes using a 1/8" hand held punch. Repeat process 6 additional times.


Preparing the Envelopes

Left Photo: Fold the envelope flap inside (see yellow arrow)

Right Photo: using the template previously made for the strips, center template on envelope, mark holes.

After punching the envelopes, the envelope side results are as shown. Note: the 1/8" punch should be ONLY punching half way (or 1/16" in).


Connecting the Envelopes to the Spine

Left Photo: A needle with larger holes will be good to thread ribbon of your choice.

Right Photo: After threading needle, push through the center hole of the spine and envelope (see yellow arrow). Leave about 7" of ribbon as a tail.


Left photo: After threading ribbon through the center hole, from the inside of the envelope, thread through the bottom hole and through the bottom of the spine (see yellow arrow)

Right Photo: Bring needle up to the top spine hole, thread through top envelope hole as shown.


Left Photo: Before the spine attaching process is completed, outside of the spine should be as shown

Right Photo: Thread through the center envelope hole and through spine ensuring the tail will be on the opposite side of the original tail (see yellow arrow). Tie a double knot to secure ribbon.


Finished attached envelope results:
Attaching Cover to Spine

Left Photo: adhere spine extension to the cover (see yellow arrow)........position it 1/4" from the edge

Right photo: Adhere the solid/pattern paper on top to hide the extension.


Results of finished project side view


Whew.........................this tutorial took a bit longer than expected. I do hope it is clear, if not, please, let me know.

Friday, April 8, 2011

Tag Book from Pleasanton Scrapbook Expo

Here is a fun project: it's a "Make & Take" from the recent Pleasanton Scrapbook Expo at the Dollar Scrapbooking booth. This tag book was designed by the creative Alison Wong who used the product line Creative Cafe by Creative Imaginations. See Alison's gallery of tag books on www.dollarscrapbooking.net . There are many vibrant tag pages with a variety of embellishments and stickers: a total of 7 small tags and 7 large tags. Photos of each page are below. I added some flowers, word stickers, along with colorful Ric-rack and buttons after I got home. This tag book is 3" x 6" and the smaller tags measure 2-1/2" x 4-1/4". The Gold color 2" ring allows additional tags to be added later...........what I love best about this tag book is the sticker tabs which are uniquely used throughout the book. This is the cover: Here's the Tag Book fanned out............... So here are all the tags I have so far...................


Don't you just love it?

Wednesday, April 6, 2011

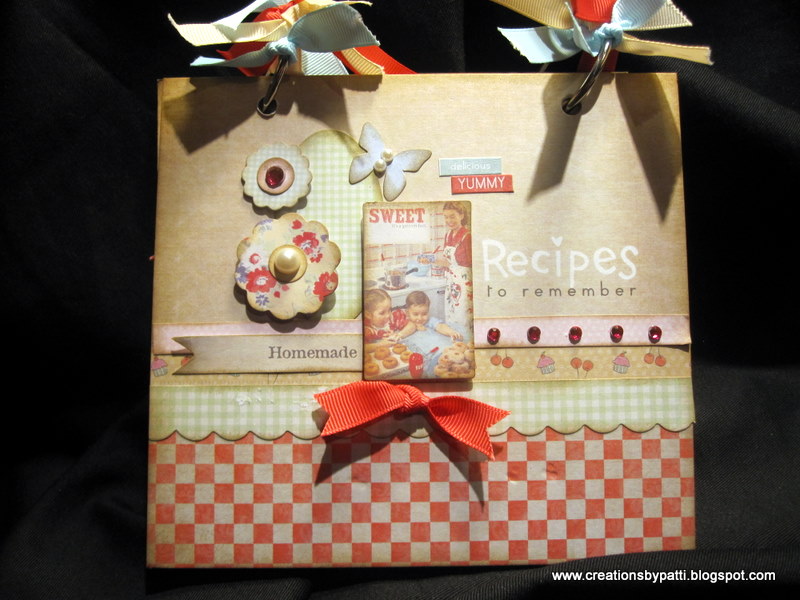
Melissa Frances Kitschy Recipe Album

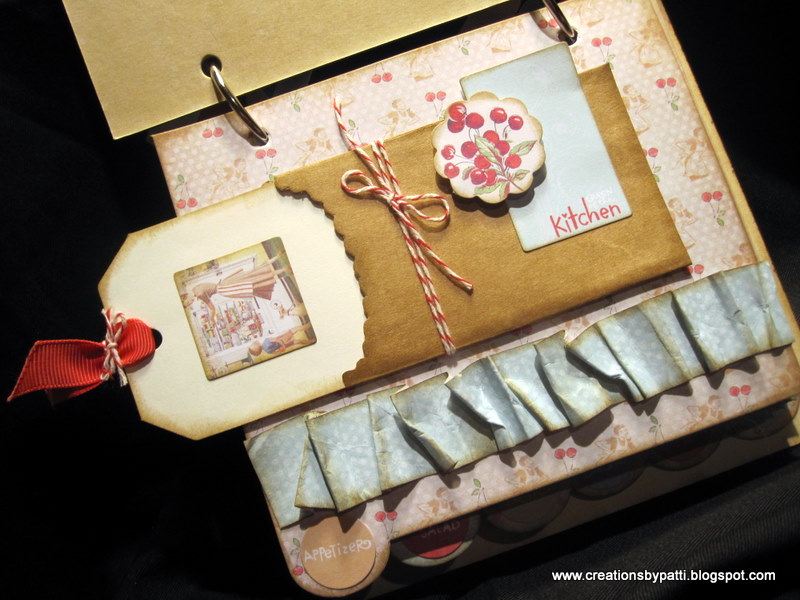
I attended the Pleasanton Scrapbook Expo a couple weeks ago and was able to attend this great class given by the Melissa Frances group. Everything was supplied to complete this project (don't you love that?) but I never finish my project at class, I finish it at home. Here's the front chipboard cover. Project finished size is 6" x 6-1/2" x 1-1/2". The 1st page was cool: the scalloped edge Kraft envelope has a tag. I added the Baker's twine to the envelope. The page has a ruffled pattern paper with a sponged edge..........Ranger's Distressed Burlap Ink is used throughout this project on all the pages and stickers. A paper doily sponged with Ranger's distressed Burlap Ink is incorporated on to this page along with added Baler's twine: Another ruffled pattern paper on this tabbed section: More fun embellishments: added Baker's twine and a waxed cupcake liner (sponged with ranger's Distress Burlap ink) Here's another fun scalloped Kraft envelope with a tag and Baker's twine. The sponged doily is peeking out of the edge The last tabbed section: a vertical ruffled pattern paper as embellishment:


There are a variety of recipe cards (6 different designs) behind each decorated tab section as follows. There were a whole bundle of recipe cards in the set which I believe,is sold separately.


This was such a cute project and not difficult to complete.

Hope you enjoyed this.........................

Monday, April 4, 2011

Asian Lattice Cards

I have a very special posting today..........my friend, Gene introduced me to the deisgner of the following cards. I just had to share them with everyone because they are so spectacular. These four cards are made by the very talented Jan Castle (www.jancastle.blogspot.com). She won First Place Blue Ribbon Award at the 2010 Oregon State Fair for these great cards.There are 3 lattice dies made by Cheery Lynn Designs and can be purchased from www.cheerlynndesigns.com made by Dies Direct ( www.diesdirect.com). See the various ways to use the dies: cutting the frames in different configurations makes each one unique - Jan cleverly uses the dies for each card in a variety of ways.


First card: Some of the diagonal lattice sections are cut out for the Dragonfly image.


Second Card: Regular lattice with some sections cut out


Third card: Another section of the lattice cut out for the Asian character with a co-ordinating image


Fourth Card: This lattice is larger in size and simple with the Washi paper as the back drop and the stamped image on top creates a fabulous card!


Jan was kind enough to share how she created these cards: they seem pretty straight forward but lots of planning, if sections are to be cut out. In addition, yeek - all those small narrow lattice lines. She suggest to use spray adhesive instead of "dotting" the lattice with wet glue. These cards are showcased in the yahoo group site: OSA (Oriental Stamp Art) as well as on the Dies Direct on line site where the dies can be purchased. If you have a passion for Oriental stamp art, then please do look into the OSA site Yahoo group - join in for monthly swaps that have a variety of categories...there is no cost to join...........and even if you don't join in on the swaps, you can see all the great cards (eye candy) from various talented members as well as sponsored vendors once you join. I do hope you enjoyed Jan's cards...................and a Thank you to Gene for the great introduction to Jan!!!!.............Thank you, Gene!

Friday, April 1, 2011

Asian Birthday Card

I finally finished this Happy Birthday Asian card.............a shout out to Ms. Sandi Maciver (her blog www.sandimaciver.com) who is uber talented and totally inspired me to create this card. She posted her card using the Kimono Kids on 3/23/11 and I absolutely loved it but when I went to make my version.........I was scared to use my brayer to create the circle even tho she has a great tutorial and stuck with using a Nestibility Classic Oval Die. I ended up using a oval shape because I really wanted to keep the pop-up in the inside. I also love how SU's Square Lattice embossing folder worked so great for the back drop (note: it was used for the front and back of the card). Thank you Sandy for your inspiration!!!! Here is the Geisha Girl: Using SU Aqua pens to color with Pretty in Pink, Certainly Celery, and So Saffron ink. A white Gel pen is used to outline the flower in her hair. Then Gold smooch is added to the center of the flower in her hair as well as the flowers on her dress. Use a Blush Blossom SU Pen for her face, hands, and feet (oops, guess this have been white color for her socks). Card front oval: after stamping and coloring the Cherry Blossoms, stamp the lanterns over the oval and card front in black ink. See the lanterns cut, then popped with dimensionals......... card inside: whoo-hoo....................... Here's a view of the inside top left side: Another view: To make this card, the following stamps were used: Geisha Girl: from great Impressions (Vicki Schreiner #158235) Cherry Blossom: from Rubber Stampede #35521 Lanterns and message: from SU Kimono Kids To make this card, the following CS is needed: (1) 5-1/2" x 8-1/2", score @4-1/4" in Certainly Celery (1) 4-5/8" x 3-3/8" White Neenah CS (1) 4-3/4" x 3-1/2" Black CS (1) Classic Ovals (small) Pretty in Pink - largest size (1) 5 x 8-1/4" Pretty in Pink Happy Birthday Pop-Up from www.SVGcuts.com (1) Stamped lantern image in Staz-On Black Ink (2) Stamped Geisha Girl image (only one is shown in the photo) in Staz-On Black Ink Color the lanterns using a SU Aqua Painter. Colors used: Melon Mambo, Pretty in Pink, Old Olive, Certainly Celery and So Saffron SU Pen. These will be cut apart, then popped with dimensionals onto the stamped lantern image. Back of card front and Geisha Girl image is popped with dimensionals. After stamping the Cherry Blossom image with Black ink on the oval and top/bottom inside, using a Aqua Painter, color the cherry blossoms with Pretty in Pink, color the branches using Close to Cocoa ink. Then use a white gel pen to outline the blossoms and color some of the buds. Final touch: apply Gold Smooch to the center of the cherry blossoms and stamens. Resources:

  • Stamps: see above information

  • CS: Pretty in Pink, Neenah White, Black, Certainly Celery

  • Ink: SU Pretty in Pink, SU Certainly celery, SU Pretty in Pink, SU Old olive, Close to Cocoa (retired SU), Staz-On Black Ink

  • Others: Nestibilities Classic Ovals Small, Happy Birthday Pop-Up from SVG Cuts.com, White Gel Pen, Gold Smooch, SU Aqua Pen, SU Dimensionals, SU So Saffron Pen, SU Square Lattice Impression Folder.
I knew I would eventually make an Asian Happy Birthday Pop-up.................Yay!!! OK - I keep correcting the formatting of this posting but it is so stubborn.............urgh.............I give up. Sorry for the zig zag post...............I'm not sure just how to remedy this craziness! Cross my fingers, hope this last correction STICKS.