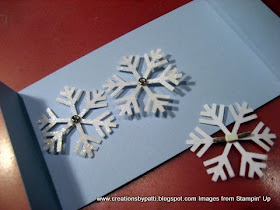
The card front: 3 Jumbo punched Whisper White snowflakes popped with dimensionals after Rhinestone Brads are attached. The smallest Rhinestone Brad was used. Be careful when pushing the brads through, potential tearing - there isn't much wiggle room.

Message is stamped with Bashful Blue ink. A Rhinestone Brad is attached at left side. Pierce through the front panel. Curl the banner using a bone folder. Clip ends.
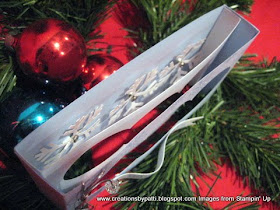
On the left side, attach silver elastic cord through the front panel, knot and tie. Crystal beads were added at the ends.
(1) 7-1/2" x 3-1/4" for Front panel, on the 7-1/2" side,: score 1" right and left side
(1) 6-1/2" x 3-1/4" for Middle panel,on the 6-1/2" side: score 1/2" right and left side
(1) 7-1/2" x 3-1/4" for Back panel, on the 7-1/2" side: score 1" right and left side


Position a Coluzzle over the 1-3/4" circle to carefully cut slightly larger circles (about 2" in diameter).
Now the front can be stamped with Versamark and embossed using the Iridescent Ice. The outside back panel is not stamped.

To add bling to the Jumbo Snowflakes, push snowflakes into Versamark. Cover with Iridescent Ice Powder. Heat and Cool. Use a piercer to push through Rhinestone Brad.

Complete card with elastic cord and stamped message.
Supplies:
- Stamps: Four the Holidays, Christmas Punch (level 3 Hostess)
- CS: Whisper White, Bashful Blue
- Ink: Versamark
- Accys: 1-3/4" Circle Punch, Coluzzle (retired), Jumbo Snowflake Punch, Iridescent Ice Embossing Powder, Silver Elastic Cord (Holiday Mini), Pretties Kit, Rhinestone Brads, Piercer
Thank you for stopping by...............Hugs........!!!


All your shadowboxes have been inpressive. But this is my favorite...may I case it? I found the card breath-taking! Thank you sooo much
ReplyDeleteGreat tutorial! I did a card last night with puching out the circles only on the top piece and gluing over my stamped image. Thanks so much for showing this.
ReplyDeleteYour snowflake shadowbox card is absolutely BEAUTIFUL, Patti! In fact, I love all the really neat Christmas shadowbox cards you've posted so far. Can't wait to see all the special Christmas projects you've got in store for us!!! P.S. do you sleep? :)
ReplyDeleteWhat a darlin' box and love the step-by-step tutorial....so fun!
ReplyDeleteWay too clever Patti. Looks fantastic.
ReplyDeleteKylie xo