Thursday, September 24, 2009

Eye Love You Flower Pot

This is a late posting: Here's my version of the various Flower Pot Cards out there. This card was inspired by Cindy (see her blog 9/21/09 http://cindyhaffnerscorner.blogspot.com/ for her version). There is a tutorial for a Flower Pot Card on Split Coast Stampers (http://www.splitcoaststampers.com/resources/tutorials/flowerpotpocket/). My version card finished size (including the "eye" flowers") is 4-1/4" x 5-1/2" (Yay!) and the measurements are slightly different.

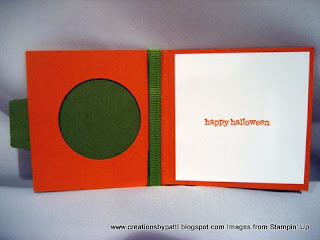
Here's the message inside the pot:

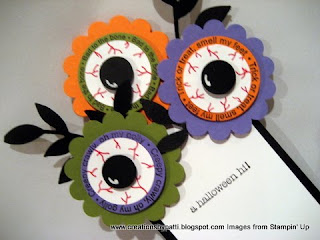
Look! And here's a close-up of the three "blood shot eye" flowers.
Back of message - another scallop circle used in the back - looks "cleaner".

Here's the pot: sponge with black ink, ink edges with Craft White ink on those tag punch tombstones and stamp "BOO". The grass is part of the Jumbo Snowflake punch. Tear a scrap of Close to Cocoa for the ground and adhere. Tie with the Black/White Gingham Ribbon and add SU Exclusive die cut Little Leaves.

Back of pot:

To create the concept of this project, I started off using scrap paper to "play" with getting the measurements for a card that would fit into a regular envelope. As you can see, the cut Jumbo Snowflakes did not make it to the final "cut" in the project.

Measurements for this project:
Pot: Start with (1) 4" x 6-7/8", on the 4" side: score 7/8", and 3-7/8". The 7/8" section is top of the pot and is to be folded over. Fold over the 3" section. At the bottom of the fold, measure 3/4" from the edge (sorry_ I forgot to put this measurement on the photo) and 3/8" from the top fold edge (as shown in photo). Cut out section. Finished pot shape is in the center photo.
Message slot: cut (1) 4" x 2-1/4", cut (1) 3-3/4" x 2"

Sponge the pot with Black ink (no need to sponge the snowflake pieces - they were not used):

Use Small Tag Punch for the Tombstone, use Craft White Ink for the edges. Stamp message, add Old Olive grass(part of Jumbo Snowflake).

To make those eyeball flowers: 1/2" is for the pupils and adhere with a dimensionals, then 1" for the white of the eye, 1-1/4" for the message around the eye balls. The message around the eyeball is from Batty for You stamp set. Use a Real Red Stampin' Write pen to make the eyes blood shot. Use a white gel pen for the pupil. Adhere to the scallop circle with dimensionals.

Supplies:
  • Stamps: Batty for You, The More the Merrier (Level 3 Hostess), Boo (unknown)
  • CS: Only Orange, Lovely Lilac, Old Olive, Black, Whisper White, Basic Grey, Close to Cocoa
  • Ink: Black, Craft White
  • Accys: SU Exclusive Big Shot Little Leaves Die, 1/2" Circle Punch, 1" Circle Punch, 1-1/4" Circle Punch, Scallop Circle Punch, Small Tag Punch, Jumbo Snowflake Punch, White Gel Pen, Real Red Stampin' Write Pen, Dimensionals, 3/16" Black Gingham Ribbon

Thank you for visiting today................hugs!

Wednesday, September 23, 2009

A Birthday Party!

This is the invitation for my Grand Niece's 9th Birthday Party. The celebration was held this past weekend. Message is computer generated. The invitation details are on the back side of this single layer card. Love those pom poms!

Here's a bunch of them:

Close-up of card front:

The invitation was made by fist stamping the background using White Craft Ink, then stamp the cupcake. Apply the "cake liner" with message (photo on the right) as shown:

Here are some of the name tags made for each attendee. There are pins in the back of each tag:

Here's is the "Thank You" card she will hand to her friends: The "dots" in the icing used a white gel pen, The cherry is colored using the Real Red Stampin' Write Pen with Close to Cocoa for the stem.

A special "Happy Birthday" banner was made for her in her favorite colors. Each end of the "happy" banner has cupcakes made from the exclusive SU Big Shot Pennant die. The letters were made using my Cricut Machine.

Supplies:
  • Stamps: Simple Birthday Thanks, Baroque Motifs, Itty Bitty Backgrounds, Dot Background
  • CS: Pretty in Pink, Pixie Pink, Close to Cocoa, Whisper White
  • Ink: Black, Close to Cocoa, Craft White
  • Accys: SU Exclusive Big Shot Pennant Die, SU Exclusive Big Shot Big Bold Cupcakes die, Big Shot Scallop Circle Die, Scallop Oval Punch, Large Oval Punch, Horizontal Slot Punch, White Gel pen, Stampin' Write Real Red and Close to Cocoa Pen, Corrugated Kraft paper (unknown source), Ric Rac (unknown source), Pink 5/8" Satin Ribbon (non SU), Cotton Pom-poms (non SU), Tombow Adhesive, Dimensionals

The celebration was fun and everyone had a great time. They wore their pink feather boas and glitter necklaces during the party, made bracelets, decorated and personalized their goody bag to hold many of their craft items and goodies. One of their projects was a paper bag scrapbook where they were able to decorate and embellish the cover and pages. We also made spider "pops" using chenille and googlie eyes. A girly journal was also personalized with embellishments. Of course we took a break to have Chocolate cake, cookies, and juice. Small bottles of nail polish were available so some of the girls did each other nails. Sound like fun? I guess Auntie (that's me) will be scrapping this event for her.

Thanks for stopping by today to visit.

Tuesday, September 22, 2009

2 Sweet Treats for ME!

A quick post today: This is the best surprise: I got this from my new downline (MAIDA) and wanted to share it with you. Yippee - I am so excited about this creation using the Sweet Treats from the Holiday Mini.I love the scallop edge on the card and the piercing touch.

Here's a peek at the inside of the card. I actually placed Whisper White CS on top of her note.....sorry, the message is a little personal.

I love the personal touch on the balloon basket (my initial "P") popped with a dimensional.


Here's another Sweet Treat I got. Card size: 3" x 3". The technique: using a dauber to apply a mixture of colors. The results are great! The candy is available by pulling the "sweet treats" tab. Love this - I believe Becky Roberts (http://www.inkingidaho.blogspot.com/) has instructions on her blog for this pull tab alternative.

Inside of the card:

Here's the tab pulled to get the candy: Cool, eh? Ya gotta try this!
Thank you for stopping by to visit today ..........aren't these surprises great? I love them so THANK YOU MAIDA!

Monday, September 21, 2009

Christmas Ornaments

Here's a trio of cards using the Delightful Decorations stamp set from the Holiday Mini Catalog. There's a ornament punch, too so no more hand cutting these "guys".

This is the first card: inspired by a fellow demonstrator (regretfully, I didn't get her name at the from the Open House event). The Snowfall Window Sheets were fun to "play" with. Love the concept of using the paperclip for an ornament hanger. The message is also from the Holiday Mini: Four the Holidays stamp set.Love the Rhinestone Brad in the center of the left ornament. Pop those ornaments with dimensionals.

Here's another version from Sharon: The ornament and edges of the Real Red CS has touches of the new shimmer paint (also in the Holiday Mini). The message "ends" were created using the new Ornament Punch.

Here's my version made for a past swap. Use the Boho Blossoms Punch for the "center" of the ornaments (which are the same stamp used for the background).

Card inside:

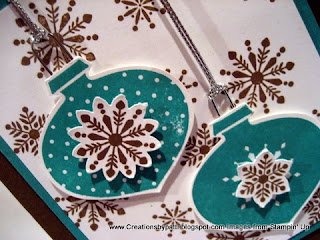
Close-up of card front:

Things needed to make this card: (for this photo, the message was changed to be using Versamark with white embossing powder)

Here's how to use the paper clip for the ornament hanger. Use an entire paper clip or cut one in half (as shown). Use dimensionals, attach to card.

LOOK at all these ornaments!

Card front assembly:

Supplies:
  • Stamps: Delightful Decorations, Four the Holidays, Christmas Punch
  • CS: Rich Razzleberry, Snowfall Printed Window Sheets, Soft Suede, Bermuda Bay, Garden Green, Whisper White, Real Red,
  • Ink: Rich Razzleberry, Versamark, Bermuda Bay, Soft Suede
  • Accys: Ornament Punch, Rhinestone Brad, Platinum Shimmer Paint, Backgrounds 1 Texturz Plate, White Organza Ribbon, White Taffeta Ribbon, Ornament Punch, Boho Blossoms Punch, Mini Glue Dot, White Embossing Powder, Silver Elastic Cord, Dimensionals.

Thank you for stopping by today to visit.............HUGS!!!!

Friday, September 18, 2009

Midnight Fright Surprise

Here's another Marvelous Magical Marquee Card. See my previous post on September 10 for another Halloween version. See Jan Tink's blog (www.stampspaperscissors.typepad.com) for her fabulous tutorial video on August 29. This card ended up having some punched art on it - quite by accident.

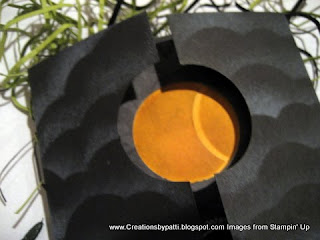
Here's the card slightly opened, revealing the message and the full moon "opening up"

Here's the card fully opened, revealing messages underneath the full moon.

Close-up of the inside message from Batty for You stamp set: the funny skull

Inside card is a rub on from the Spooky Treats Rub On.

Here are the components to make this card: the basic measurements are on Jan's site. I did increase the inside panel to be 3" x 5-1/4" and the moving part in More Mustard CS to be 2-1/4" x 3-1/4". The punched hole size is 1-1/2".

To make the "clouds" (which, by the way was so much fun to do): punch a dew circles and use a sponge to randomly apply Craft White Ink.

To make the "grass": Yup, I used the snowflake punch and cut off the pieces that are needed. Lightly sponge using Old Olive ink, too - we like depth and texture here we can get it.

For the Full Moon, make a "mask" for sponging (see the chocolate chip color scrap that was made in the photo). Close the card, sponge the punched hole using More Mustard Ink - also dab a little Only Orange Ink.

Here are the results of the Full Moon - looks OK?

To make the fence: Punch (6) posts using the Word Window Punch, cut off the bottom, trim tops as shown. Cit 2 lengths 4-1/4" long strips Tip: there's no need to make them so perfectly straight.. Apply Basic Grey Ink using a sponge to all post pieces.

This is the completed fence, grass, and ground (torn strips of Chocolate chip). The bird: it's the rub on from Spooky Treats.
Supplies:
  • Stamps: Batty for You
  • CS: Black, Basic Grey, Old Olive, More Mustard, Chocolate Chip, Cast-a-Spell Designer Paper
  • Ink: Black, Craft White, Basic Grey, Old Olive, More Mustard, Only Orange
  • Accys: Spooky Treats Rub-On, 1-1/2" Circle Punch, 1-1/4" Circle Punch, 1" Circle Punch, Word Window Punch, Jumbo Snowflake Punch, Photo Corner Punch, Stamping Sponges, Sticky Tape.

Thank you for your visit today............hope you enjoyed this version. Have a great weekend and see you allon Monday!.........Hugs...............