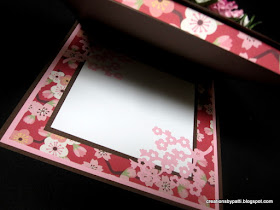
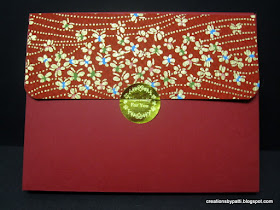
Monday, October 31, 2016

Frankenstein Couple Halloween Greetings

Absolutely LOVE this stamp set from Darcie (Design #JCS289) with Frankenstein and his Bride.  They are not even scary at all - they are just so very cute! I've had this stamp set for a year and finally got a chance to ink it up.  Made a couple simple and quick cards. Both cards are 4-1/4" X 5-1/2". Decorative card stock from. Cloud 9.
A sparkly mat on a Dark Green card stock base is enough for this card.
Copic colors used:
Pumpkin: YR65, YR16, YR18
Pumpkin Mouth/Eyes: Y18
Pumpkin Handle YG03
Face, Leg, Hand: YG21, YG01, YG03, YG23, YG63
Cheeks, Nose: R11, R20, R21
Hair: C6, C8
Her Hair: C2
Pant, Shoe: E27, E47
Her Clothes: V12, V22, V25, Y38 (belt)
This card base is Orange.  Punched fence is from Martha Stewart.  The Orange and Black grosgrain ribbon beneath the fence is from my stash.  Frankie in the Window image is fussy cut and popped with foam squares. Add a separately cut pumpkin for him to hold, then pop with foam squares, too. Stamped message is die cut using Spellbinders Labels Fourteen, then popped with a foam square.
Additional Copic colors used:
Inside Window: YR31, Y11, YR65, YR16, YR18
Inside Shutter: V12, V22, V25
Outside Shutter: YG63
Card inside: Both cards have a pumpkin in the bottom right.
Thank you for stopping by today. Have a crafty day!


Thursday, October 27, 2016

Sitting Cat Marci Kit Projects

These projects are from the September 2014 Monthly La-la Land Crafts kit. You can also join the monthly stamp and die club here.  These items from the kit are now available in the La-la Land Craft store found here. There are great instructions to complete the projects. Stamp sets Sitting Cat Rubber Stamp, Haystack, and Pumpkins along with Boo! Banner, Broken Fence, and Fall Leaves die sets are included in this kit as well as the papers. There are three projects: a decorated bag, a card, and a pumpkin hanging.  The 3 projects shown below. 
A closer look at how each Sitting Cat Marci is colored using Copic pens. Colors and technique to achieve the "cat-like fur" look used are on the kit instructions.
On the Brown Bag project top right corner a Boo! Banner die cut in decorative paper. The paper clip is decorated with paper with a paper craft bat.
Beneath the Boo! Banner glittered gathered tulle is positioned across the bag. Add black ribbon on top of the tulle, then tie a bow, die Fall Leaves die, a paper board button (included in the kit).
In the bottom right corner: more Autumn leaves, some paper flowers. See the paper doily peeking out underneath with more leaves which are all sponged with some brown ink.
Card project: finished card size is 6 x 6. There's a lot going on in this card. Can you see the acetate printed web on top of the dot decorative paper mat? There is also a die cut circle (orange and black) behind Sitting Cat Marci.  Those paper board bats are popped with foam squares. All the cut pieces are lightly sponged with brown ink.
Sitting Cat Marci on top of the Copic colored pumpkins (stamps included in the monthly club).She is popped with foam squares. One of the pumpkins is also popped with foam squares.
The Boo! Banner is die cut twice (black and orange) and only attached at the top so the flag part of the banner is curled up.
On the right and left side of the card are Broken Fence dies cut in Kraft paper - add  drops using a Viva Brown Pearl pen as shown.
 
Card inside: the autumn moon with a Fall Leaf and a paper board bat
This pumpkin hanging is made from pre-cut paper board.  Top pumpkin finished size is 5-3/4" x 5". The smaller pumpkin is 3" x3". All pieces are edges using brown ink.
A clear look at the larger pumpkin:
The smaller pumpkin:
Tied raffia with a paper board button decorate the top right side of the top pumpkin. This sits on top Autumn Leaves.
On the right and left the Broken Fence die is used as well as the Viva Brown Pearl Pen here, too. The two small stamped pumpkins are popped with foam squares.
Thank  you for stopping by today. Have a crafty day!

Monday, October 24, 2016

Nurse Marci Get Well Card

Here's a 6"x6" card. The card is made from using the February 2016 Club la-la Land Kit: Nurse Marci, Feel Better Stamp Set and dies Stethoscope Die, Medical Elements Die, Clipboard Border Die, and Pierced Scalloped Circles (this die is in the regular line and not part of the monthly kit)Join the Monthly Club here on the La-la Land Crafts site here. Additional dies used: Spellbinders: Large Circles (3-3/4"), Small Circles 3-1/2"). Paper used is from my stash. Main color for card base is Red with black used for the mat and other elements.  Scrap of decorated red printed paper used also from my stash.
Copic colors:
Hair: E21, E25, E29,
Clipboard, Stethoscope: E21, E23, E25, C00, C01
Hat, Apron, Shoes: C1, C2, C4, R29
Dress: R32, R46, R59

Top of clipboard clamp is cut using Silver card stock over the Dark Grey "board".  Medical Element cut is black card stock.
Stethoscope has been die cut using Dark Grey, Silver, and Black card stock.
Cuttlebug Typeset Embossing Folder on Vellum Card Stock can be seen more clearly here:
Card inside:
Thank you for stopping by today to visit. Have yourself a crafty day.

Thursday, October 20, 2016

Camera Film Sliding Birthday Card

A quick masculine birthday card for a friend: turning 70 can be dramatic. This is a card using the cut file from the Silhouette called Camera Film Slider Card. Jaded Blossom Birthday Candies Stamps and Jaded Blossom Capturing Memories Stamp (message inside), Jaded Blossom Film Dies also used to complete this card.  Additional dies used are from La-La Land Crafts Smile, Photo Elements, Numbers, Balloons found here. Main card paper used is from American Craft Black and White Card Stock, decorated paper from my stash.  Silver paper scraps from my stash. Finished card size is 6" x 6".
Both the "70" and "Smile" are die cuts using La-la Land Crafts die seen here:
Popped stamped message using Nestabilities Oval dies to mat.
Pull the tab out to reveal:
Closer look at the film Jaded Blossom Birthday Candies stamped messages:
Card inside: Film strip and camera are from La-la Land Crafts Photo Elements die
Thank you for stopping by today. Have a crafty day yourself, too.

Monday, October 17, 2016

Pineapple Ribbon Lei

This is a lei kit purchased from Chris Tanizawa at ctanizawa@gmail.com. It was purchased long ago and finally got completed. For FREE lei making classes in Union City, California. She has various lei kits for purchase and has a schedule for her classes but may not have this specific lei style. This particular lei finishes 42" long. Honestly, it was quick to make since the "pineapples" were one continuous strip of ribbon.
In this photo, you can see the pineapple does have another orange sheer layer of ribbon toward the inside.
A even more closer look: the green ribbon is both satin and sheer:
Thank you for stopping by today - Have yourself a crafty day.

Tuesday, October 11, 2016

Marci with Lantern Shadowbox Card

Lovin this card style so much. Previous card using this style was posted on Friday, September 30, 2016 found on this link: Renaissance Marci Birthday Shadow Box Card

This is another Shadow Box card inspired by Alexander Morein: her blog Clay Guana  here. I had to make an Asian version because it is so fabulous!!!! Papers used from my stash (retired My Little Shoebox Cherry Delight Collection).  Stamp used is Marci with Lantern from  La-la Land Crafts. Dies used also from La-la Land Crafts found here:
Lanterns Banner: die cut in Pink and White card stock, off set.
Scroll Bracket Die: die cut in Brown card stock
Cherry Blossom Branch
Scroll Banner (from July 2016 Club La-la: not available until July 2017)
Center Opening and contrast Brown card stock center mat made using Spellbinder Nestablities Labels 8. Finished card size is 6" x 6".
Multi layering of card stock using the Scroll Banner is popped with foam squares.  Stamp used  is from my stash using Momento Rich Cocoa ink.
Marci with Lantern Copic colors used:
Hair: W2, W4, W6, W8
Face: R11, R20, R21, E13, E11, E01, E00, E000
Dress: Paper pieced Washi from Hanko Designs found here
Shoes and Dress trim:
Lantern: Gold Smooch, Pink is paper pieced card stock
She is popped with foam squares
Front bottom left corner (and right bottom corner) has double layered and offset La-la Land Crafts Cherry Blossom Branch die cuts.  Add pink and white paper flowers with curled wire centered at the bottom front for dimension.
Side view:
Open the card to reveal:
Card Inside: mated with both solid card stock and decorative paper along with die cut La-la Land Crafts Cherry Blossom Branches.
Thank you for stopping by to visit today. Have a crafty day.

Wednesday, October 5, 2016

Asian Pop-Up and Panda Gift Card

Always happy to be receiving parcels in the mail - especially from my friend Eunice (her blog called A Star for Chiemi found here).  Love to get her one of a kind creations made from scratch.  It always brightens up my day. Shown here are two of the various items sent in a special surprise package.  See further below for descriptions.
This cute panda is made using that shimmer card stock.
Open his arms that were tucked underneath the heart:
Flip that heart flap down to reveal the message:
The flipped down section is a pocket which holds a gift card..........now how cool is that?
This second package is a special made envelope.
Open the envelope to pull out a vellum wrapped card:
Card is made using shimmer card stock with printed Washi paper for her dress..............is this me?
Open the card.......... but wait.........wait for it.................
Card fully opened to reveal a great pop-up surprise of sakura wishes:
A close-up of the pop-up:
Card inside top is decorated using Cricut Pagoda cartridge:
Side view of card:
Isn't this a wonderful card? I think you would agree.................