Friday, October 30, 2009

Sweet Witches Hat

Updated: original idea can be found on Tanarra's blog posted 10/21/09 www.tamarrastamps.typepad.com
There's at surprise under this Witch's hat: it's a miniature Reese's P-Nut Butter cup. I can't remember where I saw this and tried very hard to find the site - I had to recreate this project form memory. I also used what scrapbook paper I had lying around. I had finally used up all my Cast-a-Spell Designer paper.

See those stars in front of the hat? They are Gold Party Confetti I had - they are perfect for this project.


This is what the hats look like during assembly. For each hat, you will need
(1) 1-7/8" Circle
(1) 3-3/4" Circle, cut in half


Apply sticky tape to the P-Nut cup in 3 places. Apply adhesive on half of the straight edge of the circle. 1/8" away from the candy bottom, start to wrap the rounded edge around the the candy. To adhere to the brim, apply a dimensional to the bottom of the candy . You will notice the candy is not flat so a dimensional will work. Using a mini glue dot (see photo below), attach a 6" long cut 1/4" ribbon to the center back and wrap each end around to the front - secure with another glue dot. Attach star with a mini glue dot.
Supplies:

  • Stamps: none
  • CS: unknown
  • Ink: none
  • Accys: Circle Scissor Plus, 1/4" Black Grosgrain Ribbon, 1/4" Only Orange Grosgrain Ribbon, 1/4" Old Olive Grosgrain Ribbon, Sticky Tape, Mini Glue Dots, Dimensionals, Gold Star Confetti (non SU)

Thank you for stopping by today............brace yourself: tom is HALLOWEEN!!!!! have A GREAT WEEKEND!

Thursday, October 29, 2009

Are You Getting These?

These are special treat boxes that were made for a special group of Bowlers. My DH has been bowling for 35+ years (not with the same group). They will receive these this week. In order for them to be carefully transported without losing any of the candy, the treat boxes are in cello bags - tied with Linen cord.

Here are the treat boxes before they were put in plastic bags. I used some left-over "eye" stickers I had lying around - my goal was to use what I had! And, the CS for the treat boxes are those retired in colors: Eggplant Envy, Kiwi Kiss, and Tangerine Tango - gotta use that up! Candy is filled on both sides of the boxes which also contains SU Black CS shreds made by cutting up scraps into 1/8" strips.


Here are close-ups of a couple of the boxes: Note: the scrapbook paper used to decorate the outside of the tote is something I had lying around (yay -use it up!) - Source unknown.


A treat box was posted on 10/9/09 Scary Fun Treat Tote showing how to make the shreds used for this tote. Here is how to make the tote. (2) Big Shot #2 pieces are needed. Note: To show how to make this tote, generic CS is used.

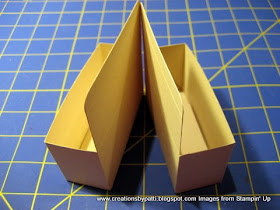
Cut the side flaps off of each box:

Using sticky tape, adhere both boxes together:

Using a Large Oval Punch, position punch between both lids of the box as shown:

Finished tote should look like this:


Supplies:
  • Stamps: Batty for You
  • CS: Eggplant Envy (retired), Tangerine Tango (retired), Kiwi Kiss (retired), Whisper White, Black
  • Ink: Black
  • Accys: Big Shot Box #2 Die, Scallop Circle Punch, 1-3/8" Circle Punch, 1-1/4" Circle Punch, Wide oval Punch, Tangerine Tango Striped Ribbon (retired), Black Multi color ribbon (unknown source), Eye Stickers (unknown source), Sticky Tape, Linen Thread, 1/8" Hand held Punch (retired), Cello Bag (unknown)

Thank you for stopping by today...............Hugs...........

Wednesday, October 28, 2009

Halloween Memory Album

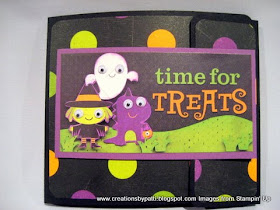
Here's another fun project that had to be completed before Halloween. It is being given to my Niece for her 3 girls (my Grand Nieces)! There are 3 inserts within this album:one for each girl! This project was made by using Black envelopes to hold the photos. This is the 4th envelope album I have posted. See 9/17 Halloween Envelope Album and 8/10, 8/11 Things I love Album previously posted. No Velcro used!!! The construction of the closure is the same as albums previously posted: by using dimensionals! Hah! Finished size of this album is: 5" x 4-1/4" x 1/4". Here's the front of the Album cover.

Close-up of the album front: I added Googlie eyes to all the characters.
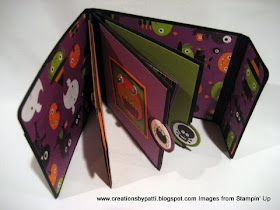
Top view of the album inside showing the photo "cases":

Here's the inside when the album is opened: (note: bugs will NOT be included in the gift to my Niece)

Opening page: Googlie eyes added on creature.

2nd Page: a larger size Googlie Eye added on the cute creature

3rd Page: This Green Witch also has small Googlie eyes.

The photo inserts:

To make this size album:
(1) 4-1/4" x 12" SU Black CS, score 4-7/8", 1/4", 4-7/8", 1/4", leaving 1-3/4 for the tab
(3) 4-1/8" x 4-3/16" sealed Black Envelopes (envelope size: 4-1/8" x 9-1/2")
(3) 4-1/4" x 1", score 1/2" on 1" side
(2) 4" x 1-1/2" Scrapbook Paper (one for outside and one for inside)
(4) 4" x 4-5/8" Scrapbook Paper (2 for outside and 2 for inside)
(6) 3-7/8" x 3-7/8" Solid CS or Scrapbook Paper (used on top of cut envelopes)
(3) 4" x 4-1/8" solid CS for inserts
(6) 1-1/4" Punched Circles
(6) 1" stamped and punched Circles
SU Supplies:
  • Stamps: Batty for you
  • CS: Black, Whisper White, Old Olive, Pumpkin Pie, Eggplant Envy (retired), Scrapbook Paper (non SU)
  • Ink: Black
  • Accys: 1-1/4" Circle Punch, 1" Circle Punch, 3/16" Corner Rounder Punch, Dimensionals, Sticky Tape, Business size Black Envelopes (non SU), Various Sizes of Googlie Eyes (non SU)

Thank you for stopping by today to visit.................HUGs!!

Tuesday, October 27, 2009

Halloween Eggs

Can you believe these are Decorated Egg Shells? I went out to lunch today and the Thai Restaurant had their own decorations made by one of the gals. Instead of throwing out all those egg shells, she put them to good use. It's great to recycle. She hand decorated all these eggs using markers. The hats were made from paper. You just never know where creativity strikes as well as inspiration!!! I just had to share this with all of you! Make them for next year? Enjoy all these egg decorations - I can't wait to see what she does at Xmas - more decorated eggs? These are just a sampling of the decorated eggs on display.


This is a "mummy" egg - there is some glued rope around it - cool, eh?
Love this crazy clown!

This crazy straw man (scarecrow?)

A Thai Vampire?

I kept thinking where's the other eye - Oh, there is only one..........cool!

I hope you enjoyed my experience at this local restaurant!

BOO Tag

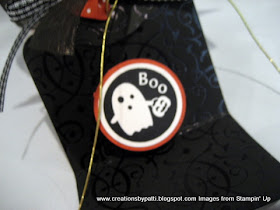
Look at this!!!!! Can you guess? This Stampin' Up Two Tags die is using the Specialty Paper that is called "Groom" - it is beautifully rich Black with embossed swirls. I keep looking at this because it is so clever. I don't have the heart to undo this packaging but I guess I have to in order to use the ribbon. Give a shout out to Eva Davalos in Albuquerque, NM who came up with this original design. Love the spray of black ink across the front. BUT, we're not done - see the next photo.............

Open up the tag to reveal "Little BOO" who pops out to personally greet you!

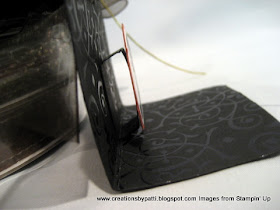
Here's a photo of the side view to show how "Little BOO" pops out. Cool? eh?

NOW I really am in love with this exclusive Stampin Up Two Tags die!!! I can't wait to make some of these.
Allow me to take a stab at the supplies to make this tag:
  • Stamps: Little Boo. Itty Biddy Backgrounds, Holiday Best (level 1 Hostess)
  • CS: Groom Specialty Paper, Whisper White, Dusty Durango
  • Ink: Black
  • Accys; SU Exclusive Big Shot Two Tags die, 1-3/8" Circle Punch, 1-1/4" Circle Punch, Stampin' Write Black and Dusty Durango Pens, Dusty Durango Polka Dot Grosgrain Ribbon, Gold Elastic Ribbon,Black Gingham Ribbon, Black Organdy Ribbon (non SU)

Thank you for stopping by to visit today.....................Hugs!!!

Monday, October 26, 2009

Halloween Goodies Album

I love it when I complete projects that have been sitting around.....this one was a class I planned to take about a month ago but received it in a kit form - it is absolutely fabulous because the recipes are cleverly positioned in the album. They are almost hidden. This style and layout form can be applied and transformed into Family Favorites - there are so many possibilities. So hers goes: the front cover. I actually made a little change from the kit. The title is matted with Stampin' Up's Crushed Curry CS, popped with dimensionals. I added a Dusty Durango strip across the front. Not sure where I got this adhesive blings - they are from my stash. I also added some Stampin' Up Grosgrain Ribbon to the rings. Finished Chipboard Recipe album size is 6" x 6"

Here's the 1st Recipe - I moved the due cut tree here - it was suppose to be on the front cover.

See the recipe hidden? To reveal the recipe, I added a Stampin' Up 1/4" Black Grosgrain Ribbon as a pull tab.
2nd Recipe: I added the extra spider here (since there were some extra ones in the kit)

3rd Recipe: see the 1/4" Black Grosgrain pull tab at the bottom center of the recipe?

Pull up the black Grosgrain tab and see the recipe revealed.

4th Recipe: I added a Stampin' Up Black CS and Old Olive CS "sleeve" to hold the recipe. The recipe can slide out and opened (see next photo)

The recipe unfolded:

Recipe 5: I added a Stampin' Up Old Olive 1" Punched circle slipped in between the photos to be used as a tab:

Recipe revealed:

No supply list for this project since it was received as a kit. I did go around each chipboard edge with a Black Stampin' Write pen as well as around each scrapbook paper. In addition, the following Stampin' Up products used:
  • CS: Crushed Curry, Dusty Durango, Old Olive
  • Accys: 1/4" Black Grosgrain Ribbon, Black Stampin' Write Pen

Thank you for visiting today........................Hugs!

Friday, October 23, 2009

Workshop Projects

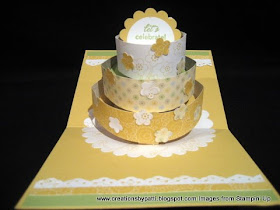
This posting is the last of the projects for the recent workshop (yes, there were quite a few). It was a wonderful event and all the gals got through to success and completion - a great feeling! This project was using the retired sale-a-bration papers: a birthday Pop-up Card: see next photo.

Here's the card..............opening.............and revealing the cake.........

And here's the full view of the cake:

Then we had a pencil holder also using the Sale-a-bration reitred Designer papers. This layout is the same as previously posted.

Top of box taken off reveals the pencils:

Close-up of the layers of die cut butterflies.

Last project made at the workshop: Tube candy! This is a 3" floral tube filled with "fire balls" (they are really hot!).
How to make the above projects:
Pop-Up cake: You can see how to make this on the various You Tube sites
Pencil Holder: refer to my blog posting dated 5/20/09 and 4/17/09
Tube Candy: refer to my blog 10/2/09
Thank you for stopping by to visit today........................Hugs!!!!

Thursday, October 22, 2009

Mummy Tote Box

This is another project from the recent workshop - cute Mummy tote filled with Pixie sticks and kraft crinkle paper. It seems the Mummy only comes out every Halloween to visit. I've seen a couple versions of thsi tote, too. This finished tote size is 3-3/4" x 4-5/8". The actual box finished size is 2-7/8" x4 x 1-1/4".
Here's a side view of the tote:

Box template as follows: (less than 1/2 a sheet of 8-1/2 x 11" of paper - yay!) Assemble using sticky tape.
added information 10/123/09:
(1) 8-1/2" x 5-1/4" Whisper White CS
score along the 8-1/2 side: 1-1/4", next section will be 2-7/8", then 1-1/4", then 2-7/8", leaving 1/4"
score along the 5-1/4" side 1-1/4"
Cut as shown in photo
Cut away the 1/4" x 1-1/4" section at the bottom right side (see photo)
Crease with a bone folder, assemble box.

Additional pieces for the tote:
(2) Top Note die in Whisper White CS
(2) strips of 1" x 8-1/2" long Whisper White CS
(1) 1/2 x 4" long strip in Whisper White for knot
(2) 1-1/4" Punched Circles in Black CS for eyes
(2) 1" Punched Circles in Whisper White CS for eyes
(2) 1/2" Punched Circles in Black CS for eyes.

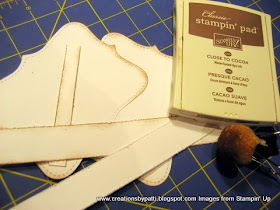
Distress edges of each strip. Using a stamping sponge, sponge edges using Close to Cocoa at the top/bottom of the Top Note for the front. For the back, sponge all edges. Sponge all the strips, too

Using a Real Red Stampin' Write Pen, draw lines in the eyes as shown:

Finished box should look like this:

Adhere eyes to Top Note front. Next cut 1" strips into 4-1/4 lengths, Position onto Top Note front. Turn over and trim excess strips, Sponge cut edges.

Apply sticky tape to the box for the Top Note pieces.

Last step: knot the 1/2" strip, adhere to front using a mini glue dot.


Supplies:
  • Stamps: None
  • CS: Whisper White, Black, Real Red
  • Ink: Close to Cocoa
  • Accys: SU Exclusive Top Note Big Shot Die, 1-1/4" Circle Punch, 1" Circle Punch, 1/2" Circle Punch, Real Red Stampin Write Pen, Mini Glue Dot, Sticky Tape, Stamping Sponge, Distressing Tool.

Thank you for stopping by today to visit.............Hugs.................!!!!